ScrapYard Armory

A BattleTech weblog

Archive for the ‘After Action Report’ Category

Feb-6-2010

Side Show

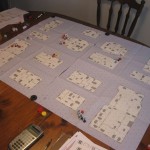
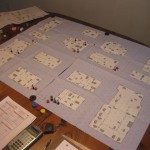
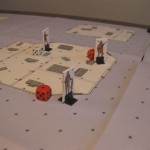
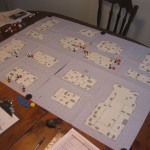
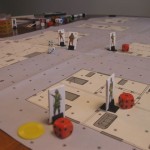
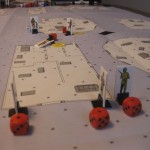
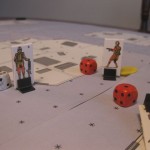
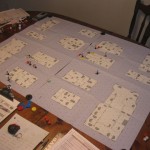
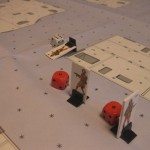
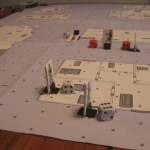
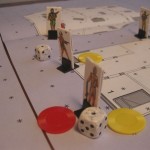
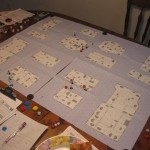
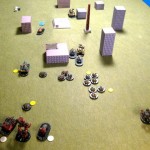
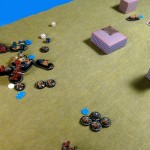
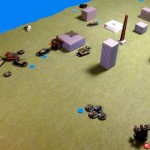
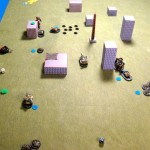
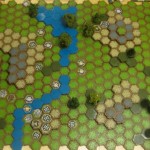
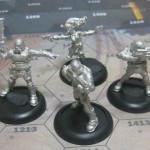
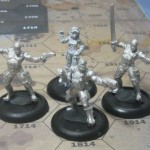
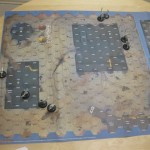
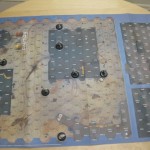
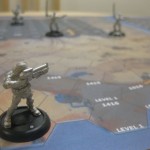
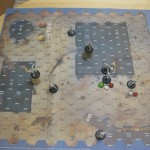
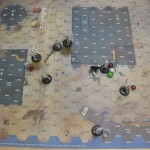
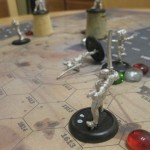
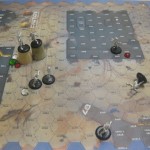
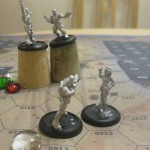
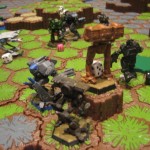
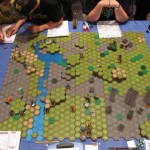
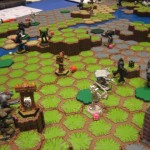
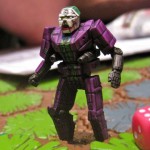
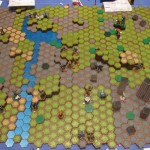
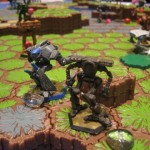
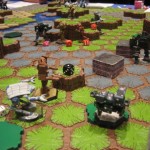
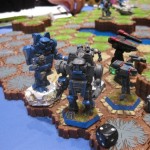
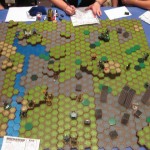
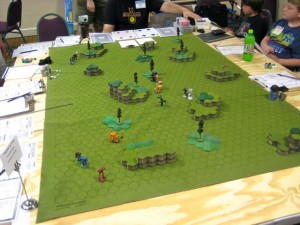
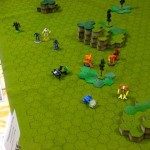
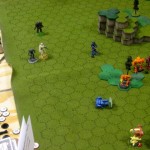
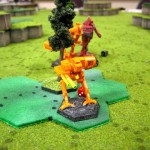
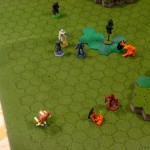
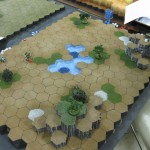
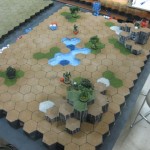
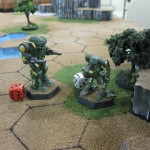
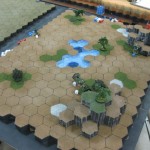
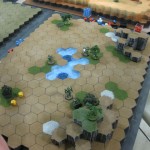
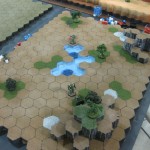
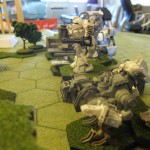
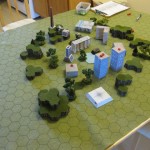
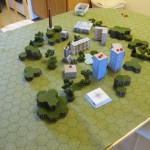
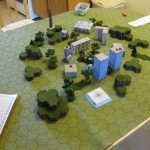
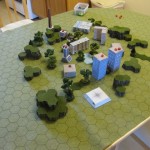
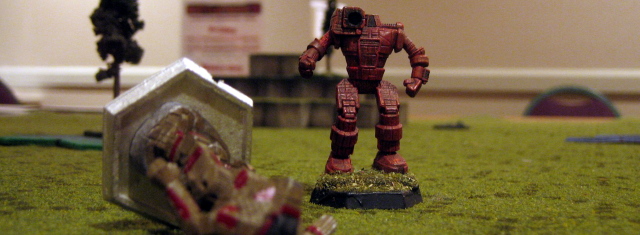
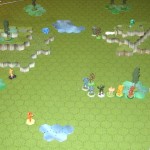
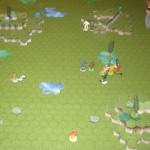
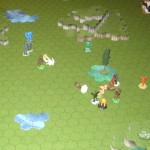
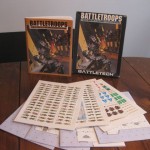
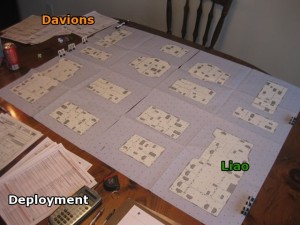
This battle was fought using the RPG combat rules from A Time of War (which was still in beta at the time, it has since been officially released).  Both players had a squad of seven characters based on the sample characters provided in the RPG rule book.  The mapsheets and figures were used from the original BattleTroops box set.

Playing through this game gave me a lot of ideas.  Combined with the enhancements that came out of the RPG beta period, I think we have a very good candidate for a BattleTroops 2.0 game.  More on that later but first, lets get into the action!

This is the first mission in the original BattleTroops box set.  The objective is not to rack up the body count but instead break through to the opposite side of the map.  Victory points are awarded for surviving soldiers that exit off the map prior to turn 12.

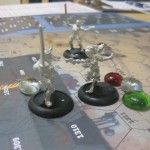
Quick Note: Yellow Chips = STUN, Red Chips = BLEEDING, Blue Chips = HOLDING ACTION

Turn 1

The Davions rush forward two down the center, three to the north and two entering a building near their deployment zone.  The Liaos sprint four soldiers around the southern flank while two stay put to take shots at the approaching Davions.  A lone soldier sprints to the north towards the larger group of Davions.

One of the Davions who sprinted up the center of the battlefield was cut down when rifle and blazer equipped Liaos walked out from cover and did heavy damage causing bleeding and unconsciousness.  Not a great start for the Davions.

Turn 2

The Davions continue working inside buildings leaving two soldiers in the open in the center corridor of the battle.  They trade fire with the two Liao soldiers who have not ventured far from their deployment zone.  The Davions miss while the Liaos hit once at long range.  The bleeding Davion from the prior turn’s fire succumbs to his injuries.

The group of southern flanking Liao take some long range shots across the battlefield but do not connect.

Turn 3

The Davion in the middle of the battle holds his position and fires at the group of flanking Liao to his south.  In one well rolled volley, an SMG carrying Combat Tech is killed instantly by the Blazer wielding Davion.  The rest of the Liao don’t bother firing back and instead run behind or into the nearest building getting closer to the objective.  The Davions in the area work themselves out of the building and toss grenades past the corner of the building mildly injuring one Liao soldier.

Near the center of the battle, another grenade toss, this time by a Liao, is much more devastating.  The throw goes long but it bounces back into the intended targets.  One Davion is severely wounded while another takes mostly fatigue damage thanks to his armor.  The last Davion in the area is too far away and his armor absorbs all of the damage.

Turn 4

In the middle of the battle the Liao soldiers begin to fan out around the building and pick off Davions who can’t roll well enough to return fire successfully.  Another grenade is well tossed in the middle of an already wounded group of Davions.  The results are devastating.  One Davion dies while the others are stunned and bleeding.

Towards the south, the Davions begin moving towards the objective edge while one holds action to cover their retreat.  A Liao soldier tries to make a break for it and sprints past the Davion’s field of view.  The Davion reacts quickly and rips the Liao apart with a well rolled hail of bullets.

Turn 5

To the north, the Liao soldiers begin cleaning up, putting the wounded out of their misery while selectively holding action to cover the middle corridor.  The remaining Davions sprint from their positions using buildings for cover.  The last Davion holds action to possibly take out any Liao foolish enough to cross his path but in the end sprints to meet his comrades.

Turn 6

With a clear path to their objectives in sight, the remaining Liao and Davions move solomly towards their respective map edges.

In a final bold move, a Davion finds an opportunity to round a building corner and shoot a Liao in the back.  He hits but doesn’t do enough damage to take the soldier out of commission.  The Liao un-stuns and dashes to cover.  The last shot is fired and done.

Aftermath

Lots of fun and it appeared that grenades are a killer tool when used correctly.  Also, I think you need to always be aware of the threat and use a 5m spread for all engagements.  Keeping your soldiers too tight is just asking for a grenade toss in your general direction.

Victory in this game goes to the Liao player with five live soldiers to three.

Posted under After Action Report
Jan-22-2010

Look Who’s Coming to Dinner

Look Who’s Coming to Dinner is the first mission in the Chaos Unbound campaign found in Dawn of the Jihad (now available as Blake Ascending).   Starting out, we selected a force of 2,000 points to take us through the whole campaign.

The mission at hand is a stealth raid on a warehouse facility owned by Kallon Industries.  The reasons don’t matter, only the money does.  The Defenders are a rag tag Merc unit made up of mostly infantry and vehicles.  Not a bad gig if you can pull it off right.  For this mission we can only use 25% of our total force.  For 500 points here is what we get:

  • Thor
  • BlackHawk
  • JES III Missile Carrier
  • DI Morgan Assault Tank

Objectives and Bonuses

The objectives are simple.  Destroy four buildings (selected at random and kept hidden from the player) and kill everything in your way.  With only infantry and vehicles to defend it should be a cake walk.

Available bonuses include Blizzard, Electrical Storm, and Overwhelming Force.  Each of these would only inhibit our ability to destroy and maim the Opposing Forces so none are taken.

Campaign Adjustments

  • Buildings (CF 25) will be 5 clicks to destroy

Look Who’s Coming to Dinner

Turns 1 – 3

All of the mercenary units begin to move closer with the infantry leading the (slow) charge towards the attacking Dragon’s Fury force.

In response, the Dragon’s Fury army is content to sit tight and pummel the approaching the infantry with long range attacks, crippling or outright killing several infantry.  The BlackHawk meanwhile stalks to the east of the city, drawing a formation of infantry to follow.

Hovercraft get closer but stay just out of reach, positioning themselves for a rapid unified attack.  Both Dragon’s Fury ‘Mechs are running hot as they attempt to get ahead of the body count early in the game.

Turns 4 – 5

The Defenders lurch forward and manage to base every attacking figure except the BlackHawk.  All of a sudden the “sit back and wait” approach is not looking too good!  The Dragon’s Fury takes a turn causing as much damage as possible before the inevitable.  The DI Schmitt Tank deals heavy damage to a JES I Missile Carrier and two Kage Battle Armor bite the dust.

An errant artillery round from the Defender’s Thumper scatters right on top of a friendly infantry, killing them.

Turns 6 – 7

The wounded JES I pushes for a last gasp attack and critically hits the Dragon’s Fury DI Schmitt!  Infantry continue to harass and maneuver for rear shots on the attacking vehicles.  The Black Hawk to the east continues it’s cat and mouse game away from the main action.

On turn 7 another artillery round crashes down off target and kills another friendly, this time the JES I.  The defending Condor tank finally draws blood and weakens the Dragon’s Fury JES III with a solid hit.

The BlackHawk continues to put distance between himself and the pursuing infantry, heating up the whole way.

Turns 8 – 9

A Merc Bellona Tank hits the Dragon’s Fury DI Schmitt and it’s not looking good.  Both Dragon’s Fury ‘Mechs are on the run and pausing only to vent excess heat when absolutely necessary.  So far they are one step ahead.

The JES III also takes a nasty hit from the Merc Condor.  At the end of turn 9 the BlackHawk fails to break away from the infantry at it’s feet.

Turns 10 – 11

The Merc artillery finally earns it’s keep and rolls high enough to spell the end for the Dragon’s Fury DI Schmitt.

The BlackHawk fails a second break attempt and is heating up again.

The Thor finally starts to damage nearby buildings while venting when possible to stay mobile.

Turns 12 – 13

The pursuing infantry take their opportunity and hit the BlackHawk on a push.  The BlackHawk shakes off the damage, breaks and runs for his life!

The Thor destroys the first building while evading the Merc DI Schmitt and momentarily shuts down due to over heating.

Turns 14 to the End

All of the units left on the field are maneuvering around trying to get the upper hand.  The BlackHawk pushes to crush the Bellona Tank with a melee attack, and nullifies its offensive capability.

Nearby vehicles ram the Thor unsuccessfully while the Bellona Tank pushes to shoot at the BlackHawk but misses.

The Thor crumbles another building once it starts up again and dances to cover keeping the Merc DI Schmitt out of sight.

The Infantry continue to harass the BlackHawk while the Bellona Tank pushes too hard trying to get in one last shot and destroys itself.  Outpacing the remaining infantry threat, the BlackHawk pauses to vent or single out lone infantry squads.

The Thor continues to spread damage around to the buildings while avoiding damage from the dangerous DI Schmitt.  Eventually the opportunity presents itself when the DI Schmitt over extends itself and cannot escape the Thor who takes advantage of the DI Schmitt’s minimum range.  The DI Schmitt starts to fade quickly after the Thor begins to pummel it.

With only infantry and severely damaged combat vehicles in the way, the BlackHawk and Thor run the table and clear off the remaining buildings and defenders.

Finishing the Campaign

The mission was a success but the price was high.  After paying the track cost (300 WP) both objectives were achieved (+200 WP).  Salvage from the mission was worth 38 WP but repairs for both ‘Mechs and the destroyed vehicles will run 74 WP total.  That leaves our final Warchest balance at 864 (1,000{starting WP} – 300{track cost} + 200{objectives} – 74{repairs} + 38{salvage}).

Looks like I should ahve taken some of those optional bonuses after all!

In the repair calculations below, the 2.5 is my Force Size Modifier (2,000 / 800).  See my previous post Chaos Campaign:  Mechwarrior Conversion which describes FSM in more detail.

REPAIRS

Repair Calculations
Thor (Damaged) (203*0.3) / 2.5 24
BlackHawk (Damaged) (156*0.3) / 2.5 19
JES III (Destroyed) (35*0.6) / 2.5 8
DI Schmitt Tank (Destroyed) (94*0.6) / 2.5 23

SALVAGE

Salvage Calculations
Bellona Tank x2 (Destroyed) (37*0.4) / 2.5 12
Condor Tank (Destroyed) (37*0.4) / 2.5 6
Thumper Artillery (Destroyed) (41*0.4) / 2.5 7
DI Schmitt Tank (Destroyed) (84*0.4) / 2.5 13
Posted under After Action Report
Oct-4-2009

BattleForce: Covet Thy Neighbor

There are not many better wedding gifts in the 31st century than an entire nation.  In 3028 Hanse Davion sparked an interstellar war with a toast to his new wife.  This is just one of those battles fought on a distant planet for control of military objectives and opposing head quarters.  Covet Thy Neighbor - 1

The battle was fought using Battle Force rules in Strategic Operations.  Each side had a reinforced battalion to command which included three BattleMech companies with one elite command lance, one Vehicle company, and one Infantry company.

We used a few special rules/tweaks to make our game resolve just a bit faster.

  • Attacks were resolved as they were declared.  It made our game slightly more deadly/efficient, but kept the action moving smoothly.
  • Damage from attacks was applied randomly against a target lance’s units.  Very similar to firing on Battle Armor in Total Warfare.
  • Dice/tokens were used to mark units that had moved.  As the units fire was resolved the token was removed.  An easy way to avoid confusion on both sides of the table.

After spending a significant amount of time preparing record sheets (something Solaris Skunk Werks will soon help) we plunged into the action, foregoing the optional command rules.  Each side has two objectives and a single HQ.  The objectives are worth 50 points and the HQs are 25 points.   This is not strictly per the rules in Strategic Ops but a simplification for us so we could begin playing sooner.

Deployment

Covet thy neighbor 00

Turn 1 – Liao Wins InitiativeCovet thy neighbor 01

Each side moves towards their objectives.  Movements appear even across the battle line.  Not much action but much thought for later position.

(Davion: 0 pts, Liao: 0 pts)

Turn 2 – Davion Wins Initiative (Davions: 0 pts, Liao: 0 pts)Covet thy neighbor 02

More movement as both sides tip their hands.  The Davions are employing a more even attack while the Liaos are concentrating the bulk of their forces closer to the southern objectives.

The first Davion unit crosses the river while to the North several units cover the Liao objective.  Each force has units close to their Southern objectives and are looking for an easy capture in the turns to come.

(Davion: 0 pts, Liao: 0 pts)

Turn 3 – Liao Wins InitiativeCovet thy neighbor 03

Davion units bypass the Northwestern Liao objective and begin the long trek across the lake.  To the South the Davions envelop their objective and begin slugging it out against Capellan troops in range.

A single Davion light Mech is dropped by long range fire as the Liao forces occupy their Southeastern objective.

(Davion: 0 pts, Liao: 13 pts)

Turn 4 – Davion Wins InitiativeCovet thy neighbor 04

Northern Liao troops make a major shift South at the last minute.  A huge firefight erupts around the Davion objective.  To the North a skeleton defense force is left behind to protect the Davion objective.

Davion troops make headway against their attackers, eliminating eight combat units while losing only three.  However the Southern Liao objective is captured uncontested.

(Davion: 13 pts, Liao: 59 pts)

Turn 5 – Liao Wins InitiativeCovet thy neighbor 05

Liao forces make a dash across the river and begin to threaten the Davion bulk from the rear.  A single lance of jump infantry to the North takes cover from the attacking Davions allowing uncontested control of the objective for now.  A lone light lance of Davions makes a dash towards the Liao HQ but is cut down by a far luckier opposing light lance.

The fight centered around the Southern Davion objective turns sour for the Davions.  The Liao forces strike down seven units while only losing six.  While numerically close, Davion casualties were far heavier units.

(Davion: 23 pts, Liao: 76 pts)

Turn 6 – Liao Wins InitiativeCovet thy neighbor 06

Liao infantry units to the North  jump into combat to keep the North objective free of Davion control and are joined by a light lance of ‘Mechs.  A Liao hover lance is within one turn of occupying the Davion HQ.  The Davion assault on their Southern objective is crushed while an understrength company can only hope to delay the capture of the Northern Liao objective.

(Davion: 52 pts, Liao: 98 pts)

It was agreed by both players that the scenario was not as fair as it could have been.  The Liao force was heavier than the Davions and the terrain placement hampered the Davion advance enough to severely hinder their ability to threaten objectives or respond to enemy movement.  In addition, poor force combinations further complicated the Davion’s movement woes.

A rough loss for the Davions but from what canon history tells us, not at all representative of the 4th Succession War in total.

Posted under After Action Report
Sep-29-2009

Kicking the Tires

A Time of War is here in Beta form and for $10 it seems silly to skip on this opportunity.  To be honest I am not much of an RPG fan. What I am interested in is an infantry level skirmish game set in the oh so familiar 31st century I love.

Besides the Gamemastering Guide and certain skills and traits, almost everything appears to work well in an infantry skirmish game.  I wanted to kick the tires to see how combat flowed and if there really was any substance behind that thick RPG exterior.  I gathered up my miniatures (not even painted yet!  I’m so embarrassed!) and set the stage for a quick fight.  No objectives, no missions, just a kill or be killed fight to the finish.

Our battle takes place in a familiar Factory.  Not much cover to be had but plenty of area to move around.  The scale is 5m to a hex.  All characters used are based on the sample characters provided in either the Quick Start Rules or the full Beta rules.  All miniatures are from Reaper Miniatures’ Chronoscope.RPG Tactical Close - 1

The Soldiers

  • Veteran Soldier (Assault Rifle)
  • Two Soldiers (Assault Rifles)
  • Gunslinger (Ambidextrous dual wielding Magnums)

The Scouts

  • Veteran Scout (Ambidextrous dual wielding SMGs)
  • Two Scouts (Laser Pistols and Vibro-Swords)
  • Combat Tech (Shotgun)RPG Tactical Close - 2

Tactical Action Resolution is in effect.  Damage does not take effect until the end of the turn so no killing characters before they get a chance to act.

RPG Tactical - 01Turn 1Soldiers Win Initiative

Nothing but movement for both sides. Important to note, each unit may only use ONE movement action a turn and must declare that mode before moving.  All troops are moving on a run so far.

Turn 2Soldiers Win InitiativeRPG Tactical - 02

The Scout Veteran kicks it into high gear and sprints to the ramp in the large building.  Meanwhile the Soldier Veteran reaches the elevator of his own building on a simple run and pushes the button to move up one level.

RPG Tactical - 03After a Scout moves to the near edge of the building, we have our first combat as Soldier 1 runs to the right enough to cut the corner and bring a shot to bear.

Target Number is (TN) 6 and the roll modifiers are: +1 Small Arms Skill, -2 Running, -1 Target Movement, -2 Medium Range.  The die roll is 10.  10 – 4 = 6 is a HIT!

The 4AP/4B shot is not impeded by the Infiltration Suit’s 4 Ballistic Armor rating so the Scout takes the full 4 damage, 1 fatigue, and a stun.

Scout 1 sprints to the door to support his wounded comrade.  Sensing an easy mark, the other Soldier moves against the Combat Tech while the Gunslinger moves towards the two Scouts.

Turn 3Scouts Win InitiativeRPG Tactical - 04

NOTE: Since each activation is resolved individually, when an attack is made before an opposing unit has activated yet, use the prior turn’s movement mode for the target modifier.

Forced to act first, the Gunslinger runs to the nearest Scout to unload both Magnums at point blank range.

TN 6.  +2 Skill, -2 Running, -1 Target Movement, -1 Magnum (for a total roll modifier of -2).  Rolls are 7 and 11.  One hit and one miss.

The magnum deals 5 damage and once again the armor does nothing.  Toughness reduces the damage taken by 1.

RPG Tactical - 05The Scout is now pissed and unleashes two Vibro-Sword attacks with his two actions.  This is now an opposed melee roll rather than a simple skill check.

Scout TN 6; +1 Skill, +1 Dex Link, -1 Target Movement. Rolls are 4 and 11.

Gunslinger TN 6; -2 Running.  Rolls are 7 and 9.

In the first combat the Gunslinger gets lucky and scores a counter-strike of 1 fatigue damage.  In the second the Scout solidly defeats the Gunslinger with a total MoS (Margin of Success) of 2 (5 – 3).  The Sword easily tears through the Gunslinger’s flak vest and deals 6 damage! Sword damage + STR/4 + MoS/4 each rounded up and then added.

The Gunslinger needs to make a BOD (body) check to avoid bleeding.  Roll is 7 + 6 BOD = 13.  One short of the required 14.  The Gunslinger is now bleeding from her wounds.

Now that you get the drift of the rules, I’m going to speed up the game play and let the bullets and swords fly fast and furious!

Soldier 1 is content to fire away at his prior target who has not activated yet.  One shot hits solidly, doing 5 damage and starts bleeding.  The wounded Scout now activates and shakes off his stun, walks forward and delivers a short range shot to the GunSlinger.  The laser pistol just misses thanks to prior injuries.

Soldier 2 runs for a shot and fires at the mortally wounded Scout 2 but misses at medium range.

The Combat Tech finally moves out for a shot and unloads a shotgun shell at extreme range towards Soldier 2 and poorly misses.

The Soldier Veteran walks out onto the cat walk and takes two shots at the Combat Tech which surprisingly miss.

The Scout Veteran moves last and walks up the ramp to see the Soldier Veteran across the catwalk.  Both actions are used to unleash three round bursts from his dual SMGs.  Unfortunately at long range, all of the shots miss the mark but no jams result.

At the end of the turn wounds bleed and the Gunslinger fails her consciousness check and slumps to the ground in a heap.

Turn 4Soldiers Win InitiativeRPG Tactical - 06

The Veteran Soldier walks to short range and unloads twice on the opposing leader hitting once for 4 damage.  Scout 1 shakes his stun, walks and fires at medium range dealing 3 damage to Soldier 2.   Soldier 1 and 2 both fire on Scout 1 remaining stationary to do so.  Three of four shots hit delivering a staggering 12 damage dropping the Scout dead.

Scout 2 tries to make something out of nothing, shakes his stun, walks and takes a shot at Soldier 1. The shot hits solidly for four damage.  The Combat Tech runs and pumps the shotgun but misses (Combat Techs are all Tech and no Combat!).RPG Tactical - 08

The Scout Veteran walks forward and opens up his SMGs again with four three shot bursts (don’t worry, each SMG has 50 rounds per clip).  Two shots hit, but one is for double damage thanks to the burst mode.  Once again lucky to avoid jams.  The Veteran Soldier badly fails his bleed check.

The Gunslinger wakes up with a solid consciousness check.  The Soldier Vet fails his own while the opposing Scout leader passes with flying colors.

Turn 5Scouts win InitiativeRPG Tactical - 09

Soldier 2 puts Scout 2 out of his misery with a well placed rifle shot while the Scout can only bleed in response.  The Gunslinger shakes her stun and walks towards cover to tend her bleeding.  Unable to help his commander, Soldier 2 backs up and fires on the approaching “Combat” Tech but misses twice.  The Combat Tech continues her bull rush and finally closes to short range to deliver a shotgun blast that once again misses.

With an unconscious opponent in front on him, the Scout Veteran walks forward and fires down onto the Soldier below.  Both shots hit and grievously injure the Soldier for 9 damage.RPG Tactical - 10

During the end phase the Soldier Veteran wakes up staring at the Scout Veteran’s boots.

Turn 6 Soldiers Win InitiativeRPG Tactical - 11

Soldier 2 has to act first and hits the Combat Tech for 3 damage with a point blank rifle shot.  Her flak vest surprisingly saves her from more serious damage.  The shotgun roars again and this time… also misses.  Soldier 1 fires on the hapless Tech and hits once for 3 damage and starts the bleeding.

With only 1 point of life left, the Gunslinger tries to stem the tide of blood from her numerous wounds but fails her MedTech roll.

The Soldier Vet stands up and fires point blank at his opponent but misses due to extreme weakness from his wounds.  The Scout Veteran uses single shots to deal the killing blow.

Turn 7Scouts Win Initiative

Faced with a killer range, the Veteran Scout opens up with double bursts while stationary on the closest Soldier.  One of his SMGs jams on the first action’s shooting and only one of the following bursts hit for a marginal 3 damage.  That would however be enough for the kill.

In return, the Soldier fires up at the catwalk and hits with one shot which starts a bleeder.  The Tech shakes her stun and runs for cover.  The remaining Soldier walks forward but can’t get to optimum range.  Still, one shot hits and deals the killing blow to the Veteran Scout on the Catwalk.

Faced with a showdown between a bleeding Combat Tech and a slightly wounded Soldier, we call the game.

Notes from the Game

When using Tactical Action Resolution, mark damage during the turn in half filled circles.  After the turn is complete, make your consciousness rolls and then fill them in fully.  That way you will have an easier time remembering what your current injury modifier is.

So what do you think?  RPG be damned, what about some squad level infantry battles to mix in when you get tired of 10m tall BattleMechs?  I think there is definite potential.  Let me know what you think.

Posted under After Action Report
Aug-19-2009

Battle the Masters, GenCon 2009

On Saturday evening at GenCon, the writers and owners of the BattleTech game set out to challenge BattleTech players.  Each participant was required to bring their favorite Battle/Omni ‘Mech to the game (without knowing what pilot skills would be).  The Masters of the game would do the same and do battle against the fans.

Piloting and Gunnery skilled were revealed to be based on tonnage alone.  Assaults were 4/5, Heavies were 3/4 and so on.

I did my best to keep tabs on what was happening during the game but it is hard when you have 41 units on the board.  I did my best while having some fun myself.  Each turn includes a picture of movement, a brief recap of notable events and deaths, and some interesting quotes that were heard over the rumble of dice and player conversation.

The Masters

Randall Bills

  • Catapult CPLT-K4
  • Stone Rhino
  • BloodKite 2
  • Banshee BNC-3S
  • Phoenix Hawk PHX-7K

Tara “Yes His Wife” Bills

  • Hatchetman HCT-6D
  • Axman AXE-3S
  • Nightsky ???-5S
  • Ti-Tsang TSJ-9J
  • Berzerker BZK-3C

Loren Coleman (assisted by Heather and Conner)

  • Sagittaire SGT-8R
  • Sagittaire SGT-8R
  • Solitaire
  • Solitaire
  • BloodKite 2

Herb Beas

  • Atlas AS7-K
  • Guilittine GUL-5M
  • Griffin GRF-5M
  • Trebuchet TBT-5N
  • Zeus ZEU-6S

Brent Evans (The Art Director)

  • Timber Wolf A

The Fans

  • No-Daichi NDA-2Ko
  • Longbow LGB-13C
  • Awesome AWS-8T
  • King Crab KGC-0001
  • Warhammer WHM-9D
  • Banshee BNC-3S
  • Warhawk C
  • MadCat A
  • No-Daichi NDA-2KO
  • Kodiak 3
  • Bane 3
  • Turkina B
  • Dragon Fire DGR-3F
  • Marauder MAD-6L
  • Warhammer WHM-8D
  • Daishi W
  • Penetrator PNT-6T
  • Griffin “Sparky 2.0”
  • Savage Coyote A
  • Sunder SD1-O

Let The Games Begin

Setup

Each side lined up their minis basically where ever they fit on the edge of the board and faced across the battlefield at their likely targets.

GenCon2009Masters 01GenCon2009Masters 02

GenCon2009Masters 03GenCon2009Masters 04Turn 1

Things started badly for the fans.  Most movement was straight ahead towards the enemy or setting up for sniping attacks.  Our poor Sunder was the first to fail a piloting check after weapons fire.

The Warhawk C on Loren Coleman’s side of the board lashed out at long range to hit the oncoming Master’s ‘Mechs.  Mr. Coleman seemed surprised at first when he confirmed that yes, Clan Large Pulse Lasers really do fire that far.

What does Stealth Armor do? – Herb Beas

Why do you even need the rulebook, the people who wrote it are all here! – Unidentified Demo Agent

Turn 2

The Sunder failed a few more piloting rolls and now on turn three has three pilot hits but is still awake and is participating in the carnage as best as can be expected up until a Clan ERPPC blows it’s head off.

GenCon2009Masters 05GenCon2009Masters 06GenCon2009Masters 07

Turn 3

At the onset of turn three, the fan’s Daishi pulls a Sunder and fails some piloting rolls of it’s own.

It’s the new Liao submunition.  It spreads ball bearings on the battlefield! – Loren Coleman

The Daishi is then promptly headcapped by an ERPPC but not before a UAC20 double shot cores through Tara Bill’s Nightsky.

What are your doing there, are you daffy? – Herb Beas

He was close and I had an axe! -Tara Bills

The fan’s fortune continues to turn when a Banshee owned by Randall Bills dies from a Heavy PPC to the face.

GenCon2009Masters 21GenCon2009Masters 08GenCon2009Masters 09

GenCon2009Masters 11GenCon2009Masters 10

Turn 4

GenCon2009Masters 15In the last turn of the battle, as the early morning fatigue began to set in a final all out rush was made by Tara Bill’s Axe patrol as well as Loren Coleman’s Solitaires.

In the middle, I walked my 13-C Longbow towards the advancing TSM horde.  Not only did I survive getting shot at by a Berzerker, Ti-Tsang, and AxMan, but I participated in gutting the Berzerker and kicked the Ti-Tsang’s legs out from under it.

Towards the right flank of the Fans, Herb’s Zeus was cored out by a Bane in stunning fashion.  Amazingly both the Kodiak and Atlas (Santa!) lived through the carnage and were ready for another turn to tear each other apart.

When the Stackpole rule goes off and I’m present and not Mike, the whole board explodes! -Herb Beas

You’re a Kodiak! -Herb Beas (surprised?)

I’m just as pleasant as I was a minute ago. -Unidentified Demo Agent

Just wait till Santa opens up… -Herb Beas

GenCon2009Masters 13GenCon2009Masters 14

Sadly, as the hour grew late and energies waned, we decided to put an early morning end to the battle.  You mean it was ambitious to try to play out a 41 ‘Mech battle starting at 10:30PM?  I’d like to give a shout out to the Demo Agent running the event for doing a spectacular job.  I believe it was Mike Miller but I could be wrong.  He was wearing a tri-corner hat and was instrumental in keeping things moving and allowing us to get in the 4 turns we did.

In the end I think there was a good argument that the Masters were going to rout the Fan’s left flank. In the middle of the board the threat of TSM madness was nullified by concentrated firepower and a few lucky shots.  To the right flank, I believe we were holding our own and making good progress.  We had several untouched ‘Mechs that would have been a strong challenge to whatever forces would breakthrough on the left.

It was a blast to play against the Powers that Be.  It was great to just watch Randall Bills and Loren Coleman geek out talking about the positioning of the Solitaires, how long the enemy WarHawk would last, and when they were going to make their big push.  These guys really love this game and it is really refreshing to see them enjoy it at the level that the players do everytime they sit down to bash ‘Mechs for a few hours.

Posted under After Action Report
Jul-25-2009

Trap on York

York was supposed to be a quiet base for Victor Davion and his Allied forces during the Fed Com Civil War, but to their surprise General Esteban had set a trap for them.  Within a few short hours of their landings, the Loyalist had divided the Allied forces and was close to capturing Victor Davion.  Join the fight to either save Victor Davion’s Allied forces or destroy them.

This battle was fought at Historicon 2009 and was prepared and hosted by Catalyst Demo Agent “Speck”.  The Davions are caught on York and need to escape off the left edge of the overall camera shots.  The Lyrans are ready to pounce and need to do as much damage as possible before the Davions make their escape.

Lyran Alliance

  • GRF-6S Griffin
  • ZEU-9S Zeus
  • AWS-8Q Awesome
  • HBK-5S Hunchback
  • MAD-5S Marauder
  • BNC-6S Banshee
  • AS7-S2 Atlas
  • NGS-5S Nighsky

Federated Suns

  • DVS-2 Devastator
  • AGS-4D Argus
  • MAD-5S Marauder
  • CN10-B Centurion
  • STK-7D Stalker
  • WHM-9D Warhammer
  • ARC-8M Archer
  • STY-3D Starslayer

The Setup

Trap on York - 01

In the picture above, the Davion forces are located dead center of the battlefield.  The Lyran Alliance forces are broken up into two lances at the near and far left corners of the map.

Turn 1 – Davions win Initiative

Trap on York - 02The Davions split the center mountain and stay low.  Only the Marauder takes any kind of high ground. The Lyrans meanwhile converge towards the middle.

The Davion Stalker and Devastator are picked out from the crowd of ‘Mechs and receive fire from one lance a piece. Trap on York - 05 The Stalker almost has it’s right torso armor cleared by concentrated weapons fire while the Devastator shrugs off damage without so much as a few paint scratches.

The Davions split their fire across three Lyran targets scoring an internal damage to a Marauder’s left torso but no critical damage.

Turn 2 – Davions win Initiative

Trap on York - 08The Devastator and Stalker lead the Davion rush to the objective edge.  Faster Battlemechs begin to get close but turn to offer fire support for the slower units left behind.  The Lyrans now pick their ranges and line up as many Heavy Gauss Rifles on the two previously damaged Davions.  In a daring run, the Lyran Nightsky (painted red) gets behind the Davion Devastator for a chance to hit the rear armor.

Trap on York - 09The Davion Stalker once again takes the lions share of damage but this time it’s left torso takes the most.  A Heavy Guass Rifle, LB-10X and LB20-X all hit solidly.  The armor in the section is ripped apart and a medium pulse laser is blasted into scrap.  The Devastator takes an equal beating but the damage is nicely spread around, pot marking the massive armor loadout but avoiding any serious threats.

The Davions spread damage across the easiest targets available but concentrate three ‘Mechs on the Lyran Hunchback with the dangerous LB-20X.  Damage is light except for the Hunchback.  The combined fire pays off as the Hunchback loses his LB-20X to critical damage.

Turn 3 – Lyrans win Initiative

Trap on York - 11The Lyran Zeus and Griffin move to block the Devastator and Stalker from leaving so soon.  The Nightsky again maneuvers behind the Devastator.  The Davions counter the Zeus by moving the speedy Starslayer directly behind.  The remaining Davion forces rally around the likely exit points and a large furball of destruction ensues.

The Davion Stalker already has two head hits from earlier turns’ LB-X cluster fire.  Trap on York - 12Another turn of concentrated fire lands several key blows, including an ER Large Laser to the head and a disastrous Heavy Gauss Rifle to the right torso which hits the SRM ammo stores.  As the ammo erupts the pilot takes his fifth pilot hit and falls unconscious.  Unable to make his pilot roll to avoid falling or the ensuing seat belt check the MechWarrior cannot avoid his final pilot hit.

The Davion Starslayer hits with most of its lasers to the Zeus’ rear armor scoring three critical hits, all of which hit engine criticals.  The path is now clear for the Devastator to escape.Trap on York - 13

However, the Devastator is mauled by another full lance of firepower.  The Nightstalker gets a critical hit on the engine by chopping through the rear armor weakened by the Marauder’s lasers.  Coupled with the loss of a double heat sink, the Devastaor’s heat spikes just enough to decrease his movement for the next turn, preventing an otherwise easy exit.

The Lyran Marauder takes serious fire from the Davion Marauder now closing in and the Argus.  Already heating up from pouring fire into the Devastator, the Mech takes an engine hit and a heat sink critical hit and is in serious trouble.  He needs to cool down next turn.

Turn 4 – Lyrans win Initiative

Trap on York - 16The Davions begin to make their escape, leaving some of their slower brethren behind.  The Centurion, Warhammer, Starslayer and Archer all exit this turn.  The Lyrans sprint towards the remaining Davion Mechs lining up several back shots.

Four Lyrans complete the destruction of the Devastator and spread remaining fire power across available targets of opportunity.  The final shot on the Devastator came from the Lyran Griffin ER Medium Laser that delivered the third engine hit.  Trap on York - 17 The Lyran Awesome has it’s leg blown off by the Davion Marauder who only fired a single PPC to stay cool this turn.  The Argus jams his RAC/5 this turn and fails to do significant damage.

Turn 5 – Davions win Initiative

Trap on York - 19The Lyran Marauder and Nightsky move to positions around the woods anticipating the Argus’ move.  The Argus surprises everyone by splitting the woods and while not making it far, manages to obtain very good cover from enemy fire.

The Argus does not disappoint during weapons fire, a volley of LRMs hit the Lyran Awesome in the head.  The consciousness roll is snake eyes and the pilot drifts to sleep.  The Davion Marauder would finish the job with a gauss rifle to the center torso which is enough to core the ‘Mech.

Trap on York - 20While covered from most incoming fire, the Argus was not immune to two elevens and a twelve rolled by the Atlas pilot.  While not doing much critical damage, precious armor is slagged off the Heavy ‘Mech.

Turn 6 – Lyrans win Initiative

Trap on York - 21The Argus makes a mad dash to the objective edge, falling just short of the goal.  The Marauder stays on board to support.

Sensing the end, all Lyran Mechs pile firepower into the wounded Argus.  The Atlas once again is the deadliest of the bunch and punches a hole deep into the left torso.  A missile critical finds an ammo bin causing the Argus and it’s XL engine to go up in smoke.

Trap on York - 22In a final bid for revenge, both Davion ‘Mechs fire on the terribly damaged Marauder.  A gauss rifle slug rips off the right arm and burrows into the side torso for good measure.  The XL engine is silenced and the ‘Mech drops.

The next turn, the last Davion ‘Mech, the Marauder, exits to meet his fellow warriors to the evacuation waypoint.

Mission Recap

While there were no official victory points for this scenario, I’d like to know who you the readers feel won this battle. The objective for the Davions was to exit as much personnel off the map as possible while the Lyrans did everything in their power to stop them.  The Davions lost three mechs, two assault and one heavy while the Lyrans lost three, two assault and one heavy.

Leave a comment and let me know who made the better moves in the end turns?  Who deserves the victory?

Posted under After Action Report
Jun-23-2009

Twilight of the Clans: St. Ives versus Clan Wolf

Twilight of the Clans: Battle 2

The second battle of the Great Refusal takes place on the standard Battletech map.  The fearless St. Ives warriors, led by none other than Kai Allard Liao himself, take on the ruthless Clan Wolf to stop the invasion of the Inner Sphere.

See other battles from the Great Refusal in the After Action Category or by searching for Twilight of the Clans in the sidebar search.

St. Ives Compact

  • Duke Kai Allard-Liao (0/0) Ryoken B
  • Colonel Adele Tsang (3/3) PLG-3Z Pillager

Clan Wolf

  • Khan Vladimir Ward (2/1) MadCat Prime
  • saKhan Marialle Radick (3/2) Man O’ War A

TotC Battle 201TotC Battle 203Turn 1 – St. Ives Wins Initiative

Both forces maneuver closer while the Pillager and MadCat immediately open fire on each other, locking themselves, 1 on 1,  in zellbrigen.  Both Gauss from the Pillager miss while the MadCat places some lasers on the Pillagers right torso, shaving a few short tons of armor away.

Turn 2 – Clan Wolf Wins InitiativeTotC Battle 202

The Pillager and MadCat look to trade blows at long range while Kai starts a run towards the Clan Wolf Man-o-War.

The Pillager lands only one Gauss Rifle slug on the MadCat, shedding armor on the right arm.  The MadCat returns fires and hits with both missiles and lasers.  The Pillager stands despite the punishment.

Kai is not yet at optimum range and is unable to damage his foe.  Meanwhile the Man-o-War unloads and manages to score a through armor critical that damages the Ryoken’s gyro.  Only Kai’s magnificent piloting skill saves him from a near certain fall.

TotC Battle 206TotC Battle 207Turn 3 – Clan Wolf Wins Initiative

The Pillager stands his ground as the MadCat closes the distance.  The Man-o-War feels lucky and rushes to point blank range after Kai maneuvers slightly.

The Pillager’s aim continues to fail missing both Gauss Rifle shots.  The MadCat continues to pummel the Pillager at range, up to now evenly distributing damage across the assault ‘Mech’s frame and one shot to the head that fails to do critical damage.

Kai seizes the opportunity and alpha-strikes the opposing Clan ‘Mech.  The combination of UAC slugs and ER Medium Lasers shred off the Man-o-War’s left leg.  The Ryoken’s heat spikes to 19 but the ‘Mech does not shutdown.   The Man-o-War delivers a furious beating to the the Ryoken’s center torso, gutting the internal structure and delivering a second gyro hit.TotC Battle 208

TotC Battle 209Turn 4 – St. Ives Wins Initiative

With the Ryoken and Man-o-War both unable to move, the two ‘Mechs resort to proping and firing available weapons. The Pillager finally jumps from it’s perch as the MadCat backs up slightly to keep distance between himself and the Pillager’s assortment of lasers.

Weapons fire is horrendous for both sides.  The Pillager and MadCat completely miss each other while the two downed ‘Mechs continue to strip only armor.  Kai uses his UAC20 this turn to try to punch a larger hole in the Man-o-War.

TotC Battle 210Turn 5 -Clan Wolf Wins Initiative

The MadCat and Pillager now close to short range. Both looking for the deathblow.

The Pillager again misses most of his weapons fire, hitting only the left leg.  The MadCat critically hits the Pillager’s gyro and lands a laser to the head.  The Pillager remains conscious and steady through the punishing rain of weapons fire.

Kai switches to lasers looking for the wounds opened up by his UAC20 shells.  He hits with everything but not the right locations for a kill.  The Man-o-War’s weapons gouge through the remaining internal structure silencing the Ryoken.

TotC Battle 211Turn 6 – Clan Wolf Wins Initiative

The MadCat stands his ground and trades fire with the Pillager.  The Pillager finally begins landing meaningful hits, destroying an LRM rack and a double heat sink.  The MadCat’s return fire is less accurate as luck turns on the Wolf player.

Turn 7 – St. Ives Wins Initiative

The MadCat wisely pulls away from the Inner Sphere assault and opens up at longer range.  The Pillager lands both Gauss Rifles ripping apart the MadCat’s left torso, but for naught. The MadCat unleashed a hail of laser fire and missles that tore away the Pillagers leg.  As the ‘Mech fell, the pilot was again injured and fell unconscious.  Clan Wolf holds the battlefield and claims victory for the Clans.

Posted under After Action Report
May-12-2009

Bullet in the Blue Sky

Guthry Island is a glass crater.  I’m sure what ‘Mech manufacturing facilities were there are now fused together in some frankenstein amalgamation of ferro-crete and ‘Mech parts.  And now the damn Blakists are out here scouring the wreckage and the scrap for anything that might be rushed into new service for their demon worshiping troops.  The Drac schism just made things worse.  It’s getting to the point you can’t tell who is out here to help you or kill you.  Or worse, reeducate you.

I hear footsteps now.  Someone’s coming.  No.  Something’s coming.  No doubt to make an even greater mess of this god forsaken city.

Ruins of LAW City, Tokoyo Island
18 July 3069

Forces from the Word of Blake Ninth Division and Sixth Benjamin are converging on the ruins of LAW city to capture what’s left of the battered city.  This scenario is an adaptation from Jihad Turning Points Luthien.  Instead of playing this wartrack in a campaign, this mission is being used as a stand alone scenario using the Quick Strike rules from Strategic Operations.

battletech-bullet-in-the-blue-sky-03Word of Blake

  • Firestarter (Commander)
  • MadCat
  • Centurion
  • Hatchetman
  • Koshi
  • Blackhawk
  • Joust Tanks x2
  • Saxon APC
  • Mechanized Infantry
  • Jump Infantry
  • Kage Battle Armor

Draconis Combinebattletech-bullet-in-the-blue-sky-04

  • Thunderbolt (Commander)
  • Thor
  • Panther
  • Spider
  • Uller
  • Packhunter
  • DI Morgan Assault Tank
  • Saxon APC
  • Condor Hover Tank
  • Raiden Battle Armor
  • Fenrir Battle Armor
  • Clan Battle Armor

Objectives

  • Grudge Match (100 Points): Destroy the opposing force’s designated commander.
  • Seizure (200 Points): Capture both designated buildings by turn 10.
  • Maximum Damage (300 Points): Destroy at least half of the opposing force.

NOTE: Objective buildings were selected in secret before the start of the game.

battletech-bullet-in-the-blue-sky-07battletech-bullet-in-the-blue-sky-10First Turn – Draconis Combine Wins Initiative

Both forces barrel into the city.  The Word of Blake concentrates their forces heading into the city center while the Combine fans out their faster units around the perimeter.

A Word of Blake Koshi manages to square a shot against the Combine leader in his Thunderbolt scratching the paint but little else.

Return long range fire from the Combine misses its mark.  Both sides are prepared to engage in earnest in the ensuing turns.

battletech-bullet-in-the-blue-sky-11battletech-bullet-in-the-blue-sky-12Second Turn – Draconis Combine Wins Initiative

As the Word of Blake moves in to occupy most of the central park area,  a brave Thor pilot contests the area against the odds.  Once the Word commander committed to the fray the Draconis Combine’s fast flanking units moved in to score damage.

The Combine saw limited opportunities for concentrated fire and thus spread damage across the multiple enemy ‘Mechs.

The Word of Blake took advantage of superior positioning to wreak havoc on the Combine light units.  The Spider fell to concentrated weapon fire and the Fenrir Battle Armor to a blast from a Blackhawk.  The Panther met it’s end from a hatchet but not before the offending Hatchetman received an engine critical hit.

battletech-bullet-in-the-blue-sky-15Third Turn – Word of Blake Wins Initiative

The Draconis Combine forces, reeling from losing three units while eliminating none, scatter away from the city center to contest nearby buildings.  The Word pursued, taking advantage of the initiative, to surge to one side leaving limited forces behind in positions encircling the Combine forces.

The Combine forces bit back and brought down the Hatchetman and Joust Tank who were both unable to move with the Blakist surge or take cover.

Now surrounded and helpless the Thor pilot braced against the incoming weapons fire.  The ‘Mech almost survived the onslaught if not for a well placed infantry shot which blew off the head.  A Saxon APC also met its end to a Joust Tank in a single volley.

battletech-bullet-in-the-blue-sky-22battletech-bullet-in-the-blue-sky-23Fourth Turn – Word of Blake Wins Initiative

Further outnumbered and now on the run, the Draconis Combine units look to the safety of cover provided by the park in the city center that the Word just left behind.  Meanwhile the Word of Blake consolidates their power on the far side of the battlefield, tipping their hand to their objective buildings.  Two Combine units move to take opportunistic shots at the enemy commander at long range.

Long range shots against the Word Commander succeed in further shredding armor, getting close to the core.  Further damage is levied against the Word Centurion and MadCat.  The Saxon APC draws fire away from it’s Commander, dieing in the process from point blank shots.

Though lining up a killing shot on the Uller’s rear, the Word’s aim falters and the Uller lives another turn.  The Combine Packhunter is less lucky and is destroyed.

battletech-bullet-in-the-blue-sky-27battletech-bullet-in-the-blue-sky-28Fifth Turn – Draconis Combine Wins Initiative

While Blake forces hold the line on the far side of the city a lone squad of Raiden battle armor jumps into the fray beside the enemy commander hoping for a glorious kill.  Meanwhile the Combine commander sulks between the city buildings to contest Word holdings.  Word of Blake forces surge again to surround the Combine command ‘Mech.

The Uller and DI Morgan combined fire to rip the Word MadCat apart.  The Condor Tank pierces the remaining WoB Joust Tank, exploding it’s ammo bay.  The Thunderbolt finishes off the wounded Centurion.  Alone and against the odds, the Raiden Battle Armor squad dealt the deathblow to the Word commander and manage to survive combat as well.  In one turn four Blakist units fall.

The Blakist Saxon APC scored a critical hits against the Condor Tank’s drive system while final damage is levied against the Combine commander in his Thunderbolt.

battletech-bullet-in-the-blue-sky-31battletech-bullet-in-the-blue-sky-32Sixth Turn – Draconis Combine Wins Initiative

Now low on numbers, both forces consolidate.  The Combine leaves the lone Raiden squad to contest objectives while Word infantry swarm the remaining Combine ‘Mech forces.

Word infantry dodge incoming fire and leave their mark, destroying the last Combine ‘Mech.  Exchanging long range shots the Blackhawk receives another hit, shedding half it’s armor.

Seventh Turn – Draconis Combine Wins Initiativebattletech-bullet-in-the-blue-sky-34

The Draconis Combine forces obliterate the offending infantry from their side of the battlefield but not before they damage the Condor Tank further.  The Raiden Battle Armor, with no where to run or hide, are forced to fight and are unable to retaliate before their own demise.

battletech-bullet-in-the-blue-sky-36Eighth Turn – Draconis Combine Wins Initiative

In an effort to ward off Draconis units, the WoB units gather together behind cover, ready to pounce.  The Draconis’ Di Morgan takes up position fortifying its control of the two tallest towers in the city.

battletech-bullet-in-the-blue-sky-37Ninth Turn – Word of Blake Wins Initiative

The Word ‘Mechs jump to the far side of the city while the Combine’s lone infantry unit jumps away from the DI Morgan Tank.  Backed up by the Blackhawk, the Koshi contests one of the two towers controlled by the Draconis Combine while the WoB infantry finish taking control of the Radio Tower on the other side of the battlefield.

battletech-bullet-in-the-blue-sky-38Tenth Turn – Draconis Combine Wins Initiative

As the WoB ‘Mechs fall back to ensure control of their buildings, the Draconis Combine’s battle armor reveals why it allowed itself to be seperated from the Di Morgan.  The battle armor manages to position itself to contest the Radio Tower’s control center while also finding cover from the Koshi’s weapons.  The remaining Word infantry are not powerful enough to finish off the Draconis battle armor, untouched until now, and the battle armor survives by dodging the Blackhawk’s massive laser fire.

AFTERMATH

Both forces achieved the Grudge Match and Maximum Damage objectives but failed to control both their objectives.  The Draconis Combine needed to control the two tall buildings while the Word of Blake had selected the Radio Tower and it’s nearby control center.

While technically a draw, the Word of Blake had significant offensive power left to bear against the Combine survivors.  A marginal victory goes to the Word of Blake.

Posted under After Action Report
Mar-22-2009

Lawyers Guns and Money: The Mistake

This Event was played at Cold Wars 2009 and run by Commando ‘Speck’.  The Lone Star  Battalion faces off against Redfield’s Renegades after a tragic error sends both Mercenaries into a rage.

Details are available in the full Lawyers, Guns, and Money scenario pack available as a free download, as are other Game Scenarios at ClassicBattletech.com.

All forces are 3025 variants.

Redfield’s Renegades

  • Cyclops (Piloting 3, Gunnery 3)
  • Zeus (Piloting 4, Gunnery 3)
  • Grasshopper (Piloting 2, Gunnery 3)
  • Hunchback (Piloting 4, Gunnery 2) *Sensor Hit
  • Catapult (Piloting 4, Gunnery 3)
  • Whitworth (Piloting 4, Gunnery 4)
  • Trebuchet (Piloting 4, Gunnery 3)
  • Dervish (Piloting 4, Gunnery 3)

Lone Star Company

  • Atlas (Piloting 3, Gunnery 3)
  • Awesome (Piloting 4, Gunnery 3)
  • Banshee (Piloting 4, Gunnery 3)
  • Dragon (Piloting 2, Gunnery 3)
  • Assassin (Piloting 3, Gunnery 3) * AC20 hit to CT
  • Enforcer (Piloting 4, Gunnery 3)
  • Clint (Piloting 5, Gunnery 4)
  • Jenner (Piloting 4, Gunnery 3)

Turn 1

themistaketurn1

The Assassin and Hunchback begin the game in the center of the map.  The Assassin, vastly outmatched makes a run for safety.  The Hunchback seizes the initiative and gives chase hoping for one last shot before being forced to pull back.  The shot goes wide gouging the dirt beside the fragile light ‘Mech.

Turn 2

themistaketurn2The remaining forces for each side enter the battle and rush towards each other.  The Lone Star Dragon manages to hit with a long range pack of missiles.  At least a few missiles punch through the now retreating Hunchback’s armor but does not cause critical damage.

Turn 3

While the bulk of both forces continue to advance the Lone Star breaks off a set of light ‘Mechs, a Jenner and a Clint, around cover to threaten the Renegades flank.

The Lone Star Atlas is the only ‘Mech to land a shot this turn, an LRM20 on the Hunchback who continues to move backwards towards the main force of Renegades.  Again the center torso armor is unexpectedly breached but again no critical hits occur.

Turn 4

themistaketurn4themistakerenegadesThe Renegades stay tight together as they slow to a walk, firing off several volleys of Long Range Missiles at the approaching Lone Star ‘Mechs.  The Grasshopper and Catapult combine fire on the Lone Star Enforcer and hit with everything.  Almost all of the missiles hit the legs, slagging most of the armor away.

The Lone Star ‘Mechs have less luck at long range and only land an AC10 and LRM10 at the Dervish and Catapult respectively.

Turn 5themistaketurn5

The Lone Star Battalion takes the hill to the right of the battle while their light ‘Mechs complete their flanking run and bear down on the tightly packed Renegades.  The Renegades continue a slow march forward as their weapons begin to cycle into better range brackets.

The Renegades concentrate all fire on the Lone Star Banshee.  A stray AC5 shell hits the cockpit while the Catapult and Trebuchet combine to rain down four LRM15 racks mostly into the Banshee’s center torso.  The Banshee lists under the wave of weapons fire and falls.

The Lone Star Battalion returns fire but fails to do significant damage.

Turn 6

themistaketurn6themistakeawesomeThe Renegades begin to fall back keeping the enemy at optimum range for long range missiles.  The Lone Star ‘Mechs continue their advance slowly closing the gap with the exception of the Awesome which stays put behind partial cover to line up shots.  The Heavies and Assaults finally round the hill and bear down on the Renegades.

The Awesome crushes into the Cyclops with two PPCs.  The other Lone Star ‘Mechs follow suit but the damage is spread evenly around the lightly armored Assault ‘Mech.  Return fire from the Renegades is spread out across multiple targets failing to deal significant damage.

Turn 7

themistaketurn7The Lone Star Atlas, Banshee and Dragon rush towards the Renegade position.  The Renegades send the Grasshopper and Cyclops to meet them in a melee fray.  The Lone Star light ‘Mechs continuing their wide flanking runs are now getting to within medium range weapons range.

The firing phase is furious.  The Renegade missile salvos scatter damage across the Atlas.  The Cyclops begins taking critical damage as the last shreds of armor melt away exposing internal structure.  The Lone Star Banshee takes a through armor gyro hit and falls.

During physical combat the Renegade Cyclops and Grasshopper kick both of the Dragon’s legs.  The Dragon returns the favor to the Cyclops but strikes the only fresh armor remaining on the ‘Mech.

Turn 8

themistaketurn8The Renegades walk backwards again, trying to keep the Lone Star Heavy and Assault ‘Mechs at optimum range for their missiles.  The Lone Star light ‘Mechs finally engage at close range.  The Banshee is unable to stand but avoids pilot damage.

The Atlas opens up weapons fire with an AC20 round to the Cyclop’s leg cutting deep into the internal structure.  Continued fire from other Lone Star units shred what was left of the leg away as well as cutting off the right arm and reducing the right torso armor to shreds.

The Jenner lines up a rear shot on the Whitworth and punches through to the torso.  The shot hits ammo bins and the ‘Mech is obliterated.

The LRM volleys from the Renegades continue to be on target.  Four more salvos of LRM 15s rain down on the Atlas slowly wasting away armor.

The Renegade Dervish spots the fast moving Assassin and hits with enough lasers and SRMs to cause a leg critical.  The Assassin fails to keep it’s feet underneath and falls onto it’s center torso destroying the previously damaged ‘Mech.

The Physical attack phase features more kicking by the bigger ‘Mechs.  The Dragon’s leg is critically hit by the persistent attention given to it by the Renegade Grasshopper.

The Results

It is at this point that hungry bellies got the better of the gamers on hand.  From the looks of the battle there was no clear winner.  Forced withdrawal had not kicked in for either side and damage was evenly spread among both forces.  The Lone Star Battalion had a long term advantage with their multitude of energy based weapons.  LRM ammo while effective for the Renegades was starting to run low.

The consensus from the players was that the event was at that point a draw but I can easily see at least a marginal victory for the Lone Star Battalion if only for their force’s longer staying power.

Posted under After Action Report
Jan-20-2009

Twilight of the Clans: Falcons versus Comstar

Twilight of the Clans: Battle Four

The fourth battle of the Great Refusal takes place near a Mountain Lake.  Can the Comstar elite defeat the ferocious Jade Falcons to save the Inner Sphere?

See other battles from the Great Refusal in the After Action Category or by searching for Twilight of the Clans in the sidebar search.

Jade Falcons

Khan Marthe Pryde (Piloting 2, Gunnery 2)
Summoner Prime
saKhan Samantha Clees (Piloting 2, Gunnery 2)
Nova Prime

Comstar

Precentor VII Harris Harvison (Piloting 3, Gunnery 2)
BL-6-KNT Black Knight
Demi-Precentor Julius Havanna (Piloting 4, Gunnery 2)
ST-8A Shootist

Turn 1 – Comstar Wins Initiative

totc_falcons_comstar_turn1Both forces rush towards each other forgoing the protection of nearby forests.  Khan Marthe challenges totc_falcons_comstar_turn1aDemi-Precentor Havanna who accepts, thus pitting saKhan Clees in her undersized Nova against Precentor Harvison’s Black Knight.

Luck is not on Comstar’s side early on.  All weapons fire directed at the Clan Omnis miss their mark.  The Falcons ended up in a slightly better range bracket.  Marthe fires and hits with everything in her Summoner, stitching energy beams, missiles, and autocannon shells across the Shootist’s torso.  Of six lasers fired, only one hits the Black Knight.

Turn 2 – Comstar Wins Initiative

totc_falcons_comstar_turn2saKhan Clees triggers her jump jets sending her Nova into a ballistic arc landing inside a dense group of trees.  The Black Knight races in close to engage.totc_falcons_comstar_turn2a

Cautiously eyeing the Shootist’s dangerous AC20, the Summoner backpedals to the edge of the battle tempting the Shootist to advance.  Demi-Precentor Havanna is happy to oblige and rushes forward, hoping to eventually corner the Falcon and bring the AC20 to bear.

The Nova unleashes another volley of six ER Medium Lasers netting four hits of which three are through armor criticals.  Only one critical results, destroying a heat sink.  The Summoner fires and hits with everything again ripping through an already damaged torso and critically damaging the Shootist’s gyro.totc_falcons_comstar_turn2b

The Shootist misses with the AC20 but hits with medium lasers; one to the head, injuring Khan Pryde.  The Black Knight unleashes a torrent of laser fire at the Nova nestled in the woods.  The shots are concentrated and burrow deep into the left torso but no criticals result.

The Shootist falls from the Gyro hit injuring Demi-Precentor Havanna in the process.

Although her Black Knight is armed with a formidable hatchet and the Nova would make a great place to put it right now, Precentor Harvison knows what is at stake and is careful not to break clan tradition knowing that if Comstar is the victor, she cannot give the Jade Falcons any reason to declare the battle invalid.

Turn 3 – Comstar Wins Initiative

totc_falcons_comstar_turn3The Nova brazenly rushes into the open.  The Black Knight follows the Clanner and positions himself for a near point blank fire fight.  Meanwhile, the Summoner begins to circle to his left, unable to keep the Shootist at bay any longer.totc_falcons_comstar_turn3c

The Nova senses an opportunity and lets fly all twelve lasers at the Black Knight.  Ten hit, causing massive damage.  Alas, the only critical hit is a lower leg actuator.   The Black Knight returns fire, ripping completely through the left torso and with it six of the Nova’s lasers and four heat sinks. The inrush of heat from the weapons fire forces the Nova to shutdown.

The Summoner fires and yet again hits with everything, slagging away tons of armor but again not finding internal locations.  The Shootist finally connects with the AC20, landing square in the center torso.  The Summoner shrugs off the damage while Demi-Precentor Havanna fails to keep the Black Knight upright taking another point of damage from the fall but remaining conscious.

Turn 4 – Jade Falcon Wins Initiative

totc_falcons_comstar_turn4Havanna struggles with the controls of the Shootist managing to stay conscious from another fall.  Undeterred, she forces the controls to do her bidding and the 70 ton machine finally cooperates.  The Summoner, meanwhile, kicks into a run and puts some distance between her and the AC20 Khan Pryde fears so much.totc_falcons_comstar_turn4b

With the Nova shutdown, and Havanna keeping Khan Pryde busy, Precentor Harvison lines up the killing blow. A point blank alpha strike reply for the shutdown Nova.  Amazingly, the damage does not destroy the Clan Omni.  A crueler fate is in store for saKhan Clees.  The Nova’s right arm is ripped from the shoulder leaving no weapons remaining.  When the ‘Omni manages to start up, saKhan Clees will be forced to withdraw from combat, defeated and disgraced.
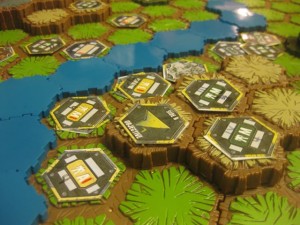
The excess heat from the barrage released by the Black Knight is more than its own heat sinks can handle resulting in an emergency shutdown.
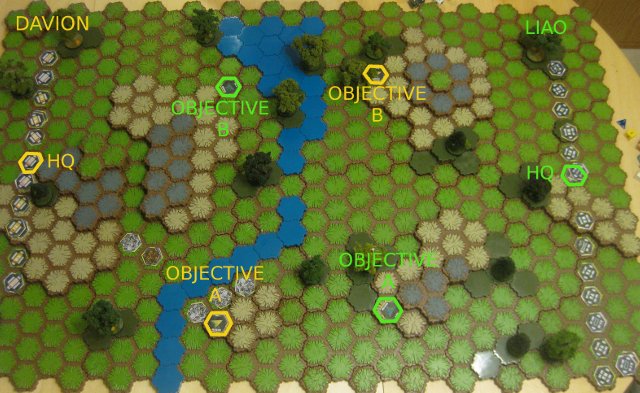
The Shootist strikes out at the maneuvering Summoner but only manages to hit with one laser at the longer range. Torso twisting back, the Summoner once again hits with her entire arsenal, coring through the Shootist’s center torso.
Turn 5 – Jade Falcon Wins Initiative by Default

totc_falcons_comstar_turn5totc_falcons_comstar_turn5aKhan Pryde wraps around a grouping of woods for a clear shot at the last Comstar ‘Mech.  The Summoner hits with everything a final time, racking up no less than five critical hits in the center torso resulting in two engine hits and three gyro hits.

Precentor Harvison succumbs to the inevitable and cedes the battle to the Jade Falcons.

Posted under After Action Report