Lawyers Guns and Money: The Mistake
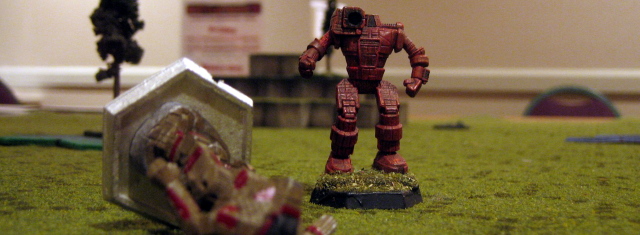
This Event was played at Cold Wars 2009 and run by Commando ‘Speck’. The Lone Star Battalion faces off against Redfield’s Renegades after a tragic error sends both Mercenaries into a rage.
Details are available in the full Lawyers, Guns, and Money scenario pack available as a free download, as are other Game Scenarios at ClassicBattletech.com.
All forces are 3025 variants.
Redfield’s Renegades
- Cyclops (Piloting 3, Gunnery 3)
- Zeus (Piloting 4, Gunnery 3)
- Grasshopper (Piloting 2, Gunnery 3)
- Hunchback (Piloting 4, Gunnery 2) *Sensor Hit
- Catapult (Piloting 4, Gunnery 3)
- Whitworth (Piloting 4, Gunnery 4)
- Trebuchet (Piloting 4, Gunnery 3)
- Dervish (Piloting 4, Gunnery 3)
Lone Star Company
- Atlas (Piloting 3, Gunnery 3)
- Awesome (Piloting 4, Gunnery 3)
- Banshee (Piloting 4, Gunnery 3)
- Dragon (Piloting 2, Gunnery 3)
- Assassin (Piloting 3, Gunnery 3) * AC20 hit to CT
- Enforcer (Piloting 4, Gunnery 3)
- Clint (Piloting 5, Gunnery 4)
- Jenner (Piloting 4, Gunnery 3)
Turn 1

The Assassin and Hunchback begin the game in the center of the map. The Assassin, vastly outmatched makes a run for safety. The Hunchback seizes the initiative and gives chase hoping for one last shot before being forced to pull back. The shot goes wide gouging the dirt beside the fragile light ‘Mech.
Turn 2
 The remaining forces for each side enter the battle and rush towards each other. The Lone Star Dragon manages to hit with a long range pack of missiles. At least a few missiles punch through the now retreating Hunchback’s armor but does not cause critical damage.
Turn 3
While the bulk of both forces continue to advance the Lone Star breaks off a set of light ‘Mechs, a Jenner and a Clint, around cover to threaten the Renegades flank.
The Lone Star Atlas is the only ‘Mech to land a shot this turn, an LRM20 on the Hunchback who continues to move backwards towards the main force of Renegades. Again the center torso armor is unexpectedly breached but again no critical hits occur.
Turn 4

 The Renegades stay tight together as they slow to a walk, firing off several volleys of Long Range Missiles at the approaching Lone Star ‘Mechs. The Grasshopper and Catapult combine fire on the Lone Star Enforcer and hit with everything. Almost all of the missiles hit the legs, slagging most of the armor away.
The Lone Star ‘Mechs have less luck at long range and only land an AC10 and LRM10 at the Dervish and Catapult respectively.
The Lone Star Battalion takes the hill to the right of the battle while their light ‘Mechs complete their flanking run and bear down on the tightly packed Renegades. The Renegades continue a slow march forward as their weapons begin to cycle into better range brackets.
The Renegades concentrate all fire on the Lone Star Banshee. A stray AC5 shell hits the cockpit while the Catapult and Trebuchet combine to rain down four LRM15 racks mostly into the Banshee’s center torso. The Banshee lists under the wave of weapons fire and falls.
The Lone Star Battalion returns fire but fails to do significant damage.
Turn 6

 The Renegades begin to fall back keeping the enemy at optimum range for long range missiles. The Lone Star ‘Mechs continue their advance slowly closing the gap with the exception of the Awesome which stays put behind partial cover to line up shots. The Heavies and Assaults finally round the hill and bear down on the Renegades.
The Awesome crushes into the Cyclops with two PPCs. The other Lone Star ‘Mechs follow suit but the damage is spread evenly around the lightly armored Assault ‘Mech. Return fire from the Renegades is spread out across multiple targets failing to deal significant damage.
Turn 7
 The Lone Star Atlas, Banshee and Dragon rush towards the Renegade position. The Renegades send the Grasshopper and Cyclops to meet them in a melee fray. The Lone Star light ‘Mechs continuing their wide flanking runs are now getting to within medium range weapons range.
The firing phase is furious. The Renegade missile salvos scatter damage across the Atlas. The Cyclops begins taking critical damage as the last shreds of armor melt away exposing internal structure. The Lone Star Banshee takes a through armor gyro hit and falls.
During physical combat the Renegade Cyclops and Grasshopper kick both of the Dragon’s legs. The Dragon returns the favor to the Cyclops but strikes the only fresh armor remaining on the ‘Mech.
Turn 8
 The Renegades walk backwards again, trying to keep the Lone Star Heavy and Assault ‘Mechs at optimum range for their missiles. The Lone Star light ‘Mechs finally engage at close range. The Banshee is unable to stand but avoids pilot damage.
The Atlas opens up weapons fire with an AC20 round to the Cyclop’s leg cutting deep into the internal structure. Continued fire from other Lone Star units shred what was left of the leg away as well as cutting off the right arm and reducing the right torso armor to shreds.
The Jenner lines up a rear shot on the Whitworth and punches through to the torso. The shot hits ammo bins and the ‘Mech is obliterated.
The LRM volleys from the Renegades continue to be on target. Four more salvos of LRM 15s rain down on the Atlas slowly wasting away armor.
The Renegade Dervish spots the fast moving Assassin and hits with enough lasers and SRMs to cause a leg critical. The Assassin fails to keep it’s feet underneath and falls onto it’s center torso destroying the previously damaged ‘Mech.
The Physical attack phase features more kicking by the bigger ‘Mechs. The Dragon’s leg is critically hit by the persistent attention given to it by the Renegade Grasshopper.
The Results
It is at this point that hungry bellies got the better of the gamers on hand. From the looks of the battle there was no clear winner. Forced withdrawal had not kicked in for either side and damage was evenly spread among both forces. The Lone Star Battalion had a long term advantage with their multitude of energy based weapons. LRM ammo while effective for the Renegades was starting to run low.
The consensus from the players was that the event was at that point a draw but I can easily see at least a marginal victory for the Lone Star Battalion if only for their force’s longer staying power.
Posted under After Action Report


