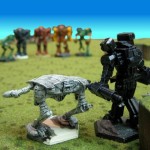
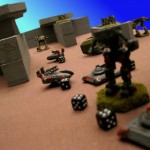
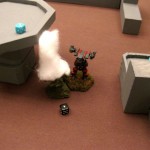
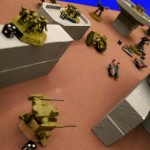
ScrapYard Armory

A BattleTech weblog

Archive for the ‘After Action Report’ Category

Apr-11-2011

Twilight of the Clans, The Great Refusal

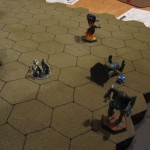
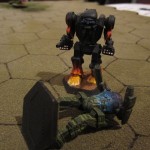
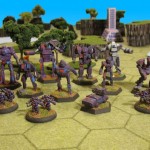
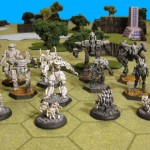
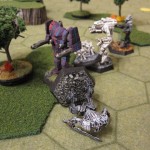
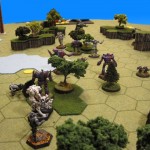
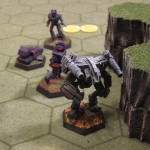
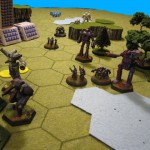
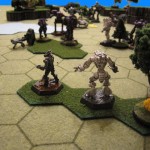
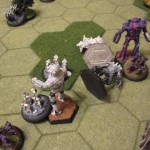
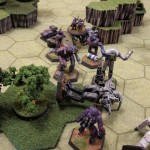
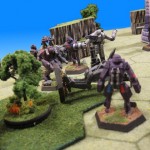
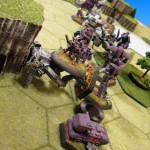
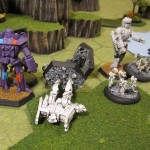
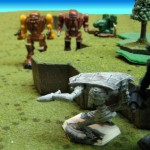
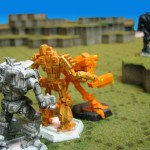
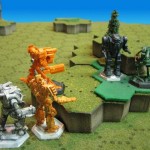
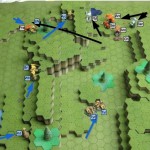
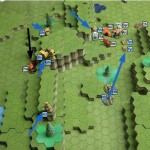
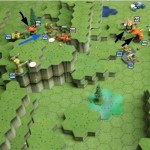
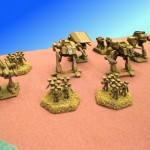
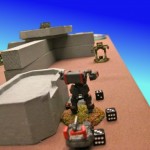
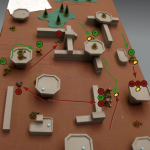
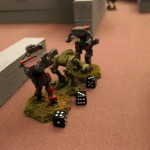
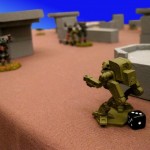
This is a series of battles played at Cold Wars 2011 held in Lancaster Pa.  The Great Refusal was the culmination of the invasion of the Clan homeworlds under the aegis of the reborn Star League.  Led by Victor Steiner-Davion, the combined armies of the Inner Sphere launched a Trial of Refusal to put an end to the Clan invasion once and for all.
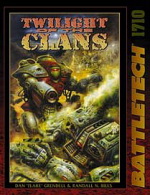
The Great Refusal was a collection of eight battles pitting the best of the Inner Sphere against the might of the Clans.  The side with the most victories would win the Refusal.

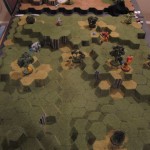
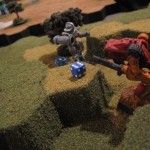
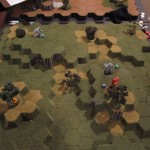
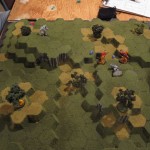
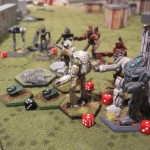
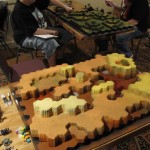
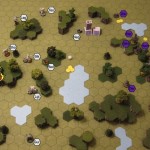
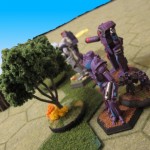
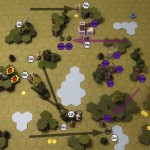
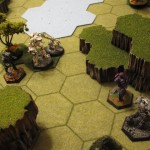
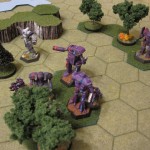
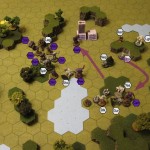
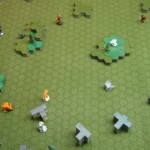
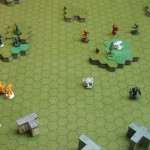
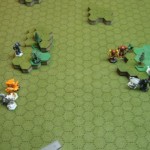
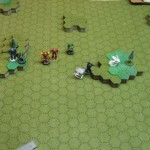
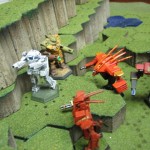
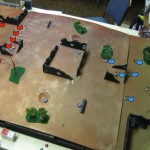
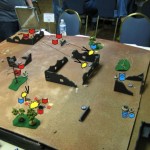
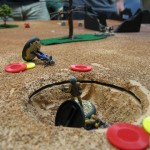
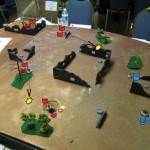
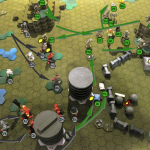
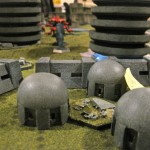
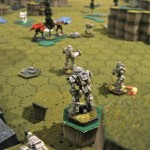
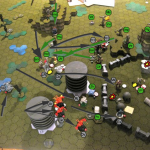
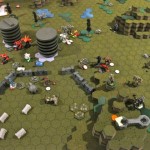
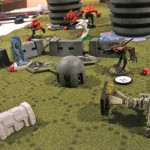
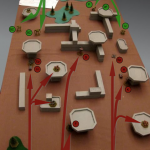
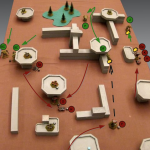
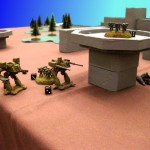
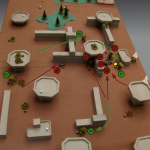
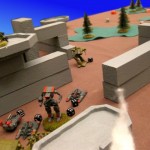
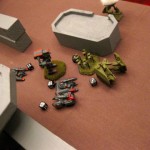
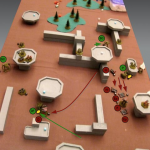
At the convention, we had five of our oversized 3D maps for players to battle on.  Players could come and go as they pleased and participate in as many battles as they wanted.  All told, we have five full battles completed, each one was a fast paced battle to the bitter end.  Did the Inner Sphere prevail or were the Clans able to defy history?

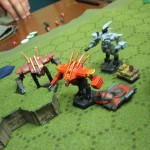
Draconis Combine vs Clan Blood Spirit

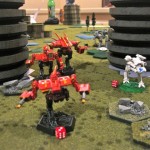
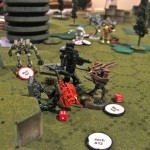
The Combine started well and managed to gain a slight advantage by delivering damage early.  The No-Dachi faced off against the Blood Kite while the Daishi (DC) took on the Battle Cobra.  As the fight dragged on the Combine continued to push and managed to knock out the Blood Kite’s arms.  Without weapons, the Blood Kite was forced to withdraw in shame.  Meanwhile the Combine Daishi was having a turn for the worse in luck and was waning as the Battle Cobra began making solid hits with it’s ER PPCs.  Once inside the internal structure of the Daishi the Clan player rolled a miraculous string of critical hits.  The Daishi ended the turn with 9 points of internal damage but 5 center torso critical hits, taking out the engine and gyro in one fell swoop.

The Battle Cobra turned to the No-Daichi.  The Battle Cobra was showing the wear of battle.  It had lost it’s entire left side while the No-Daichi damage was more spread around.  First turn into the new duel the Battle Cobra head caps his opponent with it’s one remaining ER PPC.

The Clans claim first blood.

Free Rasalhague Republic vs Clan Hells Horses

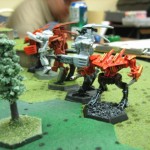
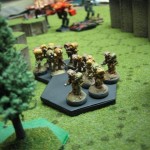
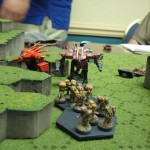
The FRR attempted to keep their distance from the potent Gnome Battle Armor and  the close-in specialist Gargoyle C.  This allowed the Clan force to take up superior positions in the middle of the battle, taking advantage of the only available cover.  The Spartan and Flashman fought the good fight and killed two of the gnomes and severely damaged the rest.

Unfortunately it was only a matter of time before the Clans could close in and bring their superior knife fighting weapons to bear.  The Flashman was brutalized before succumbing to side torso destruction.  Now two on one, the Spartan could not last against the heavier Clan weapons.  In the end, a through armor critical hit took out three engine locations spelling the end for the Spartan and the Inner Sphere’s chances in this match.

St. Ives Compact vs Clan Wolf

This was the longest battle of the bunch and went back and forth as the two players fought skillfully and energetically for their side.
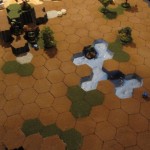
The match starts and the St. Ives Ryoken faces off against the Gargoyle while the Pillager takes on the Timber Wolf.  The St.Ives Ryoken piloted by none other than Kai Allard-Liao wastes no time to close the distance to bring his UAC20 into the action.  The Pillager attempts to keep some distance from the Timber Wolf to take advantage of his Gauss Rifle.

Kai Allard-Liao trades point blank shots with the Gargoyle and in a fast sequence of turns finds his opponent legged but suffered the loss of his UAC20 in the process.  The two MechWarriors would not yield to each other and continued to pour weapons fire into each other.  The Gargoyle is forced to prop to fire but finds luck on his side.  A stream of laser and PPC bursts find soft armor and blast through Kai’s center torso destroying the ‘Mech.

Meanwhile, the Pillager and Timber Wolf are stalking each other at medium to long range.  The Pillager had a horrible time hitting anything with it’s Gauss rifle despite decent to-hit numbers.  The Timber Wolf savaged the Pillager’s armor, pot marking it with gaping holes.  A few heat sinks, an arm actuator, and a single engine hit begin to whittle away at the St. Ive assault Mech.
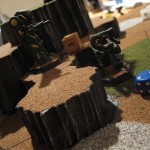
And then the Gauss rifle found home and crushed the Timber Wolf’s cockpit into scrap.

The Pillager is now at long range against the crippled but still dangerous Gargoyle.  Over a series of turns, the two traded long range weapons fire eating away at each others battered and broken frames.  The Pillager has one leg ripped apart and the last few turns are spent with each ‘Mech propping up to shoot.  In the bitter end the last round of weapons fire from the Pillager cored out the Gargoyle giving the win to the Inner Sphere.  The Pillager had only 28 armor points total remaining out of a starting 307.

Draconis Combine vs Clan Blood Spirit (a repeat due to player request!)

This game began much like the first with the Combine coming out strong but fading fast.  The crit seeking ability of the Blood Kite once again proved vital to the Clan force.  The No-Daichi ended up legged and broken on the ground while the Battle Cobra succumbed to arm destruction (no weapons) but not before head capping the Combine Daishi.

The final rounds of the contest involved the battered Blood Kite tearing apart the internal structure of the No-Daichi for the eventual win.

Capellan Confederation vs Clan Fire Mandrill

This match began with the Liao Thunder going up against the Fire Mandrill Warhawk A while the Emperor took on the Gargoyle C.  The Thunder rushed the Warhawk with hopes of bringing it’s AC20 into play.  Despite some early solid hits, the Thunder succumbed quickly to the advanced targeting computer in the Clan Warhawk which gutted the center torso and scored three quick engine hits.

The Emperor put up a better fight against the Gargoyle and managed to trash almost the entire front facing armor.  All three torso locations were open and a few lucky shots got inside and damaged the gyro and engine but not enough for the kill.  The Emperor in turn was decimated by a spread of weapons fire which blew off one arm and critically hit all of it’s own front torso locations.  After an impressive barrage from the Clan Gargoyle, two engine hits in the center torso followed by a single engine hit in a side torso spelled the end of the Inner Sphere ‘Mech.

Battles From the Past

The ScrapYard has fought several of these battles in the past.  You may recognize the terrain and miniatures from older after action reports.  here are some links to previous battles and the results.

The Final Score

After nine total games, the Inner Sphere was only able to pull out three victories.  In a stark contrast to the canon results, the Clans dominated the warriors of the Inner Sphere.  I had a lot of fun watching so many different people play these games and experience the fast paced action.  These are quick battles on average and there are still a few of the battles that we have yet to try. 

Let me know if you have had any experience with these battles from the Twilight of the Clans sourcebook.  I’d love to add your results to the pile and see if the Inner Sphere could do any better given a larger sample size!
Posted under After Action Report
Mar-14-2011

Cold Wars 2011

The first convention of the year is complete.  Lots of great games and fun with friends.

This year more than others, the Lancaster Host seemed to show it’s age.  The secluded corner where the BattleTech games were being held  was constantly overheated with very poor ventilation.  Added into the mix was poor lighting and water stained fixtures that made the venue appear more like a mildewed basement than a proper convention hall.

Poor lighting and bad ventilation aside, the crew did a fantastic job as they always do.  We had a great selection of games to select from BattleTech to BattleForce to A Time of War.  Demo Agent Speck and his minions are an example for other demo agents out there.

About Those Minions…

Most of my readers know that the ScrapYard is a two man operation.  My partner in crime is SaxyWolf who is often behind the scenes but is a vital component to making this blog possible.  I couldn’t ask for a better minion and I really owe him big this time around.

We got to the parking lot at the Lancaster Host around 11 and started fetching supplies for our noon game.  I looked around the back of the car and to my horror, I could not find my minis.  We have a full set of miniatures for our Twilight of the Clans game and I left then in SaxyWolf’s garage.

The trip to Cold Wars is a two hour drive.

Without missing a beat, we touched base with “Speck” to switch our game to the evening slot and SaxyWolf volunteered to hit the road while I sat in on the afternoon BattleTech games to generate after action report material.

SaxyWolf gets a gold star this convention.  Thanks for taking one for the team.

Iron Wind Metals

Iron Wind was in attendance as usual with a plethora of blisters on sale.  The selection of available units included many fan-funded, online-exclusives, and archive items, all at regular prices.

I love seeing Iron Wind at conventions because you are always able to find something for your collection.

Also on display were a few samples of the mini-mech line due to appear within the next month or so.

BattleTech Gaming

We had games from the animated series to the depths of the Jihad on the agenda.  The ScrapYard will have no less than three after action reports from the con.  Before the full featured reports are prepared, here is a sneak peek at some of what’s in store.

And All the Rest

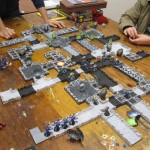
There is always more to conventions than BattleTech.  I didn’t get around to play any other games this con but I did sneak away from running or recording games to snap pictures of some of the coolest set-ups out there.  Enjoy the visual goodness!

Posted under After Action Report
Jan-21-2011

The Fall of Atreus

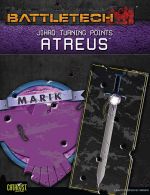
This game was inspired by events portrayed in the PDF exclusive Jihad Hot Spots: Atreus.  While not directly tied to any particular track, the scenario was built from various pieces of information.

The broken warriors of the Free Worlds League are under assault from the elite of the Word of Blake.  Sneak attacks, sabotage and genocide are now common place in the fragile nation.

Word of Blake forces are planning to attack the capital but a brave commander has marshaled a force of Free World’s League Militia to stand in their way and aim to prevent their advance.  The Word of Blake will not be denied and send a force to press the League’s defense.  Can the Militia hold out?  Can they stop the onslaught or will they be yet another ineffective speed bump on the road to desolation?

Free Worlds League

Command Lance

  • AWS-8Q Awesome (Piloting 3, Gunnery 2) Commander
  • P1 Perseus Prime (Piloting 4, Gunnery 3)
  • MR-5M Cerberus (Piloting 4, Gunnery 3)
  • ON1-M Orion (Piloting 4, Gunnery 3)

Chase Lance

  • DV-6M Dervish (Piloting 5, Gunnery 4)
  • HER-2M Hermes (Piloting 4, Gunnery 3)
  • HMR-3C Hammer (Piloting 3, Gunnery 2)
  • WTH-1 Whitworth (Piloting 5, Gunnery 4)

Support Lance

  • Striker Light Tank (Driving 4, Gunnery 3)
  • Achileus Battle Armor, Machine Gun (Gunnery 3)
  • Achileus Battle Armor, Laser (Gunnery 3)
  • Achileus Battle Armor, Flamer (Gunnery 3)

Word of Blake

Primus Level II

  • LGC-01 Legacy (Piloting 3, Gunnery 2)
  • C-SRP-O Seraph Invictus (Piloting 5, Gunnery 4)
  • TSN-1C Tessen (Piloting 5, Gunnery 4)
  • ST-8A Shootist (Piloting 4, Gunnery 3)
  • BL-12-KNT Black Knight (Piloting 3, Gunnery 2)
  • LGH-4Y Lightray (Piloting 5, Gunnery 4)

Dominus Level II

  • GUR-2G Gurkha (Piloting 3, Gunnery 2)
  • RDS-2A Red Shift (Piloting 4, gunnery 3)
  • Purifier Battle Armor (Gunnery 3)
  • Purifier Battle Armor (Gunnery 3)
  • Nephilim Assault Battle Armor (Gunnery 3)
  • Phalanx Heavy Battle Armor (Gunnery 3)

SPECIAL RULES

The following special rules were in effect during this game.

Heavy Rain and Lightning

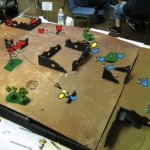
All to-hit numbers and piloting rolls were modified by +1.  Each turn there was the possibility of lightning strikes.  The location of lightning strikes were randomly determined with the aid of a cell phone random number generator.  Lightning Strikes can be seen on the battlefield marked by yellow chips.

Fire for Effect

The Free Worlds League have access to three artillery units: a Long Tom, a Sniper, and a Thumper all within 1 turn artillery flight time.

Watch Your Step

The Free Worlds League may plant 6 conventional mine fields and 3 EMP mine fields.

VICTORY CONDITIONS

Cutting Off the Head

The Word of Blake must destroy the Free Worlds League Commander’s Awesome.

Moving On

After the League commander’s ‘Mech is destroyed, the Word of Blake forces must exit at least 50% of their ‘Mech forces off the map edge opposite their starting edge.

The Word of Blake achieves a Minor Victory if they destroy the League commander and a Decisive Victory if they can achieve both objectives.  Any other result is a Free Worlds League Victory.

ENGAGEMENT

Turn 1 – Free Worlds League Wins Initiative

Both sides advance towards the other with malicious intent.  The Word of Blake spreads wide with the heavier slower units heading down the middle while the Leaguers concentrate in the middle of the battlefield protected by ample woods.  The Word of Blake Gurkha is the first to find a minefield but shrugs off the damage.

Weapons fire is sporadic with a few long range shots hitting the mark but nothing to warrant concern at this point.

Six lightning strikes reach earth but none threaten either force.

Turn 2Word of Blake Wins Initiative

The Militia press the center of the field with their heavier units while stabbing forward with faster units.  To the North a Whitworth, Striker Tank and Hermes attempt to blunt the overreaching Tessen.  To the south, a lone Dervish foolhardily jumps far from support.  Blakist forces seize the advantage and swarm the Dervish with the speedy Lightray, Gurkha, and Red Shift.

The remaining Blakist forces slowly make their way towards the fight.  Along the way the Legacy walks through two minefields, one of which goes off for minimal damage.

The first round of artillery falls in a tight grouping around the slowly moving Seraph doing moderate damage from two of the three rounds.

The Nephilim BattleArmor, who began the battle ahead of the main Blakist line, opens up with all missile tubes to the Whitworth’s rear.  The torso armor crumbles under the impact.  Critical hits strike an engine but spare the ammunition stored close by.  The Militia Dervish is spared major injury by poor shooting by the three Blakist ‘Mechs surrounding him.

Minor damage is spread around to almost all combatants.  The Free Worlds League has particularly bad rolls.  The only bright spot is a lone PPC shot to the BlackKnight which kills a Purifier squad occupying a torso location.

Ten lightning strikes litter the battle field but leave both forces unmarred.

Turn 3Word of Blake Wins Initiative

The Militia units continue to press the center and move to flank the larger Legacy allowing the Tessen to move uncontested towards the Free Worlds League Commander.

The faster Blakist units to the south swarm over the hill to surround the Awesome from the rear as the heavier Blakist units continue to approach from the front all but completely ignoring the supposedly diminutive militia units the League’s commander is hiding behind.

Artillery lands in a grouping between the Seraph and the Black Knight but only dealing minimal damage to the Black Knight after the rounds scatter.

The Blakists suffer poor rolls but do manage to slag several tons of armor off the Awesome.  The Legacy has it’s rear armor stripped but no internal damage results.  Concentrated fire on the Blakist Shootist strips the armor off the right torso and badly damages other locations.

The Gurkha misses a sword attack on the Awesome which retaliates by kicking off the Gurkha’s left leg.

Seven lightning strikes stab the earth, this time getting very close to some of the Free World League ‘Mechs.

Turn 4Free Worlds League Wins Initiative

The Blakist Legacy attempts to move forward to put it’s back (now a gaping hole) against a wall and fire at the League Commander but activates an EMP mine field with it’s first step.  The mammoth electromagnetic pulse instantly shuts down the ‘Mech for five turns.

The Militia heavies hold the center of the battle field while the faster ‘Mechs wrap around to the Seraph’s rear.  Word of Blake forces are now surrounding the Militia but cannot seize the advantage due to the loss of initiative.

Several artillery rounds surround the Blakist Black Knight, but are not close enough.  Another round scatters far enough to nick one of the Free Worlds League ‘Mechs and the adjacent  0ne-legged Gurkha on the ground.

Poor results continue for the Word of Blake who just can’t seem to score meaningful hits against their opponents despite the partial C3i network.

The Hermes behind the shutdown Legacy easily hits with everything to cause the ‘Mech to fall.  Combined fire from the majority of heavy militia units gut the Shootist, critically hitting most of it’s weapon systems but sparing it from the junk heap for now.

All Word of Blake units concentrate fire on the Militia Commander in his Awesome and manage to slag off all remaining armor in the right torso but still cannot score critical damage.

The Seraph is pummeled from the rear but avoids catastrophic damage.

In the physical phase, the Orion kicks off the Shootist’s left leg, adding the the misery befalling the Word of Blake force.

Three lightning strikes occur and one is close enough to do damage.  The Orion and Shootist both receive scars from the adjacent lightning strike.

Turn 5Free Worlds League Wins Initiative

The Free World League forces form a tight circle to corral the undaunted Seraph which obliges and walks into yet another minefield.  The Commander in his Awesome waits for the right moment and runs towards heavier cover and the protection of his lance mates where the ring of ring Blakists has collapsed.  The rear armor is prominently displayed to all enemies which has more armor than the front at this point.

The remaining Word of Blake do their best to anticipate but cannot reach optimum distance for their weapons and failing C3i network.  The League Cerberus marches into the fray and gets behind the cautious Tessen.

The guns of the artillery are now silent as the action heats up and the danger of friendly fire increases to unacceptable levels.

Almost the entire Marik force pours fire power into the Seraph which quickly accumulates engine hits until the great machine falls silent.  The Cerberus meanwhile rips through the rear armor of the Tessen and turns it’s gyro into scrap.

Return fire from the Word of Blake concentrated once again on the Awesome strips yet additional armor but cannot generate critical hits to even slow it down.

The Legacy is swarmed by a squad of Achilieus which scramble to the head of the immobile ‘Mech and aim to rend it from the torso.

End Game

The game is called as the Word of Blake finds themselves battered and their objective escaping their grasp.  Meanwhile, the greater battle for Atreus is not going so well for the Free Worlds League.  For every battle won by the League like this here, there are dozens more where the best of the League are hunted down and slaughtered.

This was a good game with incredible mine rolling by the Free Worlds League player.  Damn near every minefield the Word moved through detonated.  The EMP mine on the Legacy was more salt in the wound as more and more ‘Mechs were legged by the aggressive Militia forces.

Posted under After Action Report
Sep-12-2010

The Breakthrough at Brzo

During the fighting on Tukayyid, Clan Wolf had already secured Skupo and now were running for Brzo. The battle for Brzo took a turn for the worse for the Com Guards when the 4th Wolf Guards and 3rd Battle Clusters arrived to crush through the defenders.

This battle was fought at Historicon 2010.  Many thanks go to Demo Agent “Speck” and his great work putting this and other games together.  The battle used BattleForce rules from Strategic Operations.  The total force list looks huge but it was easily managed with the streamlined BattleForce rules.

Comstar – Tenth Army

Alpha Level II (Ostscout Mini)

  • MON-68 Mongoose
  • JR7-F Jenner
  • JR7-K Jenner
  • OTT-7J Ostscout
  • ASN-21 Assassin
  • HER-2S Hermes

Beta Level II (Phoenix Hawk mini)

  • PNT-9R Panther
  • PNT-9R Panther
  • CDA-3C Cicada
  • STN-3L Sentinel
  • WTH-1S Whitworth
  • PXH-1 Phoenix Hawk

Gamma Level II (Crab mini)

  • BJ-1DB Blackjack
  • WVE-6N Wyvern
  • CRB-27 Crab
  • HBK-4G Hunchback
  • EXT-4D Exterminator
  • EXC-B2 Excalibur

Delta Level II (Archer mini)

  • BMD-12D Bombadier
  • CRD-3K Crusader
  • JM6-A JagerMech
  • ARC-2K Archer
  • ARC-2R Archer
  • ARC-5R Archer

Eta Level II (Warhammer mini)

  • TDR-5S Thunderbolt
  • GHR-5N Grasshopper
  • GLT-3N Guillotine
  • WHM-7M Warhammer
  • BL-6-KNT Black Knight
  • ON1-K Orion

Naga Level II (King Crab mini)

  • AWS-8Q Awesome
  • CRK-5003-1 Crockett
  • HGN-732 Highlander
  • AS7-K Atlas
  • KGC-001 King Crab
  • KGC-001 King Crab

Omega Level II (Marauder mini)

  • TDR-5SS Thunderbolt
  • ST-8A Shootist
  • MAD-5M Marauder
  • ON1-M Orion
  • THG-11E Thug
  • VTR-9K Victor

Zeta Level II (Battlemaster mini)

  • AWS-8Q Awesome
  • SPT-NF Spartan
  • BLR-3M Battlemaster
  • STK-5M Stalker
  • BNC-5S Banshee
  • AS7-D Atlas

Clan Wolf – 4th Wolf Guards

Alpha First Star (black/brown Man-o’War mini)

  • Timber Wolf (MadCat) A
  • Timber Wolf (MadCat) A
  • Gargoyle (Mon-o’-War) A
  • Gargoyle (Mon-o’-War) Prime
  • Gargoyle (Mon-o’-War) Prime

Bravo First Star (MadCat mini)

  • Timber Wolf (MadCat) B
  • Timber Wolf (MadCat) B
  • Gargoyle (Mon-o’-War) Prime
  • Gargoyle (Mon-o’-War) Prime
  • Warhawk (Masakari) Prime

Clan Wolf – 3rd Battle Cluster

Alpha Assault Star (Vulture Mini)

  • Ice Ferret (Fenris) Prime
  • Mad Dog (Vulture) Prime
  • Gargoyle (Man-o’-War) D
  • Gargoyle (Man-o’-War) Prime
  • Executioner (Gladiator) Prime

Bravo Assault Star (brown/orange Man-o’-War mini)

  • Ice Ferret (Fenris) Prime
  • Mad Dog (Vulture) Prime
  • Timber Wolf (MadCat) B
  • Timber Wolf (MadCat) C
  • Gargoyle (Man-o’-War) Prime

Charlie Assault Star (Grey Man-o’-War mini)

  • Phantom C
  • Ice Ferret (Fenris) Prime
  • Gargoyle (Mon-o’-War) A
  • Gargoyle (Mon-o’-War) D
  • Gargoyle (Mon-o’-War) Prime

Turn 1Comstar wins Initiative

Very little action this turn as the two forces lurk towards each other.  Comstar Gamma Level II (Crab mini) is perfectly out of sight and lets loose indirect fire attacks which miss.

(Kill Tracker – Wolf: 0, Comstar: 0)

Turn 2Comstar wins Initiative

Both Clan Wolf and Comstar begin converging their forces towards the middle of the battle.  Gamma Level II remains hidden in woods peppering Clan ‘Mechs using indirect fire.

Most Comstar fire misses this turn except a lucky weapon critical hit on a Warhawk.  The Clans luck does not fare much better at long range and only manages to strip half the armor off one King Crab.

(Kill Tracker – Wolf: 0, Comstar: 0)

Turn 3Clan Wolf wins Initiative

Gamma Level II continues to evade line of sight as Comstar forces are forced to consolidate units into two groups.  Clan Wolf makes excellent use of initiative to force combat.  Comstar had no choice but to shore up their firing positions to absorb damage from the amazing Clan firepower.

Naga Level II is ravaged in the ensuing firefight.  Both King Crabs and a Highlander are destroyed.  Return fire from Comstar brings down a  single Man-o’-War.  On the western side of the battle, armor is slagged off in droves but only a single casualty results.  A Fenris manages to inflict a killing blow on a Marauder in the Omega level II.

(Kill Tracker – Wolf: 4, Comstar: 1)


Turn 4Comstar wins Initiative

After losing initiative, Clan Wolf pulls their forces together and Comstar happily accepts the opportunity to play hammer to their anvil.  The overall movement of the battle has left Beta Level II out in the cold and is unable to contribute.  Slowly they are making their way back into the fray.  Gamma Level II has finally broke from the cover of woods to apply direct fire onto the Clans.

Comstar concentrates fire on high priority targets and manages to deal significant damage this turn.  One MadCat A is destroyed while it’s star mate is stripped of armor.  A Man-o’-War Prime is taken out by one Level II, wasting a lot of shots by viciously over killing.  Another Level II concentrates on the Phantom and destroys it easily.

Clan return fire sheds more armor and manages to destroy a Black Knight, an Orion and an Awesome.

(Kill Tracker – Wolf: 7, Comstar: 4)

Turn 5Comstar wins Initiative

Having lost initiative again, the Wolves present a firing line to the split up Comstar forces.  Intervening terrain and long range prevents line of sight for most units.  Comstar manages to line up medium range shots on a Man-o’-War.

All available Comstar units with line of sight, bury lasers and missiles into a single Man-o’-War D.  The OmniMech is ravaged but standing with a weapon hit and a single point of internal structure remaining.  Return fire destroys a Thunderbolt with some help from an indirect fire attack from the out of sight Vulture.

(Kill Tracker – Wolf: 8, Comstar: 4)

Turn 6Clan Wolf wins Initiative

Clan Wolf breaks for open terrain and tightens up their formation.  Comstar forces to the West have to take their time getting around terrain.  The remaining Comstar forces anticipated incorrectly and are caught and isolated by the bulk of the Clan force.

The turn starts off well for Comstar.  A Man-o’-War D is finished off from long range and a Man-o’-War A is head capped by the Sentinel from Beta Level II which has finally joined the battle.

The Clans return fire in stunning fashion, concentrating most of their firepower into Gamma Level II.  The Clan splits up fire and punishes Gamma.  The Crab has it’s head blown off on the first hit.  The Excalibur, Wyvern, Exterminator, BlackJack, and Hunchback are all blown to bits with varying amounts of overkill.  Gamma Level II is completely destroyed.

(Kill Tracker – Wolf: 14, Comstar: 6)

Turn 7Clan Wolf wins Initiative

The heaviest Comstar assets are still cautious as they come around terrain.  Omega and Delta Level II are hesitant to move too far in front of the slow moving Zeta.  The Clans make good use of initiative and isolate Comstar forces in the center of the battle.  Charlie Assault Star (grey Man-o’-War mini) makes a bold move behind Naga Level II (King Crab mini).

Comstar remains on the defensive and can only respond meekly to the Clan attack.  Two level IIs combine to take out a MadCat B while the Fenris of Alpha Assault Star has it’s paint scratched after several misses.

The Crockett and Atlas both fall from split fire by a single Clan star.  An already damaged Grasshopper is finished off with minimal effort.  A Panther is pummeled but survives with one point of internal structure.  Both a Whitworth and Cicada are hit solidly but survive.  Naga Level II is now completely destroyed.

(Kill Tracker – Wolf: 17, Comstar: 7)

Turn 8Clan Wolf wins Initiative

Clan Wolf remains tightly packed and tries to put distance between themselves and the relentless Comstar pursuers.  Comstar forces despite losing initiative do a better job of anticipating the Clan’s moves but can do nothing to prevent Charlie Assault Star (grey Man-o’-War mini) from lining up rear shots against Zeta (Battlemaster mini).

Two level IIs combine to bury the dangerous WarHawk.  A Marauder and Battlemaster team up to perfectly destroy a Man-o’-War Prime.  A flurry of missiles from Delta’s Archers cripple an Executioner which is then finished off by Alpha Level II who has been making pot shots at available targets.

Previous damage continues to hamper Comstar’s ability to keep ‘Mechs from becoming scrap.  Two Panthers, a Warhammer, and an Orion all fall to enemy fire.  The Warhammer took an entire star to finish off while the Orion was finished by one last powerful hit.

(Kill Tracker – Wolf: 21, Comstar: 10)

Turn 9Clan Wolf wins Initiative

Clan Wolf is now feeling the pressure and split their forces.  Slower stars fall back while maintaining a strong firing line.  The two faster stars of Alpha and Charlie Assault continue to harass the Comstar flank.  Comstar stays as tightly grouped as possible but cannot help but to slightly leave behind the slowly moving Zeta.

Clan Wolf opens up combat with a head shot on an Awesome.  A Thunderbolt, Guillotine and Sentinel are all destroyed by a barrage of weapons fire.

Comstar unloads on the Clan forces in front of them and do considerable damage but amazingly nothing is destroyed.

(Kill Tracker – Wolf: 25, Comstar: 10)

Turn 10Comstar wins Initiative

Comstar continues to put on the pressure and manages to sneak the fast Alpha Level II (Ostscout) into the Wolf flank.  Heavy assets from Delta and Eta (Archer and Marauder) are flanked by Charlie Assault (grey Man-o’-War).

Comstar begins to reap what they sowed last turn.  The Vulture’s missiles are silenced by Zeta’s concentrated fire.  A MadCat B is destroyed by Eta level II.  Beta level II cleanly kills a Fenris from the rear and thus finishes off the last remaining Omni ‘Mechs of Charlie Assault.  A second Clan Fenris is destroyed by physicals at the end of the turn.  Alpha Level II (Ostscout mini) split up it’s fire against the Clan rear with spectacular results.  A MadCat C is destroyed outright while a Man-o’-War explodes from an ammo explosion.  This finishes off the last remnants of Bravo Assault (brown/orange Man-o’-War mini).

Return fire from the Clans is sporadic and borderline ineffective.  A single Banshee from Zeta is killed in a last gasp by the now destroyed Vulture.

(Kill Tracker – Wolf: 26, Comstar: 16)

End Game

The game was stopped at this point when our allotted time ran out.  That’s the thing about conventions, there is always another game a few hours away and we had to make way so the next game would have enough time to setup.

We began the game with 73 units and after ten turns we are down to 27.  So who had the upper hand?  Who would have pulled out the win if we had enough time to finish the game through?

Comstar (20 remaining ‘Mechs):

Alpha and Delta are both untouched.  Omega and Zeta are looking very strong with deep armor and frightening short range threats.  Beta has taken the most punishment of those surviving but is well equipped to keep up a harassing role (all the slow ‘Mechs are now destroyed!).

Clan Wolf (7 remaining OmniMechs):

Among the remaining forces, there are four Man-o’-Wars which are notoriously under armed for their size.  A MadCat and Vulture are the heaviest damage threats.  A Fenris rounds out the Clan options.  All Omnis are untouched.

Time to sound off!  Who would have ruled the battlefield?  Can the Clans make good enough use of their big damage ‘Mech killers or will the smaller but more numerous Comstar forces win the war of attrition?  Leave a comment and let us know!

Posted under After Action Report
Jul-28-2010

Reign of Chaos: Radstadt

This battle was played at Historicon 2010.  Thanks to Chuck “MetalCarnage” Stocky for putting together a great game.

Radstat

In 3074 The Word of Blake assaulted Radstadt, a core world in the newly formed Ghost Bear Dominion.  Elements of the Bear’s Sigma Galaxy were on a training assignment when the 43rd Shadow division clashed with the trueborn warriors of the Third Claw and 5th Bear regulars.

Clan Ghost Bear – Sigma Galaxy

  • Arcas (3/4)
  • Warhammer IIC 4 (3/4)
  • Supernova 2 (3/3)
  • Bane 2 (3/5)
  • Kodiak 3 (2/3)
  • Tyr Infantry Support Tank (2/2) x 2
  • Golem Battle Armor (2/2)
  • Rogue Bear Battle Armor (2/2)

Word of Blake – 43rd Shadow Division

  • Preta Dominus (2/2) *
  • Flashman 7B (2/3)
  • Seraph Dominus (3/3) *
  • Seraph Infernus (3/3)
  • Archangel Infernus (2/1)
  • Archangel Dominus (3/3) *
  • Purifier Battle Armor (2/2)
  • Challenger MK XI (3/3)

* indicate Manei Domini pilots

Turn 1 and 2Ghost Bears win Initiative Both Turns

The armies are separated by a large winding hill in the center of the battle.  As such, the first two turns feature little action.  Line of sight is blocked as each force slowly stalks forward in a foreboding line.

The Word of Blake stay relatively concentrated in a tight group to the North.  A Preta and Flashman are the point ‘Mechs, running fast but keeping out of view for the time being.

The Ghost Bears are fanned out in a wide attack line.  The slower ‘Mechs steadily climb up the mountain face.  The speedy Tyr Infantry carriers sweep around the hill instead of going over the top.

Turn 3 Word of Blake wins Initiative

Both forces cautiously approach the other at first but begin making bolder moves to attack.  The Bears get close to the top but still cannot see the main force of Blakists.  Both Tyr deploy infantry behind partial cover.  The threat of the heavy Battle Armor will have to be dealt with eventually.

In a quick attack, the forward Preta jumps over the top of the mountain and puts itself behind the lumbering SuperNova.  A flurry of PPC and laser fire shed 25 points of armor in the left leg and arm.

No other fire is successful this turn.

Turn 4Ghost Bears win Initiative

All Clan ‘Mechs except the slightly bruised SuperNova crest the mountain and line up shots against the Blakists.  The Tyr Infantry carriers speed into short range to harass.

A Ghost Bear Arcas makes a long jump behind the Blakist Flashman.  Meanwhile, the Blakist Preta assumes a harasser role and lurks just out of sight behind the Clan force, positioning for an attack.

The Ghost Bears spread their shots across available targets.  Critical hits are scored on the Blakist vehicles.  One of the Seraphs takes enormous damage from PPCs but manages to keep its balance.  In a surprising long range hit, the Preta gets tagged with an AC20 shell from the far off Kodiak.

The Blakists choose to pile most weapons on the Arcas who jumped into their midst.  Even at such short range the Wobbies managed to miss far too many Heavy PPC shots for their liking.  One Snub Nose PPC did hit the head but failed to score a critical hit.

Turn 5Ghost Bears win Initiative

Both Archangels and one Seraph stay back while the Flashman and the second Seraph push forward.

The wounded Arcas jumps to cover as the Supernova finally brings its weapons to bear.  The Warhammer IIC and Bane hold their ground behind partial cover.  The Kodiak brings up the rear and is flanked by the lurking Preta.  The Tyr infantry carriers sprint behind the big Archangels for rear shots.

This turn featured a lot of misses (some due to partial cover) with lots of damage soaking.  A significant amount of armor was shed by both sides without hitting any internal structure.  That would change in the physical attack phase.

The forward Seraph is running hot with TSM active and gives a solid kick destroying 34 points of armor from the SuperNova’s right leg.  There is one critical hit, and it finds the Advanced Tactical Missile ammunition stores.  The resulting explosion takes off the leg and severely injures the pilot.  The return kick is not quite so successful but manages to topple the TSM monster.

Turn 6Ghost Bears win Initiative

The Flashman and Preta get bolder and pick spots directly in front of the camping Bane and Warhammer IIC.  The Seraph stands his ground in front of the downed SuperNova while the remaining Blakist force inches closer while keeping the top of the mountain in sight.

The Kodiak runs to close with the main fray.  The Warhammer IIC and Bane continue to hold their position.  The battle armor all the while have been pestering the main Blakist force but fail to make a significant dent in their impressive armor.

The Blakist pile most of their fire on the Warhammer IIC while spreading enough fire to hit every target in some way.  The Ghost Bears consolidate fire on the two targets on top of the hill, leaving the Archangels and their Seraph cohort to the harassing Battle Armor and Tyr combat vehicles.

The Flashman is receives a heap of PPCs and is gutted by three engine hits.  The Seraph beside him is just as lucky.  After soaking two AC20 rounds and taking it, one last medium laser severs the the remaining structure holding  the right arm on.  Further fire from the Arcas peppers the torso and head with SRM hits.  After the pilot takes his damage (needing only a 3 to stay awake), he promptly falls unconscious.  And then it got worse.  The resulting fall would end with critical hits to BOTH hips.  Without an arm to prop with, the red Seraph was now out of the battle.

Return fire from the Blakists is just as cruel.  The Warhammer IIC takes a beating from multiple sources and finally takes an ammo critical hit.  Combined with a prior head hit and damage from the fall, the Warhammer pilot is knocked unconscious, needing a 10+ to wake up.  The Arcas, although not heavily targeted, meets a similar fate and takes pilot hits from ammo explosions and fall damage.  Both lie knocked out on the battlefield.

Turn 7Ghost Bears win Initiative

The main Blakist force slowly moves back, still being harassed by the Tyr.  They remain wary of the slowly approaching battle armor.  The Preta makes a long jump away from the thick of the battle.

The Ghost Bears stand their ground where they can while the Warhammer and Arcas dream sweet dreams in their cockpits.

Weapons fire is well spread as available targets show the fatigue of battle.  The downed Seraph soaks hits from the SuperNova in front of him.  The damage inflicts an engine and gyro hit and also destroys a leg.  Interesting choice of targets since the Seraph was unable to prop and fire.  Return fire from the other Seraph at the bottom of the hill sends two Heavy PPCs to the center torso, coring the SuperNova.

The Kraken is successful in hitting with both Ultra AC10s at double rate but manages to find fresh armor on an Archangel when very little remains anywhere else.

Turn 8Ghost Bears win Initiative

The Blakists reverse their previous course and walk forward toward the mountain into the awaiting arms of the Rouge Bear battle armor.  The Preta makes a long jump again, preferring to stay at a distance.

The conscious Ghost Bear pilots concentrate fire on the closest Archangel while the Blakist return in kind with fire directed mostly at the Bane.

The Ghost Bears tear into the Archangel but fail to shed enough armor to reveal internal structure.  The first Heavy PPC shot directed at the Bane evaporates the cockpit.  The remaining three Blakist ‘Mech’s pummel the headless ‘Mech.

In a surprise turn, the immobilized and almost forgotten Tyr combat vehicles score two engine hits on the Seraph from rear shots.  The Seraph is staggered but not out of the action.

Turn 9Ghost Bears win Initiative

The Ghost Bears rolled a 3 for initiative.  The Blakists did them one better with snake eyes.

The Warhammer IIC wakes up!  Meanwhile the battle armor are now out of missiles.  The Blakists move back again trying to get the troublesome Tyr out of rear arc.

The Warhammer is quickly put down again by a gyro hit causing him to fall behind partial cover.  The advancing Kodiak’s head is disintegrated by a Heavy PPC from an Archangel.

Return fire from the active Ghost Bears only manages to score a gyro hit and destroy a Heavy PPC in the Seraph.

End Game

All that remains of the Ghost Bear force is an unconscious Arcas, some battle armor without missiles and the immobilized Tyr.  The remaining Archangels and Seraph are more than a match for what’s left and are victorious on the battle field.

This was an excellent game with lots of action.  When the Word of Blake and the Clans meet with their best equipment, you are bound to see lots of fireworks.  This battle did not disappoint.  Kudos to Chuck for putting together this well thought out game.

Posted under After Action Report
Jul-20-2010

BattleTroops Infantry Recon

This game was played at Historicon 2010 using the RPG combat rules from A Time of War.  Two infantry forces face off in a race to gather intelligence on the area when no ‘Mech forces are available to assist.

There are eight objective on the board worth between one and four victory points.  Each enemy kill is also worth a victory point.

Lyran Alliance

  • Field Commander, Pulse Laser Rifle
  • Heavy Weapons Team, Support Pulse Laser
  • Soldiers, Pulse Laser Rifle x 2
  • Soldiers, Intek Laser Rifle x 3

Draconis Combine

  • Heavy Weapons Team, Portable Machine Gun
  • Heavy Weapons Team, Light Recoiless Rifle
  • Soldiers, Auto Rifle x 2
  • Soldiers, Imperator AX Rifle x 2

Record Sheets and Cheat Sheets

After playing quite a few games with the Time of War rules set, I made a few adjustments to suit my own particular taste.  I also created my own record sheet that helps to ease the learning curve.  All skill numbers are listed as the raw to-hit number.  The fatigue and injury modifiers are also listed for easy reference.  I also boiled down some key points into a simple two page rules summary for the players to use during the game.

I’ve included my record sheets and the rules reference here for you to take a look.  I expect to do a future post on the Time of War combat rules with further insight into the game and maybe even some new and improved record sheets.

Turn 1Lyrans Win Initiative

Both teams sprint towards the central area of the map.  The Kurita side makes a dash to the north corner of the map with their Recoiless Rifle team while the bulk of their forces fan out along a wide line.  The Lyran side sets up their Support Pulse Laser early while the remaining team spreads into a diamond pattern with the Lyran Field Commander bringing up the rear.

Both teams tag up on their 1 VP objective.

No shots are available just yet as the bombed out building and the gentle rise of the terrain prevent line of sight.

Turn 2Kurita Win Initiative

Alarmingly each team elects to sprint one member to claim the 2 VP objective which lies in front of available cover.  The Lyrans send another soldier to the corner of the center building neglecting to take cover.

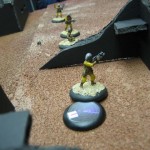
The Kurita Recoiless Rifle team takes more time getting into position in the sniper nest in the north-western corner of the battle.

The Lyran heavy weapons teams begins the break down their equipment in hopes of moving to a better location.

The Kurita Recoiless Rifle support member manages to take an extreme range pot-shot at the advancing Lyrans with his side-arm but fails to hit.  Two Kurita soldiers with Auto Rifles land three shots total against targets in the open.  The Lyran soldiers to the North and South take hits.  The Northern Lyran fails his knock-down check.

Three of the Lyran squad are lined up in the center of the battle behind the main buildings and cannot draw line of sight to any targets and can do nothing but watch as two of their teammates take damage.

Turn 3Kurita Win Initiative

The Kurita soldiers in the North take cover behind a low wall and send bullets down range at incoming Lyrans.  The Lyran take cover at the corner of the center building.  One additional Lyran takes cover in woods.

The Lyran heavy weapons team sprints forward in hopes of finding a better spot to plant their support pulse laser.

The Lyran soldier to the south suffers bleeding wounds from numerous shots from the line of Kurita soldiers across the battle.  Amazingly he keeps his balance through the barrage.    The Kurita Recoiless Rifle team is now in position and fires their first ordinance towards the Northern corner of the center building.  The round deviates marvelously and detonates a High Explosive round in range of two Lyrans.  Both are wounded and knocked down.

The Lyran soldier in the woods inches forward and fires two single shots at the Kurita soldiers behind the wall.  The first shot misses but the second hits hard, knocking the soldier down and causing a bleeding wound.

Turn 4Kurita Win Initiative

The Kurita machine gun team wastes no time and fires a burst at the Lyran soldier against the wall to the South killing him.

The Lyrans sneak a soldier into the center building and tags the 4 VP objective.  The Recoiless Rifle team takes aim and misses by a wide margin.  The shot deviates far enough to land at the feet of another Lyran soldier who was already injured.  The resulting explosion kills the soldier.

The Lyran previously in the woods sprints to claim the 3 VP objective in the pit to the North.

To the South the Lyran player sprints a soldier to the other pit and is quickly followed by two Kurita soldier.  Both Kurita soldiers happen to be armed with Vibro-Katanas for a melee weapon.

Turn 5Lyrans Win Initiative

The Lyrans win initiative and make good use of it.  The Lyran in the Southern pit scrabbles out and drops a grenade in behind him.  Both Kurita soldiers are knocked down and bleeding.  One of them is knocked out as well.  The Kurita Machine Gun team is in perfect position and shoots up the Lyran who dropped the grenade.  The soldier is knocked down and bleeding.

In the North, the Kurita soldier behind the low wall stops his own bleeding while his partner trades fire with the Lyran in the pit.  The Lyran luck is not holding out.  Despite good cover the soldier in the pit is hit while missing his own shots.

The Recoiless Rifle team continues to rain explosives onto the Lyrans.  This time the dice roll is perfect and the Lyran who claimed the objective in the center building is killed outright.

Turn 6Kurita Win Initiative

Things go from bad to worse for the Lyrans.  Once again good cover doesn’t save the Lyran soldier holding the pit in the North.  The Kurita player rolls boxcars on a burst attack for the kill.

The Machine Gun team finishes off the Lyran on the ground to the South.

The body count is now vastly in favor of the Kurita player and the game is called.

Fighting the Good Fight

Unfortunately there is not much to say about this game.  The Lyrans were picked apart by a more spread out adversary.  There was a missmatch of equipment that I am to blame for.  I overvalued the long range of the Lyran weaponry.  The Recoiless Rifle team was probably overkill.  That weapon proved very powerful by itself and devastating when combined with good dice rolls.

The gentle rise of the terrain crippled line of sight and prevented the Lyrans from using the full effect of their longer range.

What both players didn’t do is make use of suppression fire.  Maybe the rules were too complicated or I just didn’t explain it well enough.  Suppression fire is an excellent way of denying your opponents movement and I would love to see a game where it really came into play.

I learned a lot during this game and hope that the players who gave it a shot had a good time despite the uneven battlefield.  Just more reason I should start cooking up a Time of War Battle Value.

Posted under After Action Report
Jul-11-2010

Historicon 2010

A New Home

Historicon has a new home at Valley Forge, Pa.  The venue has more modern accommodations while providing much needed breathing room for the growing convention.

The one major problem was the long and twisted walk to the BattleTech area.  There were around 50 or so gaming tables tucked away on the Radisson side of the convention while the main tables were near registration at the Scanticon.  I felt that I spent too much time traveling between the two locations to get to one game or another.

While the convention site grew, the BattleTech specific gaming room did not.  The regular crew never seemed to mind.  BattleTech folk are a hearty breed after all.  The room almost always looked full especially when we ended up filling tables all the way around for the more popular games.

BattleTech Games

For the first time since I started attending HMGS events, I ended up hosting games rather than just participating.  My partner in crime minion, “Saxywolf” built terrain for one of the events and assisted preparing minis.  The first was a multi-battle big game using a unique system of synchronized battles that involved Aerospace Fighters and off-map Artillery to compliment the regular assortment of ‘Mechs and Vehicles.

Our second game was a BattleTroops skirmish using the Time of War combat system as our framework.  While not as well attended, I had a great time watching players discover this great system.  I will admit that the forces were not as balanced as they should have been.  I should have put more effort into playtesting but the effect of the terrain we used, which was not completed until the 11th hour, had a huge effect on weapon balance that I did not have the foresight to account for.

“Speck” and crew put on another great show with lots of games ranging from 2821 to 3074.  I’ll have no less than three full battle reports from the convention in the near future.  Check back for more!
Grinder and Demos

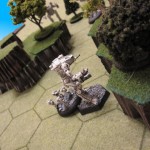
While the Grinder table always seemed full the demo table was rarely used.  The normal influx of passers-by interested in a quick 10 minute demo were far and few between, no doubt due to the location of the BattleTech room.  Demo Agent “Speck” and his crew of minions did their best to bring in visitors and put up their own signs to direct people to the demo location.  No venue is perfect and this one certainly had it’s flaws.  I find it curious during my many  long walks between the Scanticon and Radisson that there were many conference rooms available or being used by other parties.  If HMGS attends Valley Forge again, I think it would be better to use these spaces to keep the game rooms closer together.

Painting Contest

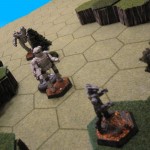
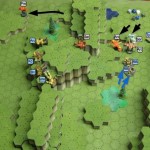
BattleTech regulars took no less than three prizes in the painting contest!  Mark’s brother Dave took home honors for his Wolf’s Dragoons and TotalWar BattleMaster while Scott “Wemic9” was awarded for his museum scale Vulture. Congrats to both on their entries!
Iron Wind Metals and the Vendor Hall

Iron Wind was in attendance with Ral Partha banners on display.  Sadly, they still have not gotten their BattleArmor sorted into new bins so they were absent.  The regular assortment was on hand though and I picked up a Limited Edition TDR-10M Thunderbolt which I plan to add to my Marik roster.

I noticed a few more painted miniatures in the display case that I had not seen before.

The rest of the vendor hall was spacious and well stocked with all manner of miniatures, terrain, tools, and random wargaming goodness.  I saw many old favorites and some new faces too.

Other Games

There are always a lot of great games at Historicon.  BattleTech will always be my bread and butter, but I love showcasing some pictures of the best I saw while walking around.  Historicon is always a huge event and a great time for any wargamer.

Posted under After Action Report
Apr-18-2010

The End of Necromo

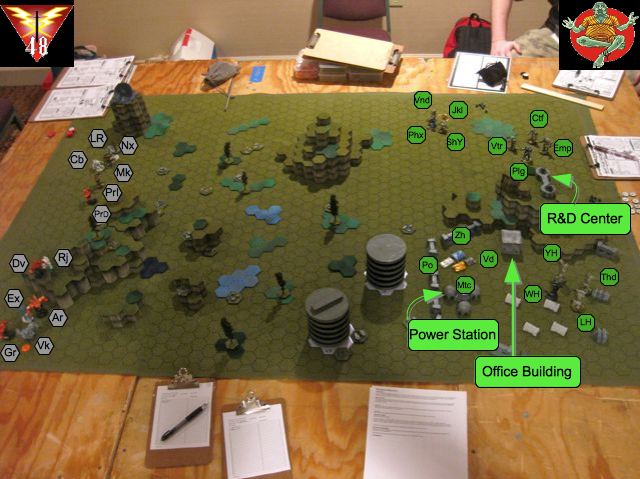
In 3071 the Word of Blake Jihad came to the Capellan Confederation planet of Necromo, home of the warship yards for the Capellan Navy.  The Shin Legion and Home Guard were protecting the planet until the 48th Shadow Division invades with intent to destroy all defenders and the factories.

Word of Blake – 48th Shadow Division

Alpha Level II

  • RJN-200-C Raijin II
  • Grigori Dominus
  • EXT-5F Exterminator
  • Archangel Dominus
  • VQR-5V Vanquisher
  • Deva Dominus

Beta Level II

  • Nexus II
  • Malak Luminos
  • Preta Dominus
  • Preta Infernus
  • CRB-45 Crab
  • LGH-6W Lightray

Capellan Confederation – Shin Legion

Command Lance

  • CTF-3LL Cataphract
  • VTR-10L Victor
  • EMP-6L Emperor
  • PLG-4Z Pillager

Recon Lance

  • JA-KL-5S Jackal
  • SYU-4B Sha Yu
  • PXH-4L Phoenix Hawk
  • VND-4L Vindicator

Support Lance

  • THR-2L Thunder
  • WHM-4L Warhammer
  • LHU-3C Lao-Hu
  • Y-H10G Yu Huang

Conventional Support Lance

  • Po Tank
  • Zhukov Heavy Tank
  • Manticore Tank
  • Vedette Medium Tank

Objectives

The Shin Legion will win a partial victory if they keep the key factory buildings intact (central office, R&D Lab, and power substation).  They win a complete victory if they also destroy at least 50% of the attackers.

The 48th will win a partial victory if they destroy the objective buildings and a complete victory if they also destroy at least 50% of the defenders.

Special Rules

Due to surprise, the 48th win initiative automatically the first two turns.

Turn 1 and 248th Win Initiative (automatic)

Both opening turns see only movement and missed long range shots.

The Capellans hold the core of their force on the small hill overlooking the battlefield.  They are not making any attempt to bring the battle to the Wobbies.  The lighter units swarm around heavy cover provided by a large hill to the north.

The Word of Blake marches forward ominously, without fear.

Turn 348th Win Initiative

A lone Preta jumps on top of the north hill for a better look and attracts the attention of several Liao ‘Mechs.  Amazingly the tiny scout gives worse than it receives in the exchange thanks to a very large target modifier from jumping and heavy woods.

The main force of Heavy Liao ‘Mechs stays grouped together but begins to stray from the defensive position they took in the opening turns.  The vehicle lance darts around cover trying to avoid shots from the slowly approaching Word of Blake Heavy Level II.

Turn 4Shin Legion Win Initiative

The Preta from last turn jumps again and takes cover in woods.  This time luck is not on its side as a Gauss Rifle rips into the left leg.  However, no internal damage results.

The Liao ‘Mechs stubbornly refuse to close with the enemy, ever fearful of the threat from the complete C3i network deployed by the enemy.  To support the tanks to the south, a Thunder keeps close behind a building avoiding contact but positioning within a short run of potential targets.

The Word of Blake light assets continue to dance around the hill to the the north.  They avoid damage while delivering timely long range hits on targets of opportunity.  The Liao decision to stay at long range is resulting in unreasonably high to-hit numbers.

A Yu Huang of the support lance is picked out from the crowd and pummeled with Heavy Gauss Rifles, ERPPCs, and ER Medium Lasers and forced to fall.  No internal damage but lots of lost armor.

Turn 5Shin Legion Win Initiative

The Word of Blake continues to press the advantage and scores more hits against the Yu Huang and a Zhukov Tank.  The scattered response from the Liao forces is barely able to break the concentration of the invading Manei Domini.

The Vanquisher decides not to dwell in a partial cover protected sniper position and struggles to keep pace with his faster allies.

Turn 648th Win Initiative

The Heavy Level II to the south is not showing any signs of slowing down and is now in range of the objectives.  The Tanks cannot stand up to the potential firepower and choose to attempt escape past nearby buildings.  The nearby Thunder fires into the ground to build up heat, activating TSM.

The center of the power plant is destroyed in a single volley and some damage is placed on the office buildings deep in the Liao deployment zone.  The Word of Blake forces begin taking shots at anything in range, ‘Mech or building.

The Zhukov, unable to match the speed of his lance mates is struck solidly from Word forces and sustains an engine hit.  A Liao Sha Yu who rushed in to disrupt the advance of the Light Level II sheds armor to concentrated firepower and takes an engine hit as well.

In a stunning turn, the Word of Blake Nexus is caught in a short but precise stream of PPC and Autocannon shells from various sources.  Almost all shots land in the center torso, coring the ‘Mech through.  First kill goes to the Shin legion!

Turn 748th Win Initiative

Unimpeded, the Heavy Level II marches to the front of the Liao ramparts where the speedy Raijin II joins them to level what was left of the Office Building and Power Plant.  The Light Level II to the north consolidates and continues to pressure the main segment of the Liao forces who are still near the base of the hills overlooked by the Research Center.  The Research Center is also victim to long range volleys and is in danger.

The Liao forces unload on a Preta who had rushed forward.  In a roar of Heavy PPCs and laser fire, the Preta has a leg ripped off and two engine hits.  The Archangel is hit with both a light and regular gauss rifle to little effect.  The Thunder who finally rushes into enemy forces lines up a LB-20X shot to a Lightray.  The cluster roll is a full complement which tears apart the weak rear armor and delivers an engine and gyro hit.  Amazingly the Lightray takes the damage and remains standing.  A TSM kick would miss during physical combat.

The Word of Blake is storming into Liao territory and shows no signs of slowing down.  The Cappellans can do nothing to prevent their facilities from getting sacked and cede the battlefield.

Aftermath

As a player on the Capellan side I confess to being a little too worried about the C3i across the board.  We were sure to lose a few ‘Mechs to the network but overkill is a factor that would work for us in the bigger picture.

We really should have challenged the Word of Blake front line sooner.  Once that Heavy Level II got close, it was all over for our poor buildings.  No superior positioning was going to save the day.

What do you think?  What would you have done differently?

Posted under After Action Report
Mar-30-2010

Last Stand of the Davion Guards

In 3063 with the Fed Com Civil War heating up, the 1st Davion Guards on New Avalon knew their days were coming to an end.  Their commander, Marshal Bishop Storek decides to set the final fight on his terms.  By October, Marshal Storek made a final stand with two assault companies at the mountain pass to prevent the Loyalist forces from following the 1st Davion into the pass.

This game was played at Cold Wars 2010 under the stalwart guidance of Demo Agent “Speck”.  This was a BattleForce game with each unit representing a lance of ‘Mechs.

1st Davion Guards

Assault Lance

  • EMP-6A Emperor
  • HGN-732 Highlander
  • MAD-5A Marauder II
  • PLG-3Z Pillager

Command Lance

  • AWS-9Q Awesome
  • Templar Prime
  • CP-11-G Cyclops
  • Sunder A

Support Lance

  • LGB-12C Longbow
  • Templar B
  • VKG-2F Viking
  • AS7-K Atlas

3rd Robinson Rangers

Command Lance

  • HBK-4G Hunchback
  • BLR-4S Battlemaster
  • BNC-5S Banshee
  • MR-5M Cerberus

Fire Lance

  • DV-7D Dervish
  • DV-7D Dervish
  • GRF-3M Griffin
  • LNX-9C Lynx

Heavy Lance

  • CTS-6Y Cestus
  • CES-3R Ceasar
  • WHM-7S Warhammer
  • DGR-3F DragonFire

Recon Lance

  • ALM-9D Fireball
  • JR7-D Jenner
  • SPR-5S Spector
  • WLF-2 Wolfhound

Strike Lance

  • Blackjack A
  • Blackjack A
  • MAD-5D Marauder
  • PTR-6M Penetrator

Support Lance

  • CN10-B Centurion
  • WR-DG-02FC War Dog
  • AWS-8Q Awesome
  • STK-5S Stalker

Objectives

Kill everything.  The Robinson Rangers only win by eliminating every last one of the Davion Guards.

Turns 1 and 2Robinson Rangers win Initiative

In the first two turns, each force begins the march towards the enemy.  The Davions tend to be reserved and are more comfortable to allow the Rangers to advance.  The Rangers have a small amount of woods in front of them to give cover.

On turn 2, the Rangers begin to have some separation between their faster units and the larger slower Heavy and Command lances.  In the next few turns the Ranger commanders begin slowing down the attack to allow the slower units to catch up.

Turn 3Davion Guards win Initiative

The Davions use their initiative to good advantage.  After committing the Heavy Lance to long range the Davions pounced and managed to isolate a small segment of the Rangers without support.  The numerical advantage at long range pays off big resulting in 13 damage delivered versus 6 received.  An excellent start for the Davions who must fend off the larger force.

Turn 4Robinson Rangers win Initiative

Back on the attack, the Rangers try a similar strategy of divide and conquer.  The Davions don’t take the bait and move back to avoid any major exchange of fire.  No shots were fired as no units ended movement within range.

Turn 5Robinson Rangers win Initiative

The Rangers are fully cohesive now and rush forward as fast as the Command Lance can follow.  The Recon Lance strays slightly closer to the Davions.  Still in long range but positioning for a flanking opportunity in the future.  The Guards have the terrain advantage and superior long range weapons.  All shots are at long range this turn.

The superior firepower of the Guards is felt by the Rangers.  Half of the Heavy Lance is destroyed (Cestus and Caesar) while the Rangers can only answer with 6 damage to the previously scratched Templar.  There were lots of misses by the Rangers this turn.

Turn 6Davion Guards win Initiative

In an interesting move, the Guards pull back and bring the fight out into open terrain.  While the bulk of the Rangers is slowly advancing in a solid group the Recon Lance is now solidly in medium range and threatens the Davion flank.  Three of the Ranger’s Mechs are still at long range while the front two lances (Command and Fire Lances) are now in medium range.

The Davions focus all firepower on the forward leading Command lance delivering a hail of fire that amazingly only destroys the Hunchback.  The Hit to Miss ration is frustratingly high for the Davions.

The Rangers have a much more successful round of shooting and manage to waste no shots on overkill at all.  Both Templars fall to combined damage from the Ranger forces.  The final point of damage on the Command Lance Templar came from a lowly Fireball from the Recon Lance.

Turn 7Robinson Rangers win Initiative

Feeling rather smug, the Rangers hope to press their advantage.  They brazenly rush to trap the Davion assault lances in melee range.

Weapons fire for the Davions is mixed but the shots that do hit are devastating.    The Davions concentrate fire on two lances and combined with physical attacks the rest of the wounded Heavy Lance and the entire Command Lance is destroyed.  Perhaps going to melee range was not the best choice by the Ranger commanders?

Not to be outdone, the Rangers unleash a blistering volley of fire on the Davion Lances.  Each lance received at least some attacks and very few missed.  The Viking in the Support Lance was killed by an unfortunate headcap very early into it’s internal structural.  A Pillager, Emperor and Longbow all join their fallen comrades, the latter two from physical attacks at the end of the turn.

Turn 8Davion Guards win Initiative

The Davions try to spread the field by jumping the Assault lance to high ground.  The Rangers have ample jumping ability to counter Davion maneuvers.  The Ranger Fire Lance and Recon Lance both have rear shots on Davion lances.  The noose is beginning to tighten around the Guards.

The Davions concentrate on the Recon and Strike Lances and kill 3 ‘Mechs in the process, a Jenner, Fireball, and Marauder.

The Rangers continue to make lucky rolls and destroy 3 ‘Mechs; one by a headshot.  All this while the entire Fire Lance misses and three ‘Mechs have no targets due to overkill.  In the Physical attack phase, the Rangers pile damage on the opposing Marauder II.

Turn 9Davion Guards win Initiative

The initiative advantage is not enough to save the battered Davions.

The last damage the Davions manage to muster is to kill the Recon Lance Spector.

The Rangers begin cleaning up and finish off the Assault Lance with rear shots and heavily damage the Command Lance Sunder.  The last remaining member of Command Lance is a lone Awesome who manages to survive one more turn against the Robinson Ranger onslaught.

Thoughts on the Game

I honestly did not think that this game would be as one sided as it was.  Certainly some of it was luck.  The Davions had several opportunities to do some serious damage early on but missed some easy rolls.  Honestly, when I saw the Davion Guard record sheets I cringed.  Several lance members could do 5 or 6 damage at most ranges.  Whatever these things hit, they were going to hurt badly if not outright kill.

It’s obvious that the Davions held the weapon and skill advantage but the shear volume of opposition ‘Mechs was too much.  In the war of attrition, the Davions lost.

One more point.  I think the Davions should have done more to secure the better terrain positions early in the game.  In BattleForce, it is key to remember that you receive FULL benefit from your individual movement without even moving.

Posted under After Action Report
Mar-3-2010

Recon Cavalry

This battle was played during Dreamation 2010 in Mt Morris NJ.  Thanks go to Anthony “ShadHawk” Hardenburgh for the great mission, map and minis!

Clan Hells Horses

  • Fenris
  • Dasher
  • Koshi
  • 2 Epona Pursuit Vehicles
  • 2 Hephaestus Scout Tanks
  • 5 Points of Elementals

Clan Nova Cats

  • ShadowCat
  • ShadowCat
  • Dragonfly
  • Uller
  • Puma
  • 5 Points of Elementals

Mission Objectives:

  • Recon the main buildings in the city – Recon units include elementals and any unit with active probes
  • Escape the city with the data to fight another day

Turn 1Nova Cats Win Initiative

Both forces move towards their objectives.  Very few shots are within range and none of those have line of sight.

Turn 2Hells Horses Win Initiative

Each force moves up carefully and begin dropping elementals next to objectives.  Again there are no shots but this time it is due to no line of sight and not necessarily range that is the culprit.

Hells Horses leave the Fenris behind to scan a building, sacrificing position for an early objective advantage.

Turn 3Nova Cats Win Initiative

The first objectives are finished scanning this turn and movement forward continues.  Positioning is becoming crucial as more weapons begin to get in range, however all weapons miss their targets.

Turn 4Hells Horses Win Initiative

Combat is inevitable.  One of the Nova Cat ShadowCats activates MASC only to have it fail causing critical damage to a hip and a leg actuator on the other leg.  The other ShadowCat moves to support causing the Hells Horses to duck behind cover to avoid engaging.

On the other side of the battle, the Hells Horses push to attack the Nova Cat Uller using the buildings to cover their vehicles.  The Fenris is bringing up the flank and positions for a long range shot.

Weapons fire goes disastrously for the Nova Cats.  The only bright spot was a solid Gauss Rifle hit to the center torso of the Hells Horses Koshi.

The Hells Horses weapons hit often, including a long range ERPPC from the Fenris.  The Dragonfly receives several critical hits to it’s right arm, destroying a SRM4.  The Uller has it’s right torso ripped off, which takes out the offending Gauss Rifle in its right arm.

Turn 5Nova Cats Win Initiative

The Nova Cats continue to press and manage to line up a rear shot on the Fenris.  The Hells Horses Dasher backs up the Fenris forming a small conga line.  The Hells Horses vehicles move quickly to attack targets of opportunity.

All the while, elementals from both Clans are fighting in one of the objective buildings.

The Nova Cat Uller and the Horses Koshi mutually kill each other.  The Puma who is slowly getting into the action is hit from behind by an Epona.  The Horses vehicles continue to defy the odds and are kept safe by continuing to move fast.

In the conga line, damage is done to each member except the Dasher.  The Dasher, however, causes the only critical hit destroying an arm actuator in the DragonFly.

The wounded ShadowCat loses it’s balance and falls after sustaining heavy damage, slowing the ‘Mech down even more.

Turn 6Hells Horses Win Initiative

The Nova Cat Puma makes a bold move and rushes to an objective building and drops an elemental squad.  The Horses are quick to pounce and line up four units with rear shots.  While the wounded ShadowCat is harassed by elementals the other makes a run to help the out maneuvered Puma and manages to gain line of sight to the Fenris’ rear arc.

The Dasher and DragonFly both seek cover, each not willing to risk damage without a significant advantage.  They scatter to very safe locations away from the main fray.

The ShadowCat with the broken MASC is blistered by elemental SRMs and can’t return fire successfully.  The other ShadowCat has better luck and rips through the Fenris’ armor on the left torso and cuts deep into the internal structure. The Puma takes too much damage from too many units and has a leg ripped out from under him.  One of the Hephaestus Scout Tanks runs low on luck and takes massive motive damage rendering it immobile.

In the objective building under contention, the Nova Cats take a decisive advantage on damage dealt.

Turn 7Hells Horses Win Initiative

With the initiative advantage, the Horses begin to back away from the downed Puma putting distance between them and the approaching ShadowCat that damaged the Fenris last turn.  The Nova Cat DragonFly and ShadowCat sandwich a Horses elemental.  The Dasher takes advantage of the wide open DragonFly and lines up a rear shot.

The Horses move another point of elementals to replace forces lost in the contested building.

Elementals continue to kill each other with lasers and machine guns.  The other Hephaestus Scout Tank takes motive damage but not rendering it too slow to escape.  The Dasher makes the most of his position and cores the Nova Cat DragonFly.

At this point, the Nova Cats see the writing on the wall and begin to withdraw from the battle to lick their wounds.  Hells Horses hold a 5 to 3 objective advantage and have destroyed or crippled 3 ‘Mechs while suffering only one ‘Mech destroyed and an immobile hover tank.

Posted under After Action Report