The Breakthrough at Brzo
During the fighting on Tukayyid, Clan Wolf had already secured Skupo and now were running for Brzo. The battle for Brzo took a turn for the worse for the Com Guards when the 4th Wolf Guards and 3rd Battle Clusters arrived to crush through the defenders.
This battle was fought at Historicon 2010. Many thanks go to Demo Agent “Speck” and his great work putting this and other games together. The battle used BattleForce rules from Strategic Operations. The total force list looks huge but it was easily managed with the streamlined BattleForce rules.
Comstar – Tenth Army
Alpha Level II (Ostscout Mini)
- MON-68 Mongoose
- JR7-F Jenner
- JR7-K Jenner
- OTT-7J Ostscout
- ASN-21 Assassin
- HER-2S Hermes
Beta Level II (Phoenix Hawk mini)
- PNT-9R Panther
- PNT-9R Panther
- CDA-3C Cicada
- STN-3L Sentinel
- WTH-1S Whitworth
- PXH-1 Phoenix Hawk
Gamma Level II (Crab mini)
- BJ-1DB Blackjack
- WVE-6N Wyvern
- CRB-27 Crab
- HBK-4G Hunchback
- EXT-4D Exterminator
- EXC-B2 Excalibur
Delta Level II (Archer mini)
- BMD-12D Bombadier
- CRD-3K Crusader
- JM6-A JagerMech
- ARC-2K Archer
- ARC-2R Archer
- ARC-5R Archer
Eta Level II (Warhammer mini)
- TDR-5S Thunderbolt
- GHR-5N Grasshopper
- GLT-3N Guillotine
- WHM-7M Warhammer
- BL-6-KNT Black Knight
- ON1-K Orion
Naga Level II (King Crab mini)
- AWS-8Q Awesome
- CRK-5003-1 Crockett
- HGN-732 Highlander
- AS7-K Atlas
- KGC-001 King Crab
- KGC-001 King Crab
Omega Level II (Marauder mini)
- TDR-5SS Thunderbolt
- ST-8A Shootist
- MAD-5M Marauder
- ON1-M Orion
- THG-11E Thug
- VTR-9K Victor
Zeta Level II (Battlemaster mini)
- AWS-8Q Awesome
- SPT-NF Spartan
- BLR-3M Battlemaster
- STK-5M Stalker
- BNC-5S Banshee
- AS7-D Atlas
Clan Wolf – 4th Wolf Guards
Alpha First Star (black/brown Man-o’War mini)
- Timber Wolf (MadCat) A
- Timber Wolf (MadCat) A
- Gargoyle (Mon-o’-War) A
- Gargoyle (Mon-o’-War) Prime
- Gargoyle (Mon-o’-War) Prime
Bravo First Star (MadCat mini)
- Timber Wolf (MadCat) B
- Timber Wolf (MadCat) B
- Gargoyle (Mon-o’-War) Prime
- Gargoyle (Mon-o’-War) Prime
- Warhawk (Masakari) Prime
Clan Wolf – 3rd Battle Cluster
Alpha Assault Star (Vulture Mini)
- Ice Ferret (Fenris) Prime
- Mad Dog (Vulture) Prime
- Gargoyle (Man-o’-War) D
- Gargoyle (Man-o’-War) Prime
- Executioner (Gladiator) Prime
Bravo Assault Star (brown/orange Man-o’-War mini)
- Ice Ferret (Fenris) Prime
- Mad Dog (Vulture) Prime
- Timber Wolf (MadCat) B
- Timber Wolf (MadCat) C
- Gargoyle (Man-o’-War) Prime
Charlie Assault Star (Grey Man-o’-War mini)
- Phantom C
- Ice Ferret (Fenris) Prime
- Gargoyle (Mon-o’-War) A
- Gargoyle (Mon-o’-War) D
- Gargoyle (Mon-o’-War) Prime
Turn 1 – Comstar wins Initiative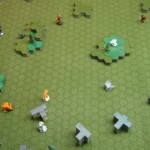
Very little action this turn as the two forces lurk towards each other. Comstar Gamma Level II (Crab mini) is perfectly out of sight and lets loose indirect fire attacks which miss.
(Kill Tracker – Wolf: 0, Comstar: 0)
Turn 2 – Comstar wins Initiative 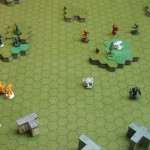
Both Clan Wolf and Comstar begin converging their forces towards the middle of the battle. Gamma Level II remains hidden in woods peppering Clan ‘Mechs using indirect fire.
Most Comstar fire misses this turn except a lucky weapon critical hit on a Warhawk. The Clans luck does not fare much better at long range and only manages to strip half the armor off one King Crab.
(Kill Tracker – Wolf: 0, Comstar: 0)
Turn 3 – Clan Wolf wins Initiative 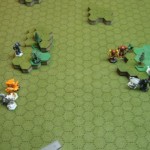
Gamma Level II continues to evade line of sight as Comstar forces are forced to consolidate units into two groups. Clan Wolf makes excellent use of initiative to force combat. Comstar had no choice but to shore up their firing positions to absorb damage from the amazing Clan firepower.
Naga Level II is ravaged in the ensuing firefight. Both King Crabs and a Highlander are destroyed. Return fire from Comstar brings down a single Man-o’-War. On the western side of the battle, armor is slagged off in droves but only a single casualty results. A Fenris manages to inflict a killing blow on a Marauder in the Omega level II.
(Kill Tracker – Wolf: 4, Comstar: 1)
Turn 4 – Comstar wins Initiative 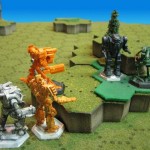
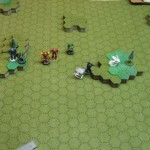
After losing initiative, Clan Wolf pulls their forces together and Comstar happily accepts the opportunity to play hammer to their anvil. The overall movement of the battle has left Beta Level II out in the cold and is unable to contribute. Slowly they are making their way back into the fray. Gamma Level II has finally broke from the cover of woods to apply direct fire onto the Clans.
Comstar concentrates fire on high priority targets and manages to deal significant damage this turn. One MadCat A is destroyed while it’s star mate is stripped of armor. A Man-o’-War Prime is taken out by one Level II, wasting a lot of shots by viciously over killing. Another Level II concentrates on the Phantom and destroys it easily.
Clan return fire sheds more armor and manages to destroy a Black Knight, an Orion and an Awesome.
(Kill Tracker – Wolf: 7, Comstar: 4)
Turn 5 – Comstar wins Initiative 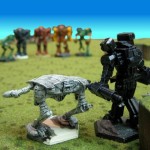
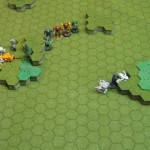
Having lost initiative again, the Wolves present a firing line to the split up Comstar forces. Intervening terrain and long range prevents line of sight for most units. Comstar manages to line up medium range shots on a Man-o’-War.
All available Comstar units with line of sight, bury lasers and missiles into a single Man-o’-War D. The OmniMech is ravaged but standing with a weapon hit and a single point of internal structure remaining. Return fire destroys a Thunderbolt with some help from an indirect fire attack from the out of sight Vulture.
(Kill Tracker – Wolf: 8, Comstar: 4)
Turn 6 – Clan Wolf wins Initiative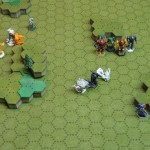
Clan Wolf breaks for open terrain and tightens up their formation. Comstar forces to the West have to take their time getting around terrain. The remaining Comstar forces anticipated incorrectly and are caught and isolated by the bulk of the Clan force.
The turn starts off well for Comstar. A Man-o’-War D is finished off from long range and a Man-o’-War A is head capped by the Sentinel from Beta Level II which has finally joined the battle.
The Clans return fire in stunning fashion, concentrating most of their firepower into Gamma Level II. The Clan splits up fire and punishes Gamma. The Crab has it’s head blown off on the first hit. The Excalibur, Wyvern, Exterminator, BlackJack, and Hunchback are all blown to bits with varying amounts of overkill. Gamma Level II is completely destroyed.
(Kill Tracker – Wolf: 14, Comstar: 6)
Turn 7 – Clan Wolf wins Initiative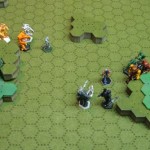
The heaviest Comstar assets are still cautious as they come around terrain. Omega and Delta Level II are hesitant to move too far in front of the slow moving Zeta. The Clans make good use of initiative and isolate Comstar forces in the center of the battle. Charlie Assault Star (grey Man-o’-War mini) makes a bold move behind Naga Level II (King Crab mini).
Comstar remains on the defensive and can only respond meekly to the Clan attack. Two level IIs combine to take out a MadCat B while the Fenris of Alpha Assault Star has it’s paint scratched after several misses.
The Crockett and Atlas both fall from split fire by a single Clan star. An already damaged Grasshopper is finished off with minimal effort. A Panther is pummeled but survives with one point of internal structure. Both a Whitworth and Cicada are hit solidly but survive. Naga Level II is now completely destroyed.
(Kill Tracker – Wolf: 17, Comstar: 7)
Turn 8 – Clan Wolf wins Initiative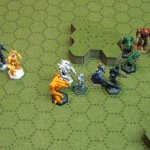
Clan Wolf remains tightly packed and tries to put distance between themselves and the relentless Comstar pursuers. Comstar forces despite losing initiative do a better job of anticipating the Clan’s moves but can do nothing to prevent Charlie Assault Star (grey Man-o’-War mini) from lining up rear shots against Zeta (Battlemaster mini).
Two level IIs combine to bury the dangerous WarHawk. A Marauder and Battlemaster team up to perfectly destroy a Man-o’-War Prime. A flurry of missiles from Delta’s Archers cripple an Executioner which is then finished off by Alpha Level II who has been making pot shots at available targets.
Previous damage continues to hamper Comstar’s ability to keep ‘Mechs from becoming scrap. Two Panthers, a Warhammer, and an Orion all fall to enemy fire. The Warhammer took an entire star to finish off while the Orion was finished by one last powerful hit.
(Kill Tracker – Wolf: 21, Comstar: 10)
Turn 9 – Clan Wolf wins Initiative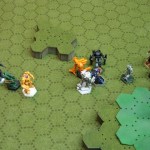
Clan Wolf is now feeling the pressure and split their forces. Slower stars fall back while maintaining a strong firing line. The two faster stars of Alpha and Charlie Assault continue to harass the Comstar flank. Comstar stays as tightly grouped as possible but cannot help but to slightly leave behind the slowly moving Zeta.
Clan Wolf opens up combat with a head shot on an Awesome. A Thunderbolt, Guillotine and Sentinel are all destroyed by a barrage of weapons fire.
Comstar unloads on the Clan forces in front of them and do considerable damage but amazingly nothing is destroyed.
(Kill Tracker – Wolf: 25, Comstar: 10)
Turn 10 – Comstar wins Initiative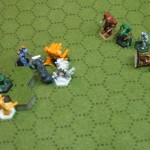
Comstar continues to put on the pressure and manages to sneak the fast Alpha Level II (Ostscout) into the Wolf flank. Heavy assets from Delta and Eta (Archer and Marauder) are flanked by Charlie Assault (grey Man-o’-War).
Comstar begins to reap what they sowed last turn. The Vulture’s missiles are silenced by Zeta’s concentrated fire. A MadCat B is destroyed by Eta level II. Beta level II cleanly kills a Fenris from the rear and thus finishes off the last remaining Omni ‘Mechs of Charlie Assault. A second Clan Fenris is destroyed by physicals at the end of the turn. Alpha Level II (Ostscout mini) split up it’s fire against the Clan rear with spectacular results. A MadCat C is destroyed outright while a Man-o’-War explodes from an ammo explosion. This finishes off the last remnants of Bravo Assault (brown/orange Man-o’-War mini).
Return fire from the Clans is sporadic and borderline ineffective. A single Banshee from Zeta is killed in a last gasp by the now destroyed Vulture.
(Kill Tracker – Wolf: 26, Comstar: 16)
End Game
The game was stopped at this point when our allotted time ran out. That’s the thing about conventions, there is always another game a few hours away and we had to make way so the next game would have enough time to setup.
We began the game with 73 units and after ten turns we are down to 27. So who had the upper hand? Who would have pulled out the win if we had enough time to finish the game through?
Comstar (20 remaining ‘Mechs):
Alpha and Delta are both untouched. Omega and Zeta are looking very strong with deep armor and frightening short range threats. Beta has taken the most punishment of those surviving but is well equipped to keep up a harassing role (all the slow ‘Mechs are now destroyed!).
Clan Wolf (7 remaining OmniMechs):
Among the remaining forces, there are four Man-o’-Wars which are notoriously under armed for their size. A MadCat and Vulture are the heaviest damage threats. A Fenris rounds out the Clan options. All Omnis are untouched.
Time to sound off! Who would have ruled the battlefield? Can the Clans make good enough use of their big damage ‘Mech killers or will the smaller but more numerous Comstar forces win the war of attrition? Leave a comment and let us know!
Posted under After Action Report


I think Comstar has it as long as they don’t let their force get spread out.
Looks to me like Comstar will win out, but at a high cost.