Play By Email with Japan
My Brother happens to make his living overseas in Japan. Since his laptop broke a few months ago it has been difficult to get a game of Battletech in via MegaMek. Even when we did play, MegaMek had far too many disconnect issues.
Fast forward and we are itching for a game so we are making the best of our situation and playing the whole thing over email and chat.
We selected a lance on lance battle with a 5,000 BV1 limit, Inner Sphere level 2.
My Forces
- Axman AXM-1N
- Shootist ST-8A
- Hunchback HBK-5M
- Atlas AS7-D
His Forces
-
King Crab KGC-005
-
Flashman FLS -9C
-
Wyvern WVE 10-N
-
Spider SDR-8M
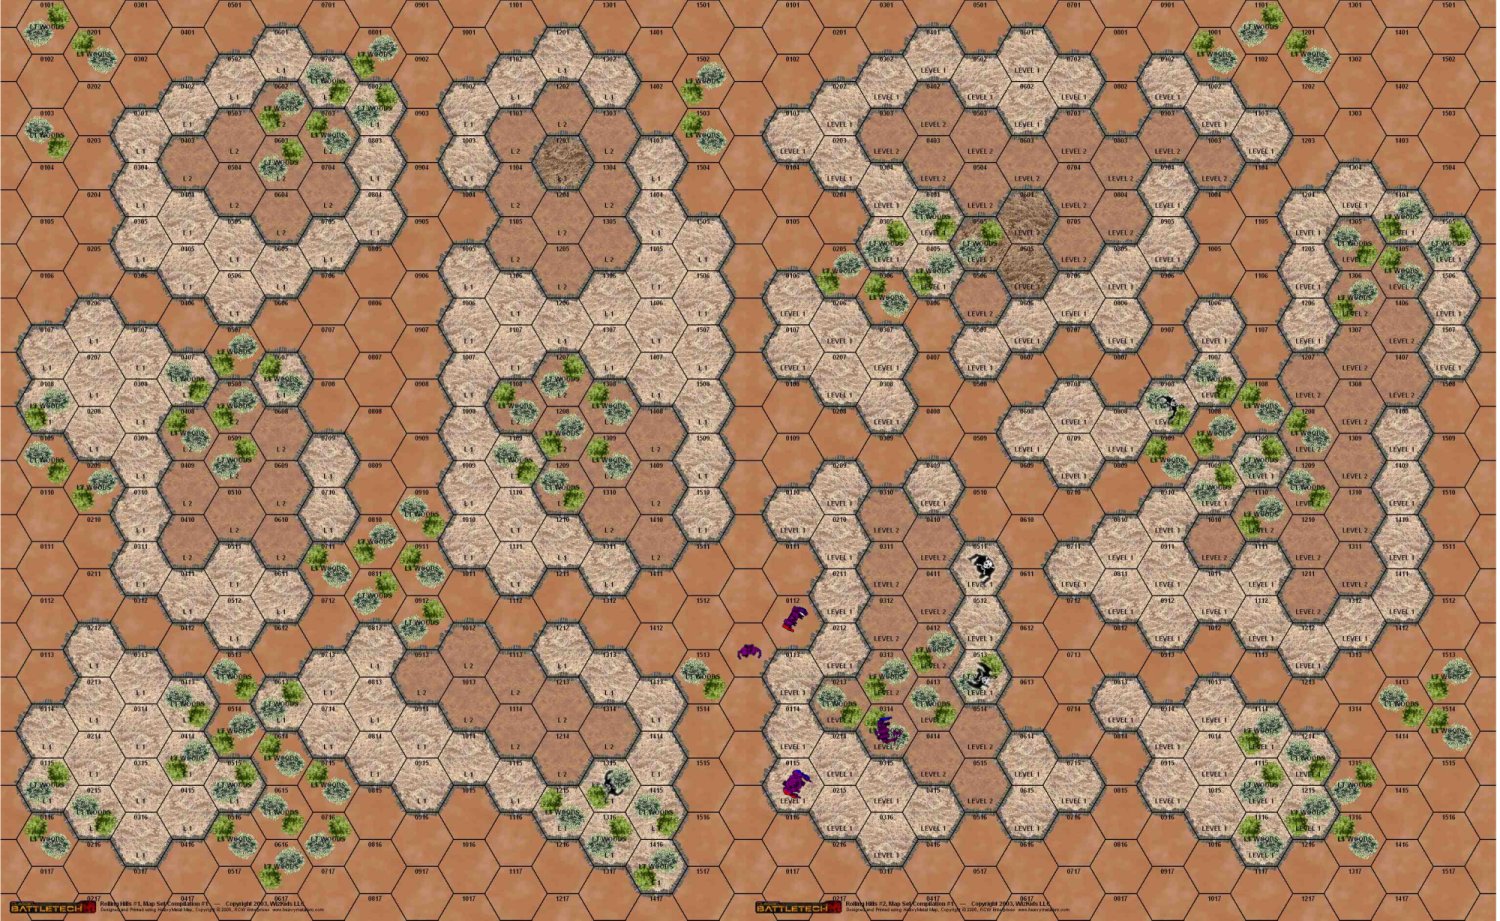
The battle will take place over rolling hills.
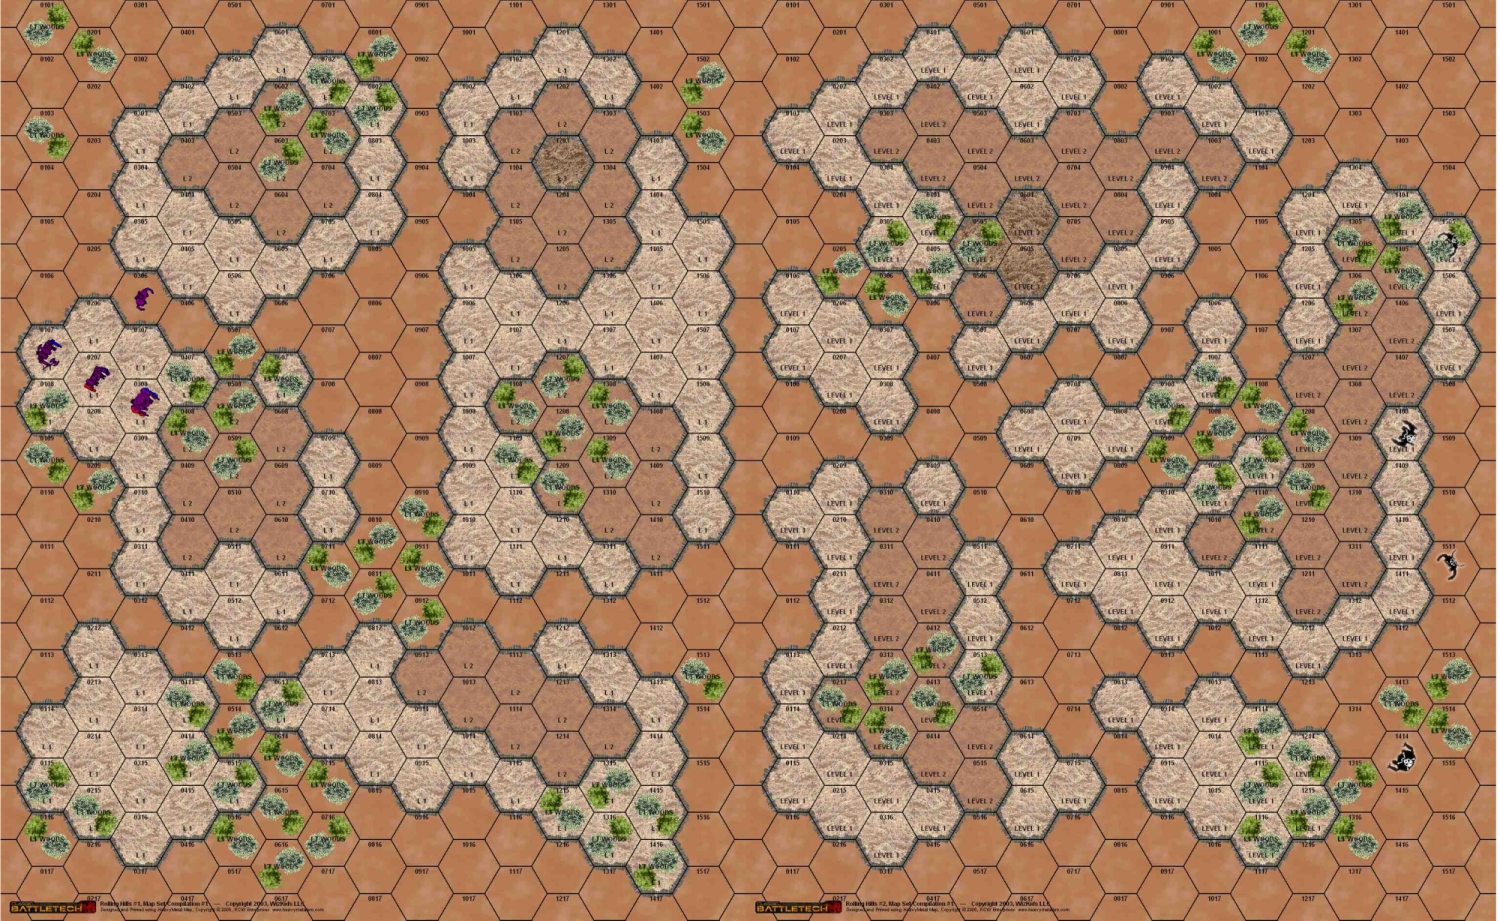
Initial Deployment
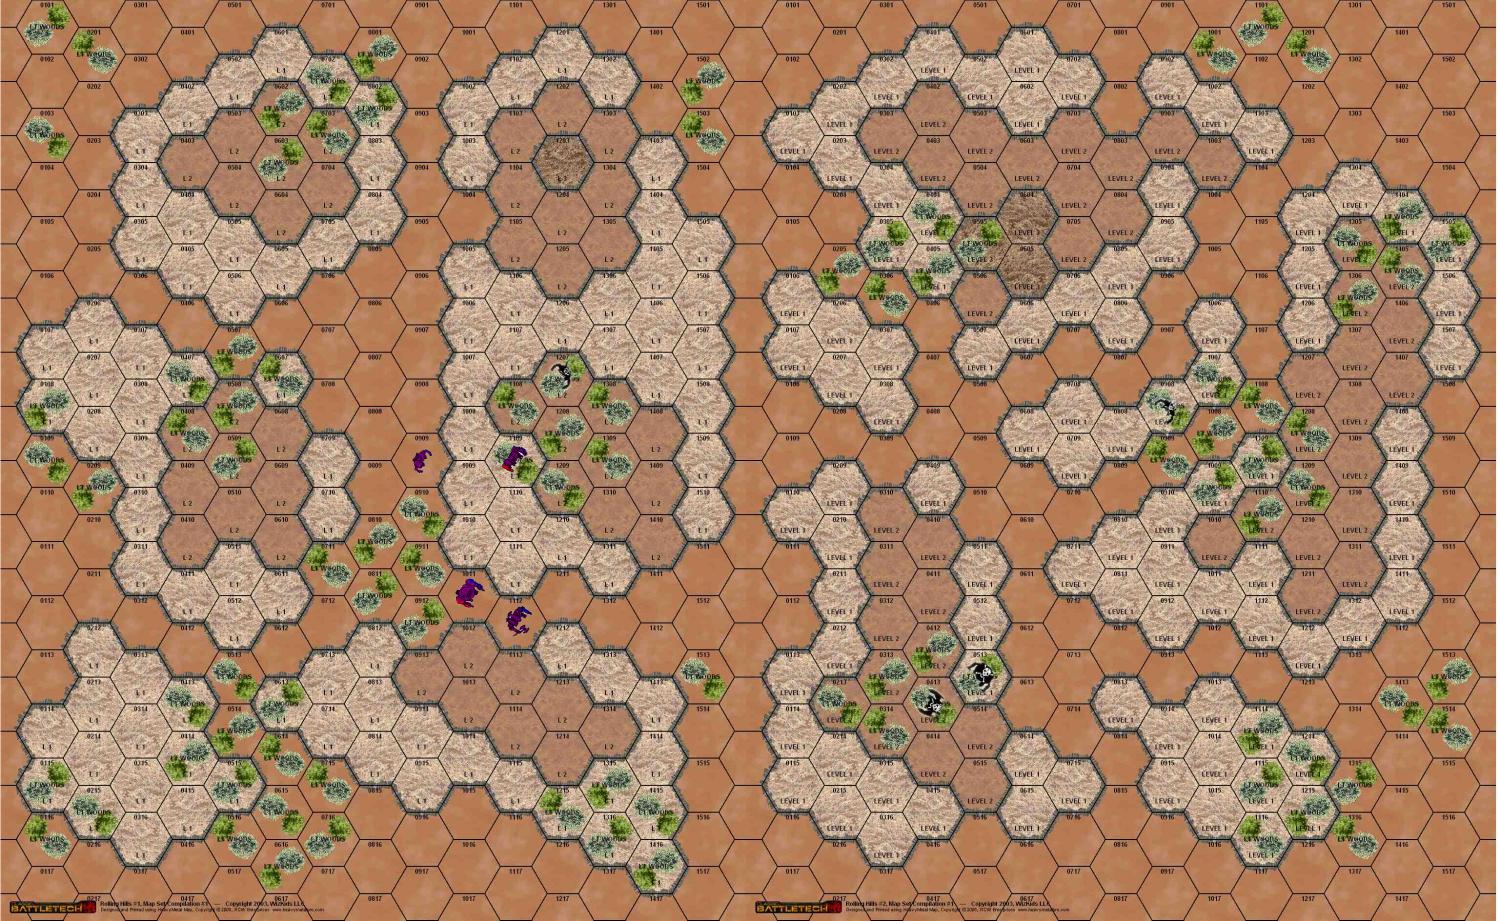
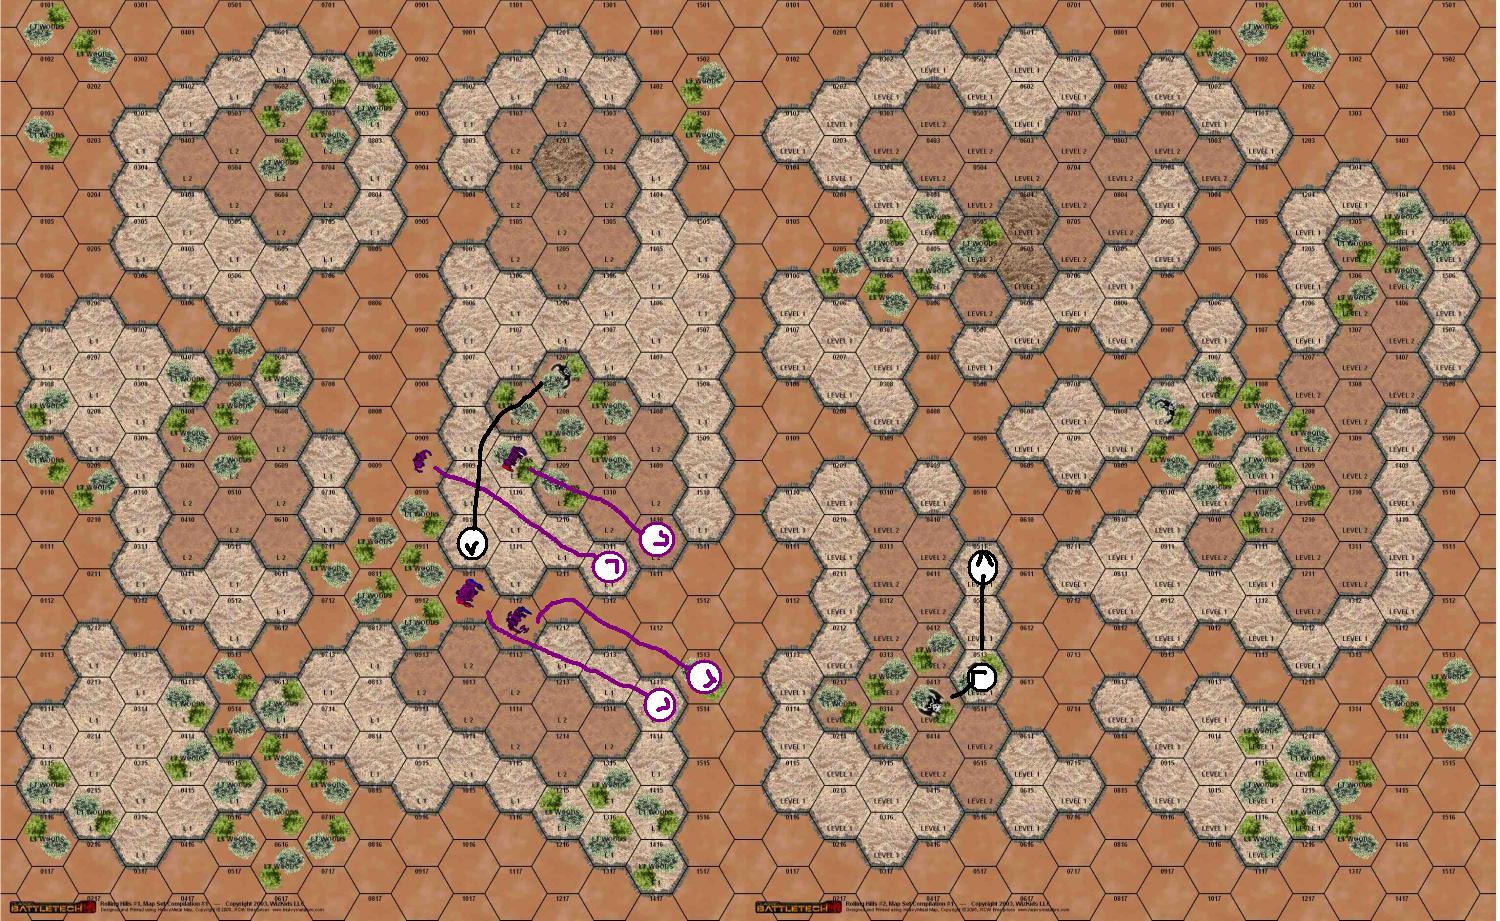
Beware the large images. I will be updating this map as the game progresses so check back for updates.
Turn 1 – I Win Initiative
The Atlas fires off a LRM20 volley at the King Crab but misses badly. No other fire this turn.
Turn 2 – My Brother Wins Initiative
My Atlas follows up with another volley of missles that find their mark this time around. The King Crab takes nine missiles across the left side of its body.
Return fire from the Wyvern misses.
Turn 3 – I Win Initiative
All fire is ineffective due to cover provided by trees and partial cover. Lasers and missile volleys go wide for both squads.
Turn 4 – My Brother Wins Initiative
My Shootist and Hunchback land a couple medium lasers on the Spider but nothing crits.
The Spider in turn hits the Shootist with only one laser.
The Atlas gets hit with an ERPPC, LRM10, an ERLL, an a cluster of 16 LBX shots. The damage is scattered fairly well. No major damage concentration yet. One ends up hitting the head but he pilot stays conscious.
The Atlas shrudges off the damage and gets ready to charge.
Turn 5 – My Brother Wins Initiative
I get the better of this round of combat. The King Crab is singled out for fire by all of my units. The King catches no less than two of four AC20 shells needing 9s and 10s to hit. There are now gaping holes in his armor ripe to be critted in the following turns.
Return fire is concentrated on the Shootist and rips open two sections of armor but no criticals result.
Turn 6 – My Brother Wins Initiative
The Shootist manages to land an AC20 shot onto the King Crabs’ left arm, disintegrating it. Additional laser fire rips apart the rest of the right torso but does not cause critical damage.
The cluster shot from the King Crab shreds more armor, but the damage is thin and evenly distributed. By now the Shootist has two pilot hits.
The Flashman and the Atlas/Axman trade fire, shredding more armor but not opening any new holes.
The Wyvern is content to stand and hit from afar thanks to C3i.
Turn 7
The Shootist goes toe to toe with the King Crab hoping to put it down with the help of the Hunchback. The Atlas and the Axman team up on the Flashman ignoring the pesky Wyvern and Spider.
The plan did not work well. A AC20 round managed to crit the King Crab’s ammo but with CASE protecting it, it withstood the damage. It made it’s pilot rolls and conscious rolls. The return fire cored several holes in the Shootist but missed vital criticals. The kick however, sheared off the Shootist’s leg entirely. Now on the ground the Shootist is going to be of limited use.
My Axman set up a nice rear shot and hit with the AC20 and the large pulse and both manage to hit the left arm. He loses a double heat sink and the shoulder actuator as a result.
After looking at the possible shots, the Atlas torso twists to take out the Spider. And manages to miss a 5 with the AC20. The rest however finds the mark, ripping apart an arm and the entire left torso. The SRM6 takes out a few more jump jets, adds two head hits, and puts the Spider on the ground. He won’t be going far next turn hopefully.
Turn 8 – I lose Initiative again…
On the ground and lacking an arm, my Shootist eats dirt. My hunchback has just about everyone behind him, so he takes one shot with an arm mounted laser at the King Crab and hopes he doesn’t become popular. The Atlas and Axman split fire on the King Crab and the Flashman hitting with both AC20s and doing a lot of damage. The King Crab takes a gyro hit and goes down. The pilot takes another point of damage and goes unconscious. However, without an arm, he is now in the same situation as my Shootist, unable to prop and fire.
The Wyvern fires on the Hunchback, tearing off front armor but not breaking through. The King Crab and the Flashman concentrate fire on the Atlas, hoping to burn it down. However, the Flashman is conservative with his heat. The Atlas takes a boatload of damage but takes it like a champ including an AC20 slug to the leg. Nothing goes internal.
The Axman kicks the downed King Crab and manages to crit the gyro again, making sure he will absolutely not be getting up again.
Turn 9 – I lose Initiative
The Spider and Axman trade fire ineffectively. The Hunchback is left to watch the Atlas’ back without a viable target to shoot at. The Atlas pummels the Flashman including an AC20 to the Left Leg and destroying the Left arm with laser fire.
The Flashman returns fire, overheating in the process, and manages to place an ERLL to the head. This is the second head hit and it tears off the reamining armor in the location. My pilot makes his consciousness roll.
Turn 10 – Guess What! I Lose Initiative!
The Hunchback and the Atlas fires everything they have at the Flashman but manage to miss both AC20s. Adding insult to injury, that was the last round of ammo the Hunchback had. A few lasers get inside the Torso armor but no criticals result.
The Axman turns and fires his pulse laser behind him but misses.
Everyone fires on the Atlas and effectively so. While the Flashman cooled off with only 3 Medium Pulse lasers he made them count. Both the Wyvern and the Flashman put hits on the Atlas Head, killing the mighty hundred tonner. Dead as a doornail.
Well that changes things an awful lot.
Turn 11 – I win Initiative (finally)
 The Spider runs north away from combat, but my Hunchback (who is now ammo-less) and Axman keep pressure on the Flashman. Interestingly, the Wyvern starts to work his way towards the battle.
Both forces fire at each other with damn near everything they have but do not end up delivering much damage. The only critical hit this turn is a hand actuator on my Axman.
Turn 12 – I lose Initiative
The Shootist finally stands and takes the beating he deserves. A few engine hits later and he is sucking dirt with his friend the Crab.
Otherwise a boring turn and the hunt is on…
Turns 13 to the End
My Brother dodges around for a while and we trade shots as I rush forward with my battered Hunchback and Axman. Finally, he makes a break for it and sends his Spider on a flanking run. The Hunchback moves to intercept and expects at least a few easy shots. Astonishingly, it’s medium lasers find fresh armor. In return, the Spider sends his own medium laser to the head causing the pilot to go unconscious.
Meanwhile, the Axman duels with the lightly armored Wyvern. The Wyvern manages to find the wholes in the Axman’s armor and knocks out the AC20 it desparately needed.
With one pilot unconcious and the other missing his main weapon, I can do nothing by cede the battlefield to the victor.
After all is said and done, it was a great game. If the rolls had gone a little differently the end result may have gone in my favor. A very good game indeed.
So lets recap. A lance on lance game played over email beginning in September. Game ends in February. Hmmm… We may need a better way to make the turns move a bit quicker. I plan on investigating some alternatives and reporting back. Until then, this post is officially complete. I’m looking forward to the next one already!
Posted under After Action Report






How did your Atlas like that sandblast Brian?
Hey this commentary has been getting more and more one sided! I am beginning to suspect some kind of Bias on the part of the narrator!
While I pay for the bandwidth, I make the rules.
By the way, your King Crab dies this turn one way or another…
whats the other way?
Boot to the head!
….jerk…..
My scary cockpit design will shield me from these pesky missiles!
Hey what happened to the dramatic conclusion? I want to hear what happens next! Good work on those trees by the way.