ScrapYard Armory

A BattleTech weblog

Archive for February, 2009

Feb-28-2009

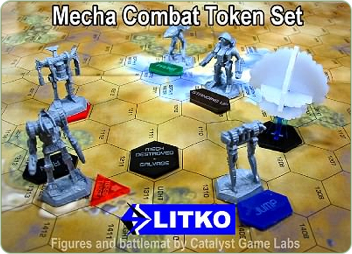
Litko Releases Mecha Token Set

And I am less than impressed.mecha-combat-set-graphic-400

Honestly, it’s great to have a little extra exposure for the game and it is also nice that they have made each token available separately as well as in a set.

However, I just don’t think that the token set is going to prove useful for most players.  Lets take a look at what is being offered.

Core Breach Marker

Interesting, but this piece is almost useless for 95% of Battletech players.  How many people honestly use the Stackpole rule for catastrophic ‘Mech engine failure?  And even if you do play with the Stackpole rule and get it to trigger, you are going to put out this token for what?  To mark the spot where the exploding mech is until you resolve all of the damage?

If you needed a nuke token, they already have them available in their store, and they look cooler also.

Mech Destroyed – Salvage

Potentially useful if you play with ‘Mech rubble (or double-rubble Oh My!).  But I think most players don’t need to be reminded that a ‘Mech is salvaged, just ask for the record sheet.

Shutdown

Very useful.  Fits under your ‘Mech as well.  Good idea.  If only they came in different colors.

Torso Twist

We haven’t had a reaction phase for years.  And since hit locations do not depend on torso twisting, these tokens are about as useful as a set of screen doors on a submarine.

Run- Walk

Useless.  Movement dice do everything you need including jump and movement mods.  A truly unnecessary token.

To Ground – Standing Up

If you need a token to remind yourself that your ‘Mech is standing, you have other problems.  To Ground sounds like something an infantry unit would do. Maybe I never got to that section of TacOps yet.

Prone – Kneeling

Prone is useful and kneeling only if you and your players are actually using such rules from TacOps.  Ultimately confusing for someone who may not have TacOps and not realize that such a rule exists for players who must have everything.

Jump – Skid

Jump is useless as described above.  Skid is nice to have if you run lots of urban games or hovercraft or VTOLs.

What’s NOT Included

  • Pilot Roll Markers?
  • Target Assignment Markers?
  • Pilot Unconscious?

There are a bunch more I’m sure.  Chime in with a comment if you think of any more that would be useful.

I’m not here to bash on Litko.  I think they make good products but this set misses the mark.  I am still a fan of their Custom Token Sets for all things Battletech, Aerospace, and everything in between.  You can have all of the control you really want by creating your own custom token set with the colors you want, the text you want.  You can make it work for your game rather than be forced to use a token set built for somebody else’s game.

Find out more about Litko Custom Token sets here.

Posted under News
Feb-21-2009

Mechwarrior Figures for Classic Battletech – Redux

mwmadcatmaxim

I’ve long advocated the use of Mechwarrior figures to play Classic Battletech.  It just makes sense to me and I think my readers agree.  Since my original post on the subject debuted in July of last year it has been the most popular ScrapYard article every single month.

Since then my modest collection of a battalion of converted figures has ballooned into a short combined arms regiment of ‘Mechs, vehicles, and even infantry.

mwall

Is Quick Strike the New Mechwarrior?

The introduction of the Strategic Operations core book gave us a special treat in the Quick Strike rules.  I swear, this rules set is the new reincarnation of Mechwarrior Age of Destruction.  What’s so good about it?

  • All the charts you need to play fit on two single sided sheets
  • Each company/binary/2 level IIs of figures takes up one sheet of paper
  • ‘Mechs have special abilities to reflect specific Classic Battletech loadouts

Quick Strike features fast play and does away with copious record keeping.  It is a great transition from the Mechwarrior game to the Classic Battletech style of play.  It retains the combined turn mechanic that Battletech players love while simplifying game play without too much sacrifice in detail.  The developers have outdone themselves with this latest update.

It may not be for everyone and I am probably getting ahead of myself in thinking that this new set of rules could replace Mechwarrior completely.  There will always be those out there who will never give up their combat dials.  Nothing wrong with that at all but it also doesn’t hurt to have this new way to play.

mwwoballnewmwthormaximnewmwinfantryvees

mwhacthetinfantrymwdraconisallmwcenturiontboltnew

More Miniatures, More Things to Blow Up

Even if you are not going to give Quick Strike a try, Mechwarrior figures are a fun and easy way to expand your miniatures collection so long as you have access to 2″ hex terrain or are adventurous enough to go with hexless miniature rules.

Keep your eyes peeled.  There are plenty of deals out there on Mechwarrior figures and they are only going to get better.

Posted under Minis
Feb-18-2009

King of the Mountain

kotmfinal2

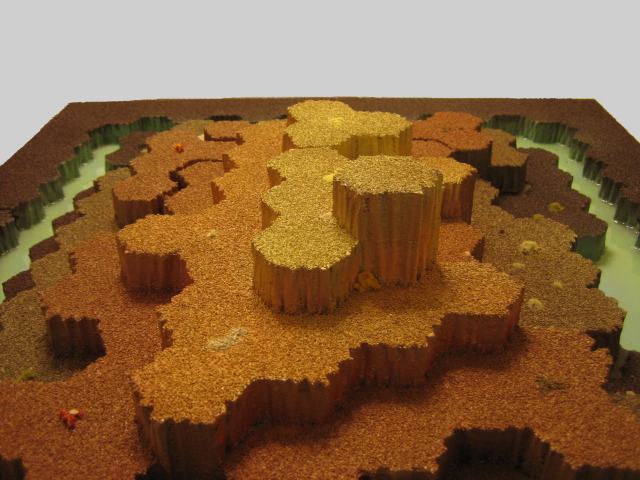
Hex maps in 3D provide the best of both worlds.  The attractive looks of 3D terrain meets the simplicity of map sheet rules.  I always have fun building maps with my good friend and fellow contributor Saxywolf.  Last weekend we had a go at building an iconic map from the Solaris 7 MapPack.

King of the Mountain is a map that just screams to be in 3D.  It was a pleasure to build and I just love the results.  Read on to see how all the bits of foam came together as we built this great looking map.

Materials List

  • Pink insulation foam
  • Hex paper and pins
  • Hot wire foam cutter
  • Apple Barrel Paints (Brown and Black)
  • Paint brushes
  • Elmers glue
  • Woodland Scenics Medium Ballast
  • Poster board (40 x 30)
  • Various shades of spray paint
  • Woodland Scenics Realistic Water
  • Miscellaneous ground cover (static grass, flock, rock debris, foliage)

Planning the Map

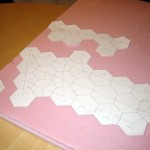
We made ample use of paper templates to help us mark what we needed to cut.  Each level is it’s own cut of foam, so getting them right was important to keep the map accurate.

We chose to use 2″ hexes for our map to give our miniatures a little extra breathing room on the battlefield.

Here at the ScrapYard we use large format paper printouts to make cut-outs for the large level 0, level 1, and level 2 terrain.  If you don’t have such a luxury don’t fret.  Standard 8 1/2 x 11 sheets  work just as well with a little patience and a lot of scotch tape.

Once you have your paper templates ready, use a few pins to attach them to your foam.
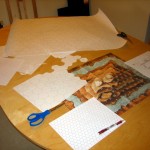
kotmplanningkotmpaperandpins

Cutting the Foam

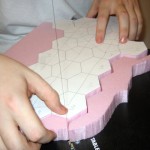
kotmcuttingYou are going to need a Hot Foam Cutter of some kind for this task.  You can get one from any respectable model railroad store.  We made use of a system from Hot Wire Foam Factory and it worked great.  Whatever tool you end up using, make sure you use as thin a wire as you can get away with.  The thinner the wire, the less stringy strands will result from your cuts making them faster and more accurate.

Use your templates as a guide and cut out all of your levels.  Depending on how many levels and the complexity of the shapes you are making, this may take a while.  If it was easy, it wouldn’t be nearly as cool.

Shaping the Foam

Shaping the edge of your foam will give it an authentic look.  We don’t see ninety degree angle cliff faces in nature and your hills shouldn’t either.
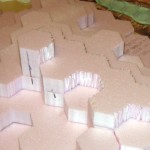
kotmshapingFirst things first, lay out your levels on top of each other as they will fit when they are attached.  Look at the level changes and mark those that are more than one level high.  You are going to shape the single elevation edges first.  Once you have multiple levels glued together you will then shape the two and three level change faces.  See the picture for a sample of what I’m talking about.

Use your hot foam tool of choice and work across the surface with a wavy pattern.  Use a piece of scrap foam before you start on the real thing if you are unsure of the technique.  Once you do it yourself and see the results, it will become obvious how to get a simple yet effective result.  After only a few edges you will be a pro.

As we shaped the foam we glued levels together.  Once the glue had a chance to set we shaped the two and three level cliff faces.  At this point though, we did NOT glue the level 0 terrain to the rest.  It was kept separate for reasons described below.  Keep on reading!

Base Coating
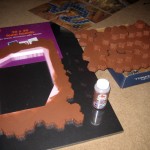
kotmbasepaintBase coating provides your terrain protection from the spray paint you are going to apply later.   We use Apple Barrel paint because it is cheap and easy to work with Acrylic based paint.  It covers well and seals the foam so we can apply spray paint later on.

Wait for this base coat to dry for a few hours and go over it again to make sure you have hit all of the nooks and crannies. Depending on how detailed your edges are you are going to want to make sure the whole piece is covered.

Putting It All Together

Our base is a large (40″ x 30″) poster board we got at Staples.  We glued only the level 0 terrain to the board.

One of the issues that we have found on previous maps was warping of the poster board over time.  When you are gluing two different materials together like we are, you are bound to notice a bow or sag to your map as the poster board flexes under your foam.  This is unavoidable unfortunately.  We have thought of some methods to stiffen up the construction but all of them would inevitably lead to a heavier and bulkier map.  One of the major advantages of using foam and poster board is how light and transportable they are.

As a mitigation we glue only the first level of terrain to the board.  Anything level one and above gets glued together but not to the level 0 you glued to the poster board.  What you end up with is a board with removable terrain features.  Not only does this result in less warping but also make the board much easier to transport and store.

Adding Some Texture

Break out the Elmers and make sure you have a lot of it to spare.

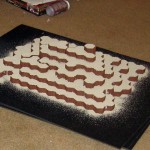
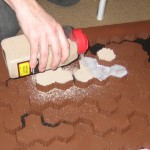
In order to make our map look as good as it can we base the top part of our foam with a medium railroad ballast to give it a proper texture.  Using a foam brush we spread a healthy amount of Elmers glue onto our terrain.  Once the glue is down we sprinkle liberally with our gravel texture.

After all of your terrain is covered, give the last layer about five minutes before flipping it upside down to get off the gravel that didn’t stick.  I hope you have some sort of large paper underneath to catch the excess.  We dumped it on the poster board, brushed it onto a piece of paper and poured it back into the container.  You will be using less gravel than you think.  Make sure you don’t waste what comes off during this step.

Make sure you give this step as much time to dry as you can.  Excess glue can leach into the base coat of paint making your foam potentially vulnerable to spray paints until the whole thing has time to dry and set completely.
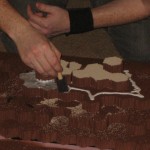
kotmgluekotmglue2kotmtexture

Painting

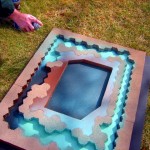
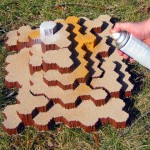
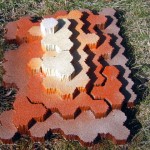
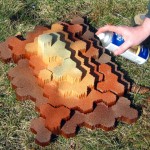
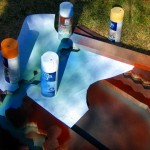
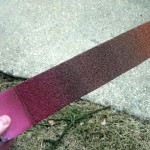
We took all of our terrain outdoors for a whole lot of spray paint.

There certainly is an art to doing this well.  I have to give all of the props to Saxywolf for an amazing job choosing colors and blending them together just right to give us the colors you see on the final map.  He made clever use of some of the leftover paper templates to cover up portions of the map when applying the last colors on the acid moat and then touching up the brown by covering the acid moat.  If you can wait for a day with no wind, you will not have to keep re-spraying to touch areas up. To blend the the entire map together a bit more, he used a mid-tone color from farther away.

Take your time and you’ll do fine.  If you happen to feel overwhelmed, use another piece of scrap foam (properly base coated with Apple Barrel paint) to try out some of the colors you intend to use.
kotmtestingkotmspraypaint1kotmspraypaint2

kotmspraypaint3kotmspraypaint4kotmspraypaint5

Water Effects
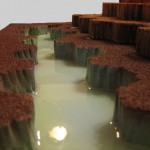
To add a little extra to the acid moat we used a pourable realistic water effect from Woodland Scenics.  Even after drying overnight the water wasn’t completely cured.  Keep this in mind as you plan as the stuff becomes very tacky and will catch anything that gets near including flock and static grass that you may want to add in the last steps.  I’d advise you cover it very well and give it extra time to dry.

Adding the Details

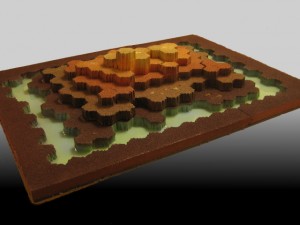
Hex delineation is important for these 3D maps.  We are still relying on hexes for range and line of sight after all.  In previous maps we used a sharpie to put a dot where individual hexes were not easily seen.  For King of the Mountain we tried something a little different.  We used little bits of terrain, rocks, static grass, and foliage to mark the hexes providing character and functionality in one swing.

Here are a few shots of the finished product.  We managed to build this map start to finish in one weekend.  Between each step that required substantial dry time we played a few games of Battletech.  Nothing like smashing ‘Mechs while you wait for the Elmers to dry.  If you look closely you can see the dark brown base remains unattached to the mountain in the middle.
kotmfinal1

kotmfinal3kotmfinal4


Posted under Terrain
Feb-18-2009

Robot Viking Miniature of the Week

warhammer01My recently painted Warhammer has made it onto the front page of a gaming news blog Robot Viking.

Full Article

I’m thrilled to share my work and it’s great to receive positive reviews from those outside the Classic Battletech community. The added exposure is a great thing for the game too.  Just about everyone inside the Battletech circle knows what a Warhammer looks like.  I hope that at least a few people who see the Robot Viking article may be intrigued enough to take a look at what’s cooking at Catalyst Game Labs.

For those of you who may have wandered over make sure you take a moment and look at the Leap Into The Action page at ClassicBattletech.com.  It holds a great assortment of information on the game including more than enough free PDFs to satisfy any curiosity you may have.

Posted under Minis
Feb-14-2009

Custom Deciduous Trees

battletech-trees-final

Sometimes a mapsheet just looks bland and boring.  Perhaps it’s time to branch out and try some Battletech miniatures rules.  Or maybe, all you really need is a little visual appeal to add to those maps to bring them to life.

Here at the ScrapYard we’ve gone to great lengths to come up with custom trees for our Battletech games.  You’ve probably already seen some finished ones in the background of recent pictures.  Here is a detailed view of how we did it and how you can make your own.

MATERIALS LIST

  • 26 gauge bare wire (Craft store like Michael’s)
  • Wire Cutters
  • Super Glue (Gap Filling, 5-10 sec drying time)
  • Elmers Glue
  • Epoxy (5-Minute Epoxy is available in many craft or hobby stores)
  • Corks, top of box, pins OR tape, piece of cardboard
  • Primer (Spray paint is easier, but brush-on is ok too)
  • Brown Paint (Again spray paint is easier.  Different shades if you want different color tree bark.)
  • Washers
  • Black felt (Craft store like Michael’s)
  • Shades of Clump Foliage
  • Shades of Fine Turf

Cut Your Wires To Length [pic 1]

Cut between 18-30 wires 2.75″ to 3.25″ in length.  Varying the length will give you different tree heights, while the number of wires effects the thickness of the tree and the number of branches.  Too few wires and it starts to look patchy, and much more and you need a thinner wire or it becomes difficult to twist and makes the wire texture harder to cover.  Just remember that the roots use up about 1/2″ of the wire length.


Cut, Twist Trunk, and Twist Roots

Twist the Tree Trunk [pic 2]

With all the wires together, twist a portion of the wire approximately 1/2″ from one end.  Let them splay a little as you squeeze them when twisting as this makes it easier (and possible) to twist them around each other.

Superglue the wires at the twisted location so it doesn’t fall apart while twisting the rest of the tree.  Don’t add too much as you don’t want to drip or run down the wire and end up gluing other sections of wire together.  It will need extra time to dry as it need to fill gaps rather then just hold two surfaces together.  If you can hold the tree twisted tightly for a few seconds without gluing yourself to it, it will dry faster.

Twist the Roots and Branches [pic 3]

Twist 3 or 4 groups about 1/2″  from the end to make roots.

Twist all the tree branches.  I usually just do it in a semi-random pattern.  Often the lower branches stick way out as they do on the right of tree 4 [pic 4].  You can either clip them, or twist them into a loop [pic 5] which allows you to attach a bit more greenery.  Twisting at least two wires nearly to the end makes them stronger.  Remember that it’s the clump foliage that gives the tree volume, not individual wires.battletech-trees-2

Superglue all the main branches for added strength and stability before moving on.

Smooth Out the Wire Texture [pic 6]

To avoid getting glue on your fingers try gluing your trees to a cork [pic 9], popsicle stick, or even a scrap piece of cardboard.

Carefully coat the tree with Elmers.  Wait till it dries and repeat.  I use a toothpick and spread it all around as it dries. You are trying to smooth out the spiraling wire groups so it looks more like a real tree and not a twist of wires.

Take a Break From the Tree to Make the Base

battletech-trees-3Spray paint your tree base, in our case a metal washer [pic 7], with black primer.

Once the primer has dried, glue the washer to a piece of black felt [pic 9 at left] with Elmers.  You can use superglue if you want it to dry faster, but it will soak into the felt so quickly that it will leave a residue on whatever is underneath the felt while it dries. Once the felt is secure cut out the base from the rest of the felt.

Fill in the washer with something cheap.  Epoxy is ok, but not as cheap as old putty, tightly folded newspaper, scrap cardboard, or anything else cheap so you don’t end up filling it with more expensive and loose turf.

Time to Paint and Add the Leavesbattletech-trees-4

Spray on a primer (we used white) followed by the desired main color [pic 9 at right].

Once the paint on the tree is dry it is time to attach the tree to the base.  Mix some epoxy (thoroughly!) on a piece of cardboard or index card.  Apply blobs to the roots and set on the washer. I use epoxy when gluing a wire tree down because superglue has a hard time holding unless one surface is pressed flat against the other and the roots don’t have much surface area to glue down.

Superglue Clump Foliage to the ends of the branches, and maybe a few smaller pieces further toward the trunk.

Coat the base in whatever mixtures of turf you want and your tree is finished and ready for the battlefield.

Some Pitfalls to Avoid

battletech-trees-mistakesTo the right you can see what happens when you don’t mix epoxy in equal proportions.  The epoxy will never harden. To avoid this, squeeze the epoxy in equal portions onto an index card, and mix it with a toothpick.  This allows you to mix in less of one part if you put too much of it on the card and when you use the toothpick to move it from the index card, you only grab the well mixed portion.  I tried mixing it right on the base.

The copper wire pine tree to the right is a good example of what a tree looks like when you have many many branches and a very thin wire.  It bends so easily it gets deformed a lot.  I won’t bother trying to make anything of it.

Since these battles take place on a multitude of planets, environments, and seasons, feel free to use and mix all sorts of wild colors/shapes/turf, etc.

I prefer my Heavy vs Light Woods to be clear.  You can use Forest Green (its darker then Dark Green; almost black) and/or multiple trees of differing heights on a single base to represent heavy woods.
You can use course turf/bush clump vs fine turf to differentiate between open and woods on the map itself when the trees aren’t on that particular hex.

Posted under Terrain
Feb-10-2009

Chaos Campaign and Starterbook Pilot Dossier

One of the vital and entertaining parts of a Chaos Campaign as well as either of the Starterbook campaigns is managing your Mechwarriors.  There are a variety of events that would require you to shift around your pilots between ‘Mechs.  Pilots get injured.  ‘Mechs get destroyed.  New and better ‘Mechs are either bought or salvaged.  Sometimes, a different mix of pilots and ‘Mechs just makes sense for one mission over another.

I got tired of constantly erasing the pilot data off all of my record sheets when I shifted around my pilots.  I was also afraid as the campaign missions become more heated, I’d forget what pilot had what damage.  I came up with a way to keep a record of each pilot separate from the ‘Mech record sheet.

mwdossier

Make a small cut with an exacto knife just above the Mechwarrior data section on your ‘Mech record sheets.  With a small cut and a #1 paper clip, you can swap out pilots at will between missions.

Blank Pilot Sheet (PDF, 60KB)

I modified a Classic Battletech record sheet with multiple Mechwarrior Data sections.  Cut them out for your force and use a blank to hold them all between missions.  When a pilot gets injured and he needs a few missions to rest you can put him aside for a track or two to heal up.

I am looking forward to using this tool in my campaign and I hope some of you out there find it useful as well.

Posted under Articles
Feb-7-2009

Basing Tutorial

Here again is that Warhammer I painted up a few posts ago.  I’ve tried out a new technique for this series of miniatures and now I’ll be sharing it with you.

I apologize for the poor lighting and framing at times.  I’m getting the hang of this video thing as I go.  With each one I learn a little more.  Sorta like painting.  To get better you have to give new ideas a try.

Materials List

  • Woodland Scenics Fine Buff Ballast
  • Woodland Scenics Medium Buff Ballast
  • Woodland Scenics Talas Rock Debris
  • Woodland Scenics Fine Yellow Turf
  • Woodland Scenics Static Grass

Paint List (Vallejo Game Colors)

  • Black (Base Coat)
  • Stormy Blue (Base Coat)
  • Cold Grey (Base Coat)
  • Stonewall Grey (First Drybrush)
  • White (Final Drybrush)


Posted under Minis
Feb-3-2009

2009 Convention Season

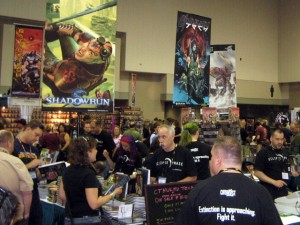
It’s never too early to start thinking about conventions!genconbooth

Conventions are a great way to meet new people, play new games, and otherwise have some fun blowing up ‘Mechs with your buddies!

Here is the shortlist of conventions you may see me at this year.

Both of these HMGS conventions are great conventions.  Catalyst Demo Agent “Speck” always has a full weekend of games running and they are all well attended.

As an added bonus, Iron Wind Metals makes the trip and has all of their Battletech miniatures on display at their booth.  IWM brings way too many goodies to the show.  Where else besides GenCon are you going to be able to buy battlearmor by the singles?

I’ll be attending and running games in this second running of NJCon.  I’m already plotting new maps and miniatures for this convention.  If you are in the area come on over and roll some dice!

If you were waiting for a year to attend GenCon, this is it.  It is Battletech’s 25th anniversary and there are sure to be some special offerings from the good folks at Catalyst.

UberCon is new to my target list of conventions.  There doesn’t seem to be a large miniature wargaming support or any Classic Battletech.  It is a perfect opportunity to stick my flag in the sand like I did at NJCon.  I’m willing to give it a go this year to see anyways.

I hope to see some of my readers here and there this year.  Obviously, if you live on the east coast near the state of New Jersey, you have a much better chance.  There is always GenCon, though.

Hoping for a great 2009 to you and yours!

Posted under News
Feb-2-2009

Making the Mini: Reseen Warhammer

warhammer01

I knew I wanted to do something exciting with this miniature.  The Reseen Warhammer’s left leg is sculpted with a slight bend at the knee.  Perfect for a walking pose or stepping up onto something.  I had some extra pieces of miniatures I did not have all the parts for.  It all just came together.   Here is how it went.

warhammer001Starting Out

Like most Reseen scuplts, this miniature came in an impressive number of pieces.  Just great for those wanting a little flexibility but an added trouble to put together.  I ended up pinning each and every part and let me tell you those arms were a bitch.

But not nearly as bad as those hips.  In the picture you can see the early stages of assembly.  I spent a good few minutes figuring out just how I was going to go about putting the legs together and keep the hips level.  Nobody likes a miniature that looks like it is in a limbo contest.

See the leg on the right of the picture? I put one pin in that and then drilled a hole straight through the hips to the other leg which had a matching hole.  I wish I had a secret technique to share, but honestly, I just slapped superglue on the thing and held it together knowing I would have at least one adjustment before the glue set fast.

The base was a simple matter of slapping green stuff together with the MadCat torso.  I drilled in some bullet holes for good measure as well as some laser burns cut with a file.

warhammer002Adding Some Color

I slapped on the first coat of green both on the Warhammer and his little friend.  The Warhammer is based in a mix of Dark Green and Camo Green (These are Vallejo Game Colors acrylics).

The MadCat started out with a coat of Jade Green.  Simple so far.

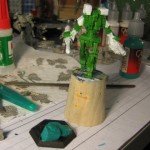
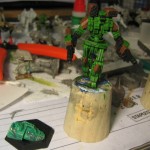
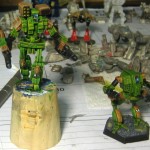
Note I am working on the Warhammer using a cork.  That way, while I paint, I won’t have to touch the mini itself.  I have already at this point dry fit the Warhammer on the base and drilled a mounting hole in the MadCat for a pin coming out of the Warhammer’s foot.

warhammer003A Quick Wash

Just about every miniature I do gets a healthy dose of magic wash.  You can see in the picture how the dark ink leeches into the crevasses of the miniature.  If applied properly, you get a great base onto which you can highlight and bring the color of the miniature back up to a final shade.

It is slowly starting to look like something.

Beside the Warhammer you can see the quick job I did on the MadCat torso.  I added in progressively greater amounts of Scorpy Green to my Jade Green and dry brushed in the highlights.  A final panel line of Scorpy Green in all the right places finishes it off.

warhammer004Final Touches

Both green and tan sections of the miniature get at least two dry brushed highlights and sharp panel lines.  A quick cockpit jeweling and some final yellow dots put on the final touches.

And now… I have to get the damn thing off the cork!  The super glue stuck a bit too well.  I ended up scraping off the paint from the toes on both feet.  A did a quick repair job with  several dark green mixes.  Bet you didn’t pay that much attention to the feet anyways!

I was sweating bullets when it came time to glue him to the MadCat.  I used epoxy because I wanted a super strong bond that wouldn’t crack under heavy use.

In the final image you can see the Avatar from an earlier post from which I practiced the paint scheme.  I think they look good together and I can’t wait to paint up the rest of the lance.  I’m thinking a T-Hawk and maybe a Sunder.

One thing I do know for sure, this is not the last time you’ll see this Warhammer.  That’s a promise.

Posted under Minis