Bushwacker Down
For those of you who have read my A Time of War after action report Bad Intel, you no doubt recall the center piece terrain feature, a downed BSW-X1 Bushwacker ‘Mech.
This was an idea that I had for a while and was pleased to finally have an opportunity to pull it all together with a scenario to go with it. Here is a step by step recap of what was required to go from childhood toy to BattleTech terrain!
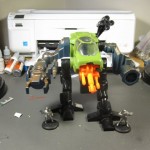
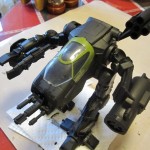
First things first I needed the parts. I found a lightly used Tyco Bushwacker toy on eBay for a steal at $20 shipped. This particular auction was a bit on the low side since it was missing a few of the missiles and the ejection seat was non-functional. This would be a serious red flag for a collector but since I didn’t need them I was happy to get the cheaper price.
Filling in the Gaps
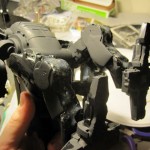
The back of the legs and arms of the Bushwacker are hollow. I wanted the ‘Mech to be a little more complete so I thought of ways to fill in the gap. I ended up using expanding foam to fill the bulk and then later adding a thin layer of epoxy after the first coat of paint.
After waiting overnight for the foam to dry an exacto knife was used to carefully cut out the backside contours of the legs and one arm. The epoxy coat I felt was necessary to finish the look. The expanding foam is full of holes and pores. It covers the bulk of the missing volume but it lacks a smooth surface to accept paint.
First Coats of Paint
The first base coat of paint involved black Apple Barrel paint. This stuff is cheap and covers well. No need to waste higher priced paints when you have a cheap alternative. This is the same paint that I used for other terrain products.
Black may be a bit boring but it goes with everything. It’s a good night camo as well.
Battle Damage
Break out the Dremel and prepare to get messy. I traced a quick outline of the damage I wanted on the rear section of the ‘Mech using an exacto knife. From there, I loaded in my largest drill bit and went to work mauling the cheap plastic until the edges looked appropriate for an armor breach.
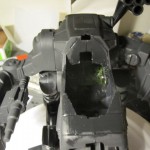 At this time I also removed the ejection seat components and hollowed out the back of the cockpit to make room for additional accessories. This step was an absolute pain. While the rest of the ‘Mech was made of a soft plastic that yielded readily to my Dremel, the cockpit components were a harder variety that fought me at every turn. After a good fight I had the desired space available.
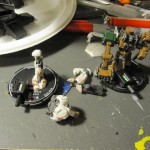
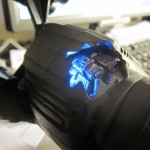
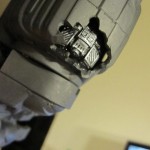 The next step was to put something interesting to look at inside the gaping hole. I couldn’t just leave it empty. I opened up my trusty box of MechWarrior minis and found an appropriately looking torso, an Avalanche. I cut the mini apart and painted the torso flat black followed by a dry brush of gun-metal. The engine-ish looking part was then attached to the inside of the battle damaged section with a dab of 5-min epoxy and a lot of patience. I had to use a popsicle stick and a glob of Sculpy putty to position it correctly and then held it there for several minutes until the epoxy set.
Let There be Light
We are looking good so far but what I really wanted was a custom lighting effect to make this ‘Mech really rock!
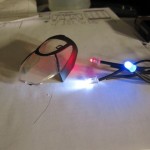
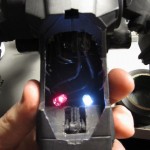
I used a PIC microcontroller to control three LED lights.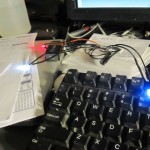
- White LED – ambient cockpit lighting
- Red LED – blinking error/warning lights inside the cockpit
- Blue LED – reactor core fade in fade out effect around the battle damage
I had some existing code for a pulse width modulation (PWM) controller that I re-purposed for this project. The three lights are controlled by modifying their PWM value within the main loop of the program. The interrupt service routine takes those PWM values and does the real magic behind the scenes.
I made my first set of wires way too long and ended up trimming them significantly so they would fit in the limited space within the cavity behind the cockpit. A small piece of wax paper helps to diffuse the blue led by the battle damage and a small cut out of black construction paper is all that is needed to hide the controller and battery behind the cockpit.
Finished Product
The entire ‘Mech was dry brushed with grey and white to bring out the panel lines. It looked great on the battle field and really helped to bring the game to life. If I have more time later I may see if I can’t convert a few more ‘Mechs for use in A Time of War games.
Posted under Terrain


I think the real question is how you managed to record so many videos without a single guest appearance by Mr. Bond.
Badass work. We need a “Big Game” soon.