Last Stand of the Davion Guards
In 3063 with the Fed Com Civil War heating up, the 1st Davion Guards on New Avalon knew their days were coming to an end. Their commander, Marshal Bishop Storek decides to set the final fight on his terms. By October, Marshal Storek made a final stand with two assault companies at the mountain pass to prevent the Loyalist forces from following the 1st Davion into the pass.
This game was played at Cold Wars 2010 under the stalwart guidance of Demo Agent “Speck”. This was a BattleForce game with each unit representing a lance of ‘Mechs.
1st Davion Guards

Assault Lance
- EMP-6A Emperor
- HGN-732 Highlander
- MAD-5A Marauder II
- PLG-3Z Pillager
Command Lance
- AWS-9Q Awesome
- Templar Prime
- CP-11-G Cyclops
- Sunder A
Support Lance
- LGB-12C Longbow
- Templar B
- VKG-2F Viking
- AS7-K Atlas
3rd Robinson Rangers
Command Lance
- HBK-4G Hunchback
- BLR-4S Battlemaster
- BNC-5S Banshee
- MR-5M Cerberus
Fire Lance
- DV-7D Dervish
- DV-7D Dervish
- GRF-3M Griffin
- LNX-9C Lynx
Heavy Lance
- CTS-6Y Cestus
- CES-3R Ceasar
- WHM-7S Warhammer
- DGR-3F DragonFire
Recon Lance
- ALM-9D Fireball
- JR7-D Jenner
- SPR-5S Spector
- WLF-2 Wolfhound
Strike Lance
- Blackjack A
- Blackjack A
- MAD-5D Marauder
- PTR-6M Penetrator
Support Lance
- CN10-B Centurion
- WR-DG-02FC War Dog
- AWS-8Q Awesome
- STK-5S Stalker
Objectives
Kill everything. The Robinson Rangers only win by eliminating every last one of the Davion Guards.
Turns 1 and 2 – Robinson Rangers win Initiative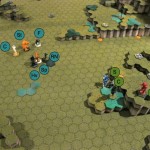
In the first two turns, each force begins the march towards the enemy. The Davions tend to be reserved and are more comfortable to allow the Rangers to advance. The Rangers have a small amount of woods in front of them to give cover.
On turn 2, the Rangers begin to have some separation between their faster units and the larger slower Heavy and Command lances. In the next few turns the Ranger commanders begin slowing down the attack to allow the slower units to catch up.
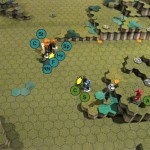 Turn 3 – Davion Guards win Initiative
The Davions use their initiative to good advantage. After committing the Heavy Lance to long range the Davions pounced and managed to isolate a small segment of the Rangers without support. The numerical advantage at long range pays off big resulting in 13 damage delivered versus 6 received. An excellent start for the Davions who must fend off the larger force.
Turn 4 – Robinson Rangers win Initiative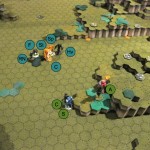
Back on the attack, the Rangers try a similar strategy of divide and conquer. The Davions don’t take the bait and move back to avoid any major exchange of fire. No shots were fired as no units ended movement within range.
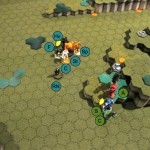 Turn 5 – Robinson Rangers win Initiative
The Rangers are fully cohesive now and rush forward as fast as the Command Lance can follow. The Recon Lance strays slightly closer to the Davions. Still in long range but positioning for a flanking opportunity in the future. The Guards have the terrain advantage and superior long range weapons. All shots are at long range this turn.
The superior firepower of the Guards is felt by the Rangers. Half of the Heavy Lance is destroyed (Cestus and Caesar) while the Rangers can only answer with 6 damage to the previously scratched Templar. There were lots of misses by the Rangers this turn.
Turn 6 – Davion Guards win Initiative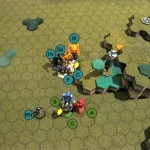
In an interesting move, the Guards pull back and bring the fight out into open terrain. While the bulk of the Rangers is slowly advancing in a solid group the Recon Lance is now solidly in medium range and threatens the Davion flank. Three of the Ranger’s Mechs are still at long range while the front two lances (Command and Fire Lances) are now in medium range.
The Davions focus all firepower on the forward leading Command lance delivering a hail of fire that amazingly only destroys the Hunchback. The Hit to Miss ration is frustratingly high for the Davions.
The Rangers have a much more successful round of shooting and manage to waste no shots on overkill at all. Both Templars fall to combined damage from the Ranger forces. The final point of damage on the Command Lance Templar came from a lowly Fireball from the Recon Lance.
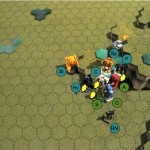 Turn 7 – Robinson Rangers win Initiative
Feeling rather smug, the Rangers hope to press their advantage. They brazenly rush to trap the Davion assault lances in melee range.
Weapons fire for the Davions is mixed but the shots that do hit are devastating. The Davions concentrate fire on two lances and combined with physical attacks the rest of the wounded Heavy Lance and the entire Command Lance is destroyed. Perhaps going to melee range was not the best choice by the Ranger commanders?
Not to be outdone, the Rangers unleash a blistering volley of fire on the Davion Lances. Each lance received at least some attacks and very few missed. The Viking in the Support Lance was killed by an unfortunate headcap very early into it’s internal structural. A Pillager, Emperor and Longbow all join their fallen comrades, the latter two from physical attacks at the end of the turn.
Turn 8 – Davion Guards win Initiative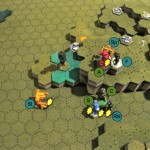
The Davions try to spread the field by jumping the Assault lance to high ground. The Rangers have ample jumping ability to counter Davion maneuvers. The Ranger Fire Lance and Recon Lance both have rear shots on Davion lances. The noose is beginning to tighten around the Guards.
The Davions concentrate on the Recon and Strike Lances and kill 3 ‘Mechs in the process, a Jenner, Fireball, and Marauder.
The Rangers continue to make lucky rolls and destroy 3 ‘Mechs; one by a headshot. All this while the entire Fire Lance misses and three ‘Mechs have no targets due to overkill. In the Physical attack phase, the Rangers pile damage on the opposing Marauder II.
Turn 9 – Davion Guards win Initiative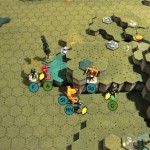
The initiative advantage is not enough to save the battered Davions.
The last damage the Davions manage to muster is to kill the Recon Lance Spector.
The Rangers begin cleaning up and finish off the Assault Lance with rear shots and heavily damage the Command Lance Sunder. The last remaining member of Command Lance is a lone Awesome who manages to survive one more turn against the Robinson Ranger onslaught.
Thoughts on the Game
I honestly did not think that this game would be as one sided as it was. Certainly some of it was luck. The Davions had several opportunities to do some serious damage early on but missed some easy rolls. Honestly, when I saw the Davion Guard record sheets I cringed. Several lance members could do 5 or 6 damage at most ranges. Whatever these things hit, they were going to hurt badly if not outright kill.
It’s obvious that the Davions held the weapon and skill advantage but the shear volume of opposition ‘Mechs was too much. In the war of attrition, the Davions lost.
One more point. I think the Davions should have done more to secure the better terrain positions early in the game. In BattleForce, it is key to remember that you receive FULL benefit from your individual movement without even moving.
Posted under After Action Report


A little hard to follow all the moves in the pictures, but far better than no pictures. Interesting AAR and I am really looking forward to getting my act together sometime and playing the Quick Strike version of BattleForce.
As the Davion player, I agree with you. Only problem was I was trying to string you out to divide and conquer more. That being said, it was a well-played, hard-fought game.
Towards the end it does get confusing.
How about this; did you like the arrows I did with the Recon Cavalry AAR? I’m trying new things to help tell the story and would love the feedback.
This one I just did the basic identifiers because there were fewer drastic movements.
Thanks!
Nice report. One thing I did notice, you guys might want to reread the rules on physical attacks (unless you’ve house-ruled it) cause in BattleForce there’s no Physical Attack Phase. You can make physical attack against a target in the same hex as you, but when it comes to combat you can make a ranged attack OR a physical attack, but not both.
I could just be reading your report wrong, though.
woops…..
Wow! Great catch. Sure enough there it is on page 225.
To be honest I’m inclined to make this my first house rule for BattleForce. And I bet very few people would ever question it.
If you are ever in melee range, you almost always will throw a kick at your opponent. Seems odd NOT to have a melee phase, especially when each BF turn is around 3 BT turns.
Brian